
Most "digital reverb" sounds flat because it sits beside the mix instead of behind it. The Bricasti M7 is the box that fixed that problem for a generation of engineers.
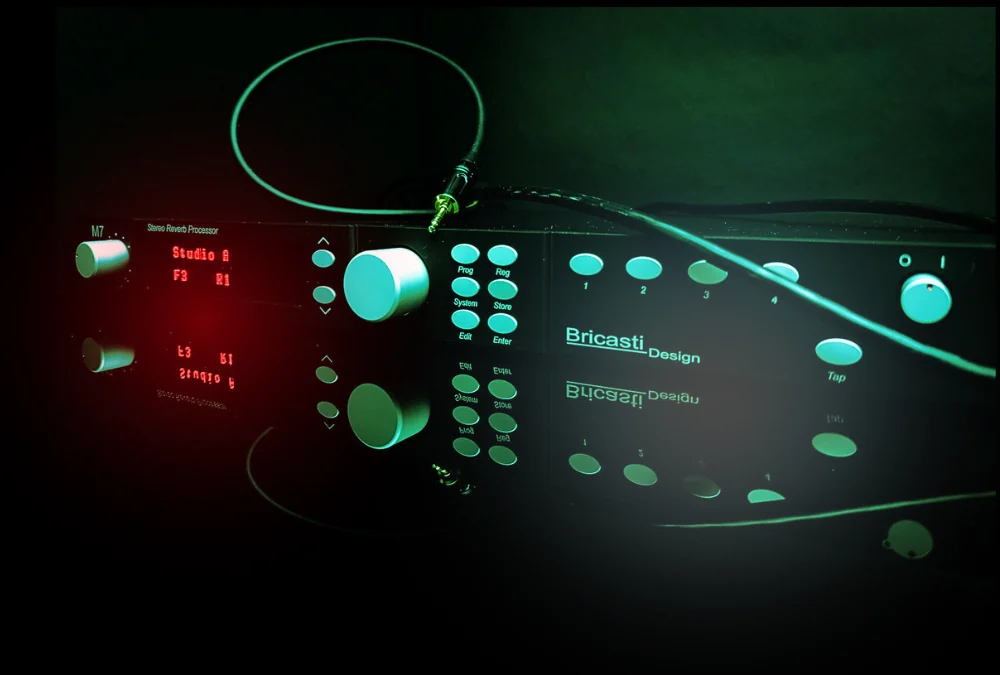
Real depth is dimensional. It tells your ear how far away a source is and how big the room around it feels, without smearing the mix. This guide covers how the M7 actually makes reverb, how its presets and parameters are organized, and the practical technique for getting professional depth on vocals, drums, and the full mix. It also covers how you can run the real M7 in our racks from inside your DAW using Access Analog.
Key Takeaways
The M7 became a studio standard because it made high-end digital reverb sound natural again, then put it in a box engineers trusted on a master. It is a fixture in mastering and mix rooms worldwide, and it is frequently described as the "gold standard" of hardware reverb.
The pedigree is part of the story. Bricasti Design was founded in 2004 by Brian Zolner and Casey Dowdell, both veterans of Lexicon, the company whose reverbs defined records for decades. (The name "Bricasti" comes from Brian Casey Technical Innovation.) The M7 was their first product, released in 2007, and it was aimed squarely at professional recording and mastering rather than at a feature-checklist market. The result is a unit with a short learning curve and a long ceiling: easy to get a great sound fast, deep enough to refine for years.
The M7's reputation is not nostalgia. It comes from a specific design choice about how the reverb is generated.
The M7 synthesizes reverb in real time with algorithms, rather than replaying a recorded "impulse response" of a real space the way a convolution reverb does. This is the single most important thing to understand about why it sounds the way it does.
A quick definition. Convolution reverb captures a snapshot of a real room (the impulse response, or IR) and imprints that fixed fingerprint onto your audio. It can sound photographic, but it is a static recording of one moment in one space. Algorithmic reverb instead models how sound behaves in a space using networks of delays, filters, and feedback, then generates the tail live as your audio passes through.
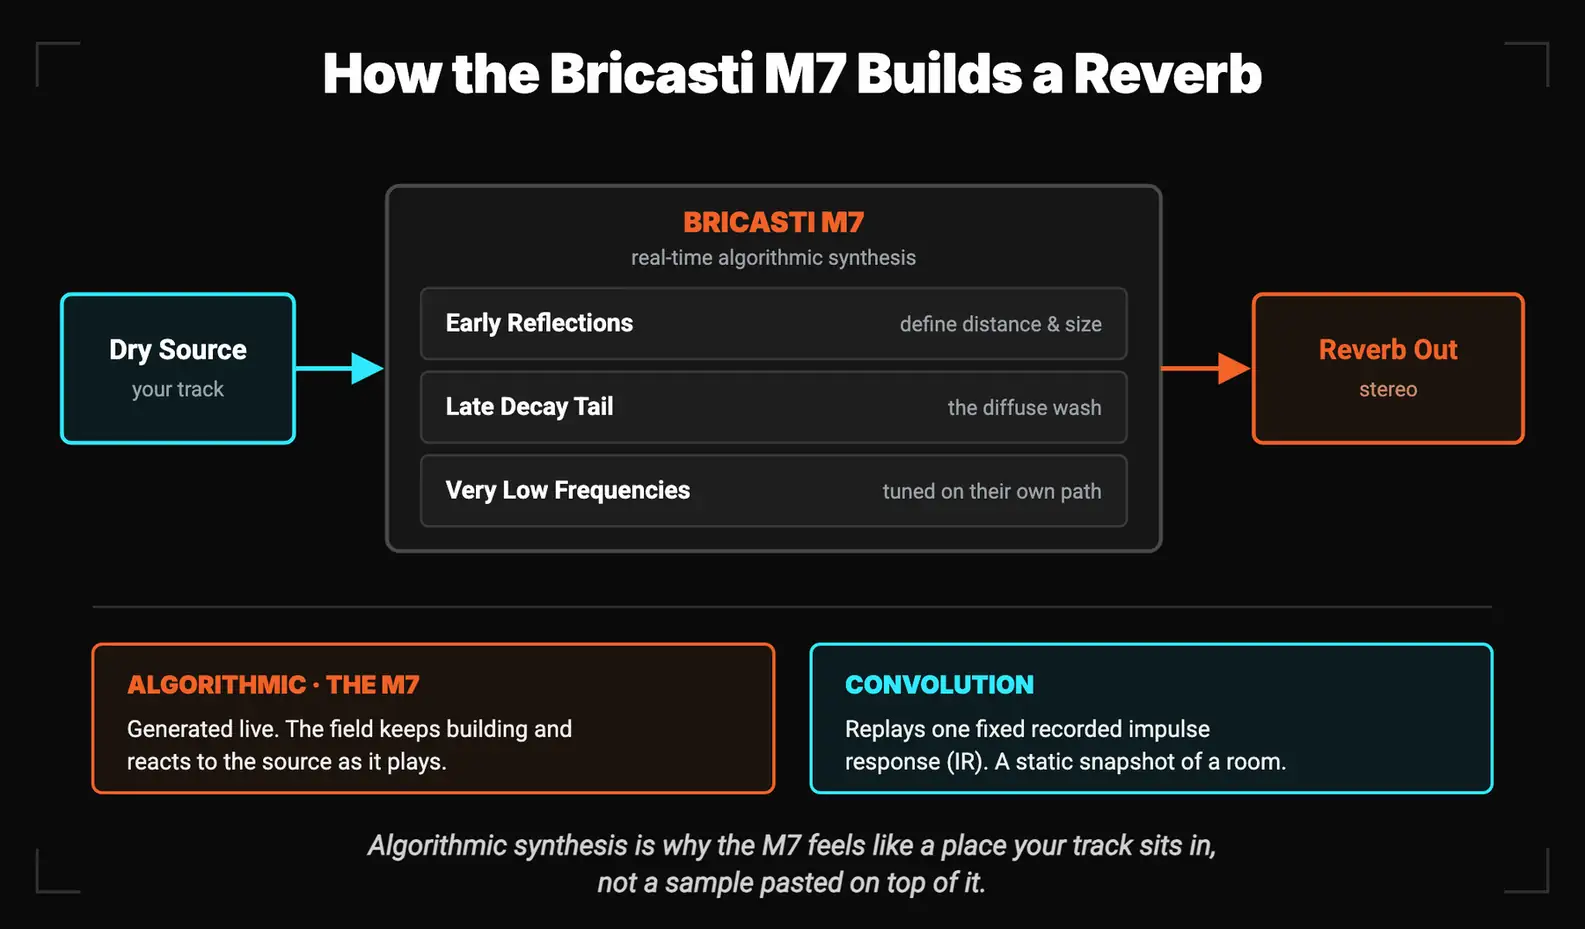
Why does that matter for depth? Because a synthesized field reacts. It keeps building density and complexity for as long as the source feeds it, and it responds to transients and level the way a real room does. Bricasti's own documentation is careful on this point: the preset names suggest the impression of a space, but the algorithms are not meant to be exact sampled or modeled responses of specific rooms. They are designed to sound real and to sound musical, which are not always the same goal.
A current M7 gives you three distinct reverb engines you can load:
Within an algorithm, the M7 lets you shape the early reflections, the late decay tail, and the very low frequencies independently. Early reflections are the first bounces off nearby surfaces that tell your ear about distance and size. The late tail is the diffuse wash that follows. The very-low-frequency path is handled on its own so you can keep the lows from turning a long tail into mud. That separation is why the M7 can sound huge and still sit cleanly in a mix.
Algorithmic synthesis is why the M7 feels like a place your track is sitting in, not a sample pasted on top of it.
A current M7 ships with more than 200 factory presets, grouped into banks by reverb type, plus 50 user registers for your own saved versions and 4 Favorite keys for grabbing a sound instantly.
The presets are organized so you can navigate by the kind of space you want:
The user registers are arranged as 5 banks of 10, which is where you store an edited preset with your own label so you can recall it exactly. The 4 Favorites work like radio presets: press and hold to store the running program, tap to recall it. Out of the box, the M7 powers up on Large Hall in the Hall bank.
Treat the factory presets as starting points, not destinations. The register and Favorite system exists because the pros who use this box always edit.
Choosing the reverb type before you touch a parameter is the highest-leverage decision you make, because the type sets the character and the believable size range. Match the space to the source and the material.
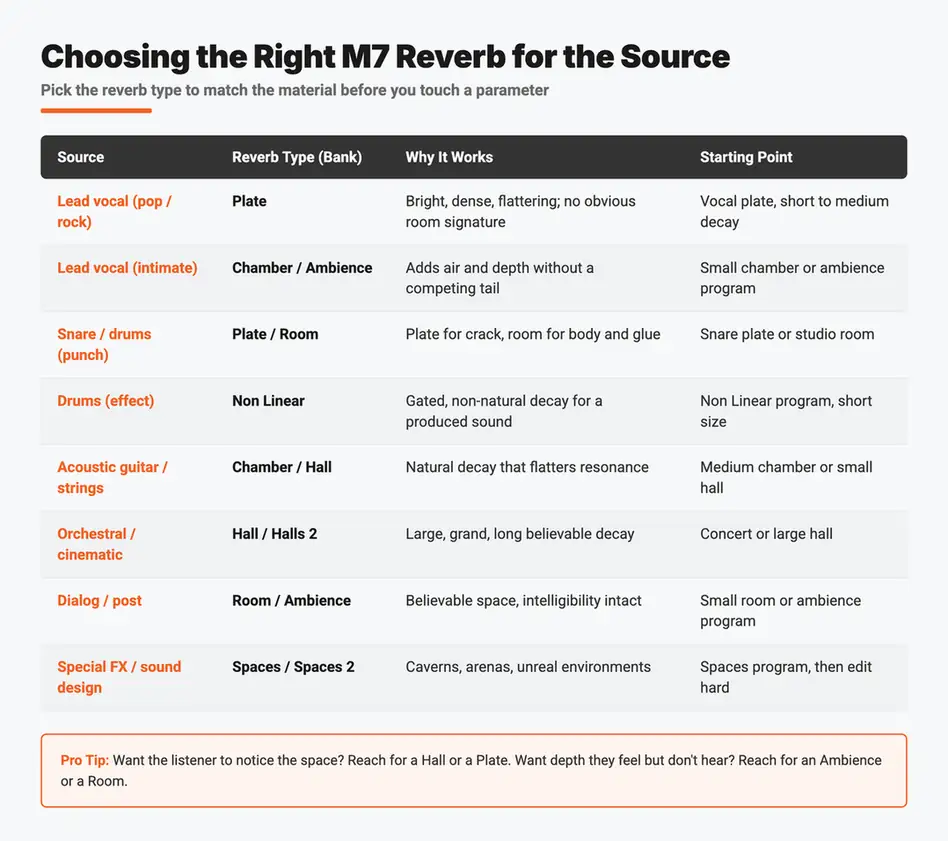
A simple rule of thumb: if you want the listener to notice the space, reach for a Hall or a Plate. If you want them to feel depth without hearing "reverb," reach for an Ambience or a Room. Plates flatter vocals and snares because they are dense and bright with no literal room signature. Chambers sit beautifully on acoustic sources. Halls create scale. Spaces are where you go to break the rules on purpose.
Pick the type for the job first. Half of "pro reverb" is choosing the right space before you ever turn a knob.
Depth and space are built from a handful of parameters working together: pre-delay for distance and clarity, reverb time and size for the room, the early/late balance for perspective, and the frequency controls for how the tail sits. The M7 exposes fifteen reverb parameters (eighteen once the V2 delay controls are included), but you can get most of the way there with the core set below.
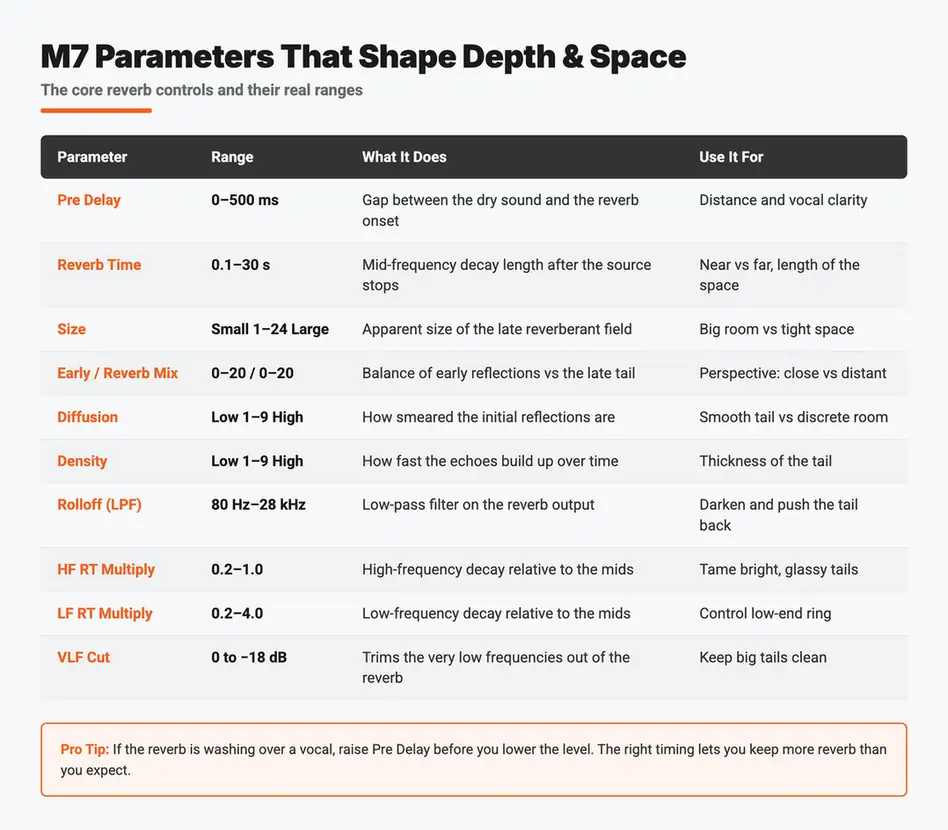
Pre Delay (0 to 500 ms) sets the gap between the dry sound and the onset of the reverb. This is the most important control for depth and intelligibility. A short pre-delay glues the reverb to the source and pushes it back. A longer pre-delay (roughly 20 to 80 ms on a vocal) keeps the dry signal up front and clear, then lets the space bloom behind it.
Reverb Time (0.1 to 30 seconds) is the mid-frequency decay time. Long times read as large and distant. Short times read as tight and close. For a vocal in a busy mix, 1.2 to 2.0 seconds is a common starting zone.
Size (Small 1 to 24 Large) adjusts the apparent size of the late reverberant field. Size and reverb time interact: a large size with a short time is a big room that decays fast, a small size with a long time is a tight space that rings.
Early/Reverb Mix balances the early reflections against the late tail. More early reflection energy reads as a defined, closer space. More late tail reads as a diffuse, distant wash. This is your perspective control.
Diffusion and Density (each Low 1 to 9 High) shape the texture of the tail. Diffusion sets how smeared the initial reflections are, and Density sets how quickly the echoes build up over time. Higher values give a smooth, thick tail that flatters vocals; lower values leave more discrete reflections, closer to a real, slightly irregular room.
Rolloff (a low-pass filter, 80 Hz to 28 kHz) darkens the overall reverb output. Rolling off the top of the tail is one of the quickest ways to push reverb behind the dry signal, because distant sound in the real world loses high frequencies.
The decay multipliers and crossovers let you tune the tail by frequency band. HF RT Multiply (0.2 to 1.0) scales the high-frequency decay relative to the mids, above a HF Crossover point (200 Hz to 16 kHz). LF RT Multiply (0.2 to 4.0) does the same for the lows below a LF Crossover (80 Hz to 4.8 kHz). And VLF Cut (0 to minus 18 dB) trims the very low frequencies out of the reverb entirely. Together these let the tail breathe up top while you tighten the bottom, so the space is big but the mix stays clean.
Pre-delay places the source, reverb time and size build the room, the early/late balance sets the perspective, and the frequency controls keep it all out of the way of the mix.
For a professional vocal, reach for a Plate or a small Chamber, set a pre-delay so the words stay up front, and keep the reverb on a 100% wet aux so you can blend it precisely. The goal is a vocal that sounds close and intimate while still sitting in a believable space.
Start with a plate. Plates are dense and bright with no literal room signature, which is why they have flattered lead vocals since the analog plate era. Set the pre-delay to roughly 20 to 60 ms so the dry vocal speaks before the tail arrives. Choose a reverb time around 1.2 to 2.2 seconds depending on tempo: faster songs want shorter tails so the reverb clears before the next phrase.
Then shape it to fit. Roll off the top of the reverb so the tail does not compete with the vocal's consonants and air, and use VLF Cut or the LF controls to keep low-mid buildup out of the way. If the reverb is washing over the lyric, raise the pre-delay before you lower the level. You will often keep more reverb than you expected once the timing is right.
For an intimate, "dry but dimensional" vocal, switch to an Ambience or small Chamber program. These add depth and air without an obvious tail, which is exactly what you want on a close, modern vocal that still needs to feel like it exists somewhere. Reverb only flatters what reaches it, so get the vocal chain that feeds the reverb right first.
A great vocal reverb is felt before it is heard. Get the pre-delay and the top-end rolloff right, and you can use far more of it than you think.
Beyond vocals, the M7 shines by matching its banks to the source: Rooms and Chambers add body and glue to drums and acoustic instruments, Plates add crack to a snare, the Non Linear engine handles gated drum effects, and Ambience adds air to anything that needs to feel real without an obvious tail.
Drums. For natural drum depth, a Room program adds body and pulls a close-mic'd kit into one space. For a snare that needs to cut, a short Plate adds brightness and crack without a long tail. And for the produced, gated drum sound, the Non Linear engine is the correct tool. Modeled on the AMS RMX 16, its decay is deliberately unnatural, which is what makes a gated snare or a big nonlinear room sound the way classic records do. Smaller sizes give you tight gated bursts, larger sizes open up into a dramatic ambient hit.
Acoustic guitar and strings. A medium Chamber flatters the natural resonance of acoustic instruments without the scale of a hall. If the part is meant to feel grand, move up to a small Hall. Keep the high-frequency decay in check with the HF multiplier so the tail does not get glassy on bright sources.
Anything that needs to sit in a track. The Ambience bank adds the sense of a shared room without an audible reverb tail. It is one of the most underrated tools in the box for making overdubs from different sessions sound like they were tracked together.
The instrument tells you the bank. Body wants a room or chamber, crack wants a plate, and a produced effect wants the Non Linear engine.
The professional method is to run the M7 as a 100% wet effect on an aux (effects) send, then blend that return under the dry mix, rather than inserting it across a track. This gives you independent control of the wet level, lets multiple sources share one space, and keeps the dry signal untouched.
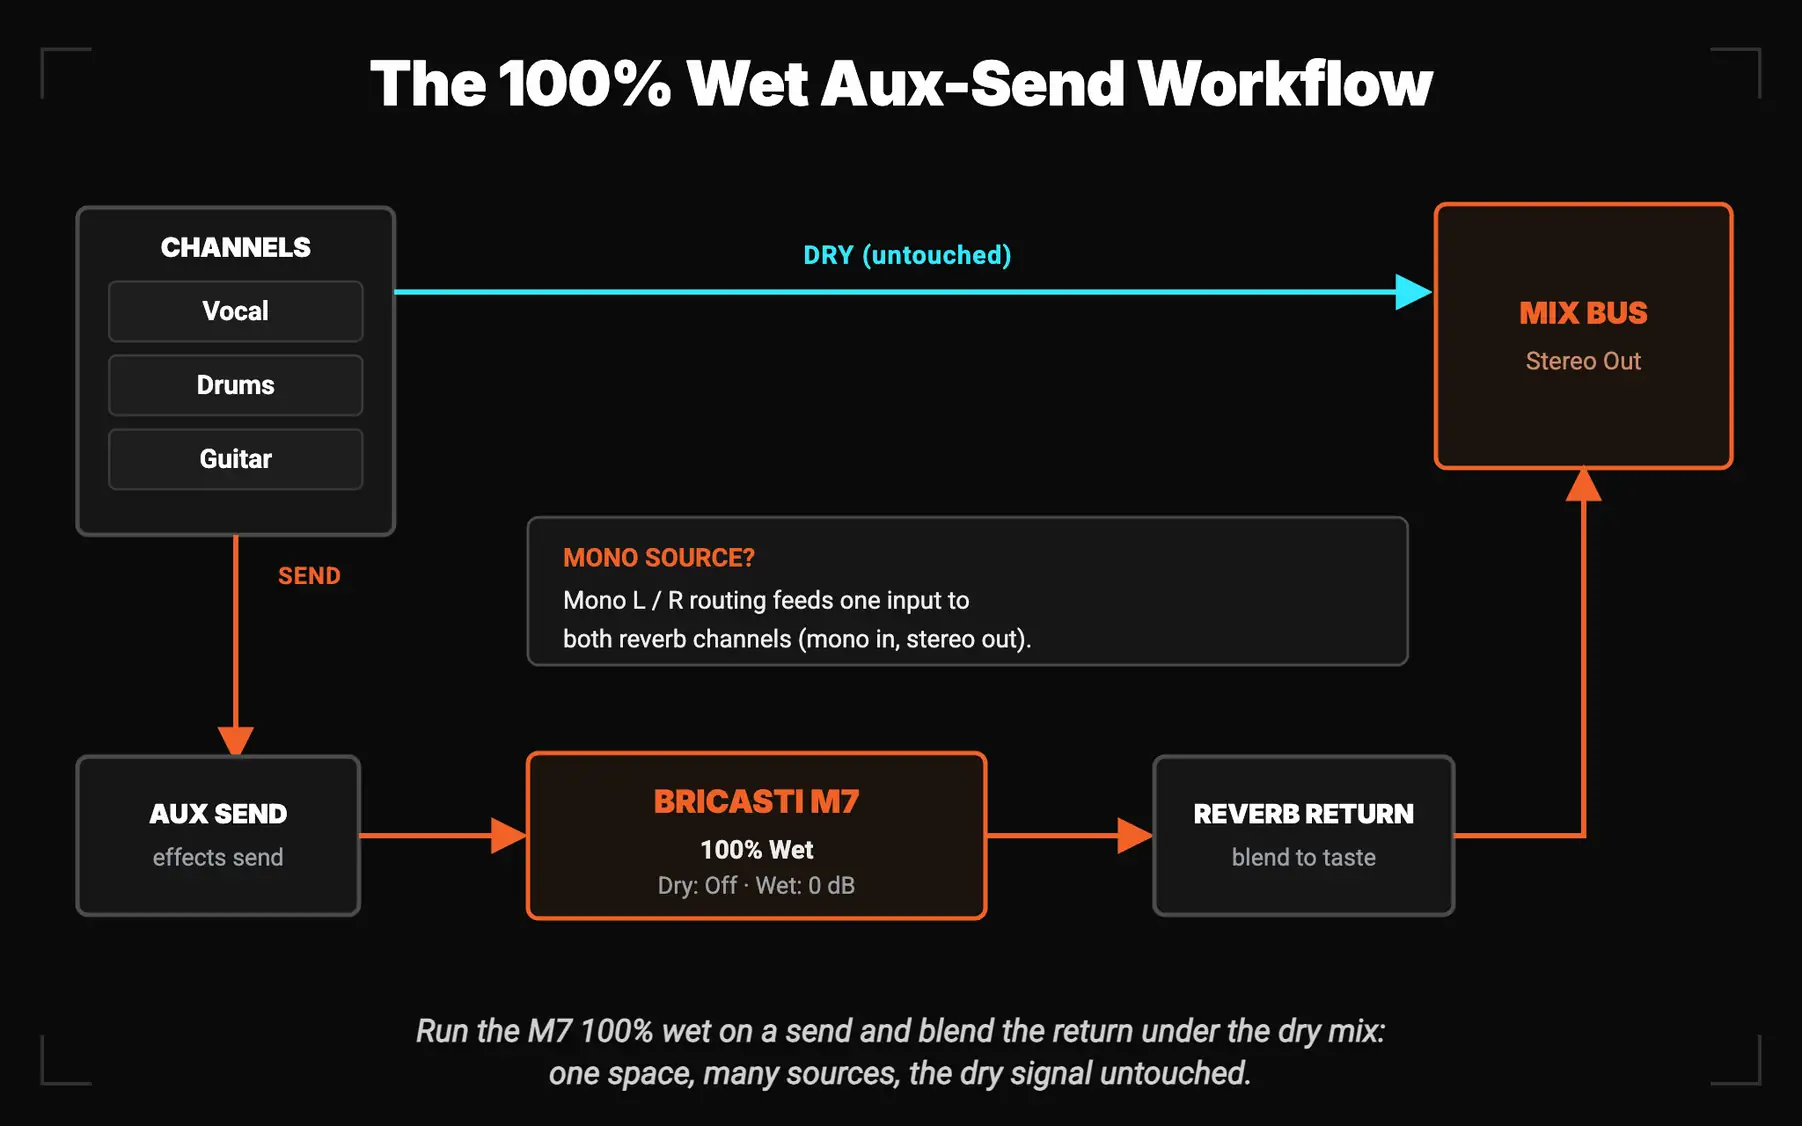
Here is how the M7 is built to work that way. In the system menu you set Dry Gain to Off and Wet Gain to 0 dB, so the unit outputs only the processed signal. Bricasti's manual states this directly: as a reverb, the M7 is normally used as a side-chain device with its outputs full wet, and you mix the wet return against the dry on your console or in your DAW. The Wet Gain itself ranges from 0 to minus 60 dB in half-dB steps, so you have fine control over the return level at the box.
Mind the gain-staging. The M7's manual carries an explicit warning that the reverb process can add up to 10 dB of gain to the signal, so leave headroom on both the send and the return. If your reverb is distorting or your mix is jumping in level when the send opens up, that is the place to look first.
Routing for mono sources. The M7 can take a single input and feed both reverb processing channels with its Mono L or Mono R routing, giving you a true mono-in, stereo-out reverb. Use Stereo routing to preserve a true stereo path on stereo sources. This is how you get a wide, even reverb from a centered mono vocal.
Layer for depth. Real depth in a mix is rarely one reverb. A common professional approach is two sends: a short, bright space for sources you want close, and a longer, darker space for sources you want far back. Send each element to the appropriate space, and the mix gains a believable front-to-back dimension. For a deeper walkthrough of the aux-send approach in a DAW, see our guide on how to use reverb on a dedicated aux channel.
One reverb across a track flattens it. Two or three shared spaces on sends, blended under the dry mix, is what builds depth.
Beyond natural spaces, the M7's Spaces banks and Non Linear engine turn it into a sound-design instrument: caverns, arenas, unreal environments, gated effects, and modulated shimmer tails. This is where you stop emulating rooms and start inventing them.
The Spaces banks contain outdoor and unreal environments. These are built for post-production and special effects, and they are a fast way to throw a source into a cavern, an arena, or somewhere that does not physically exist. Load one and edit hard: push Size and Reverb Time, then use the frequency controls to make it dark and huge or thin and strange.
The Non Linear engine is your gated and reverse-feel tool. Because its decay does not follow natural physics, you can create gated bursts and dramatic ambient hits that a hall or room cannot produce.
Modulation and the V2 delay. The M7's Modulation parameter adds pitch movement to the later part of the tail, from subtle to obvious. The V2 software also added delay parameters to every preset (Delay Time 100 ms to 1 second, Delay Level minus 20 to minus 6 dB, plus delay modulation), injected into the late reverb. Used at higher levels on a program like Vocal Plate 2, this creates a bright, diffused, shimmering swell that is very different from ordinary reverb modulation. It is an easy way to add motion and interest to a pad, a vocal, or a guitar.
When you need a space that does not exist, the Spaces banks and the Non Linear engine are where the M7 stops being a reverb and starts being an instrument.
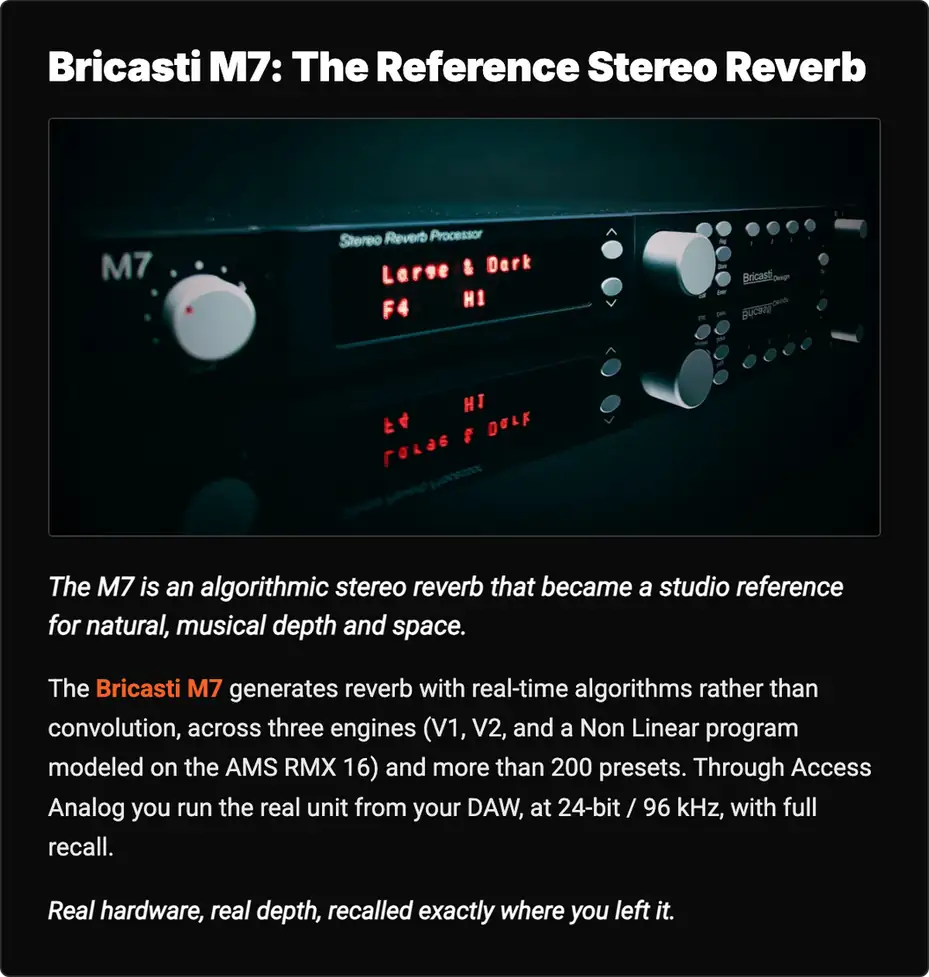
The professional workflow is recall-driven: dial a sound, store it to a register or a Favorite, and treat the M7 as a set of reusable spaces you trust. The harder problem has always been that a real M7 is a several-thousand-dollar piece of hardware. Access Analog solves that.
Build a set of spaces you trust. Save an edited vocal plate, a drum room, and a long cinematic hall to registers with clear labels, and keep your four most-used sounds on the Favorite keys. The point of the recall system is that you stop rebuilding reverbs from scratch and start reaching for known, dialed-in spaces.
Print with intent. Because the M7 runs as a wet send, you can commit a reverb by printing the wet return to its own track, which keeps your depth decisions locked while leaving the dry vocal untouched.
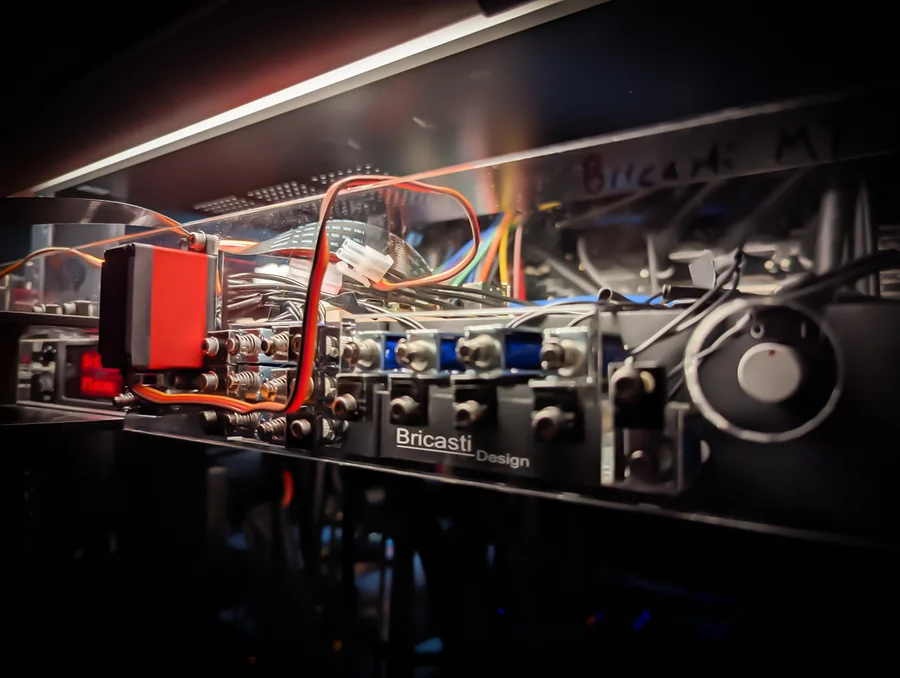
Run the real M7 from your DAW. This is the part that used to require owning the box. The Bricasti M7 in our racks is real hardware, and through Access Analog you control it remotely from inside your session. The Analog Matrix plugin connects your DAW to the physical unit through robotics, so you are hearing the actual M7, not an emulation of it. Conversion runs at 24-bit / 96 kHz, and every setting is saved in your DAW session for full recall, which finally solves the old problem of getting a hardware reverb back exactly where you left it months later. New accounts get one free hour, so you can hear the M7 on your own material before committing to anything. You can reserve the M7 here or grab the free plugin from the downloads page.
The M7 made high-end reverb sound real. Access Analog makes that real unit something you can reach from any room, with your settings waiting where you left them.
Pro-sounding depth and space are not hiding in a single magic preset. They come from understanding what the M7 is doing, choosing the right type of space for the source, and then using pre-delay, decay, early/late balance, and the frequency controls to place that space behind the mix instead of on top of it. The M7 gives you a deeper, more musical set of tools to do that than almost anything else, which is exactly why it became the reference.
Choose the space, set the distance, blend it under the mix. Do that with a real M7, and your tracks stop sounding like parts in a row and start sounding like records in a room.
What is the Bricasti M7?
The Bricasti M7 is a high-end stereo digital reverb processor made by Bricasti Design, released in 2007. It generates reverb with real-time algorithms rather than convolution, and it is widely regarded as a reference-grade hardware reverb for mixing and mastering. A current unit offers three reverb algorithms and more than 200 factory presets.
Is the Bricasti M7 algorithmic or convolution reverb?
The M7 is an algorithmic reverb. It synthesizes the reverberant field in real time using networks of delays, filters, and feedback, instead of replaying a recorded impulse response of a real room the way a convolution reverb does. That live, reactive synthesis is a large part of why it sounds natural and musical.
What are the best M7 settings for vocals?
Start with a plate or a small chamber on a 100% wet aux send. Set a pre-delay of roughly 20 to 60 ms so the dry vocal stays up front, a reverb time around 1.2 to 2.2 seconds depending on tempo, and roll off the top of the tail so it does not compete with the vocal's air. Raise the pre-delay before you lower the level if the reverb is washing over the words.
How many presets and user memories does the M7 have?
A current M7 has more than 200 factory presets, organized into banks by reverb type. It also has 50 user registers (arranged as 5 banks of 10) for storing your own edited versions, plus 4 Favorite keys for instant recall.
How do I add depth to a mix with reverb?
Run reverb as a 100% wet effect on an aux send and blend the return under your dry mix, rather than inserting it across a track. Use pre-delay to control distance, roll off the high end of the tail to push it back, and use two or three shared spaces (a short bright one and a longer darker one) so the mix has front-to-back dimension.
Why use a hardware reverb like the M7 instead of a plugin?
Plugins are excellent and have made good reverb accessible to everyone. A reference hardware reverb like the M7 still offers a depth of algorithm and a quality of conversion that many engineers prefer on critical work, especially for mastering and lead vocals. With Access Analog you do not have to choose: you run the real M7 from your DAW and A/B it against a plugin on your own material.
Can I use a Bricasti M7 without buying one?
Yes. Through Access Analog you control the real M7 in our racks remotely from inside your DAW using the Analog Matrix plugin. You hear the actual hardware, not an emulation, with 24-bit / 96 kHz conversion and full recall saved in your session. New accounts get one free hour to try it on their own tracks.