How to Use the Connection Tab in Analog Matrix: Set Up a Smooth, Clean Stream
A few minutes on the Connection tab decide how your whole session sounds: smooth or full of dropouts, clean or converted twice.
When you use the Analog Matrix plugin, your audio streams from your DAW to our rack of real analog gear and back again. The Connection tab is where you tune that stream to your internet connection. Get it right once, and every session after it runs smoother and sounds better.
In this guide, Dr. Dan walks through the Connection tab in the order he sets it up himself: sign in, choose your format, pick a rack, connect and read the buffer graphs, deal with dropouts, bring the buffer down, and choose your routing. He finishes with his tip for the cleanest possible path through our converters.
Key Takeaways
- Three settings decide your stream: Format (what we send), Buffer (how much audio is held at each end) and Routing (which network it travels).
- Pick lossless at your DAW's sample rate. When the two match, the plugin does no sample rate conversion.
- Connect, press play, and read the graphs. A steady orange block about half full in Uplink and Downlink means a healthy stream.
- Getting dropouts? Send less data (lossless 16-bit, then compressed), and print the final with an offline bounce, which is always lossless.
- Bring the buffer down last. Keep the smallest size that plays cleanly: smaller means a faster response, but it needs a steadier connection.
- For the cleanest path, work at 96 kHz with Lossless, 96kHz, 24bit. Our converters run at 96 kHz, so nothing is converted anywhere.
Why the Connection Tab Matters
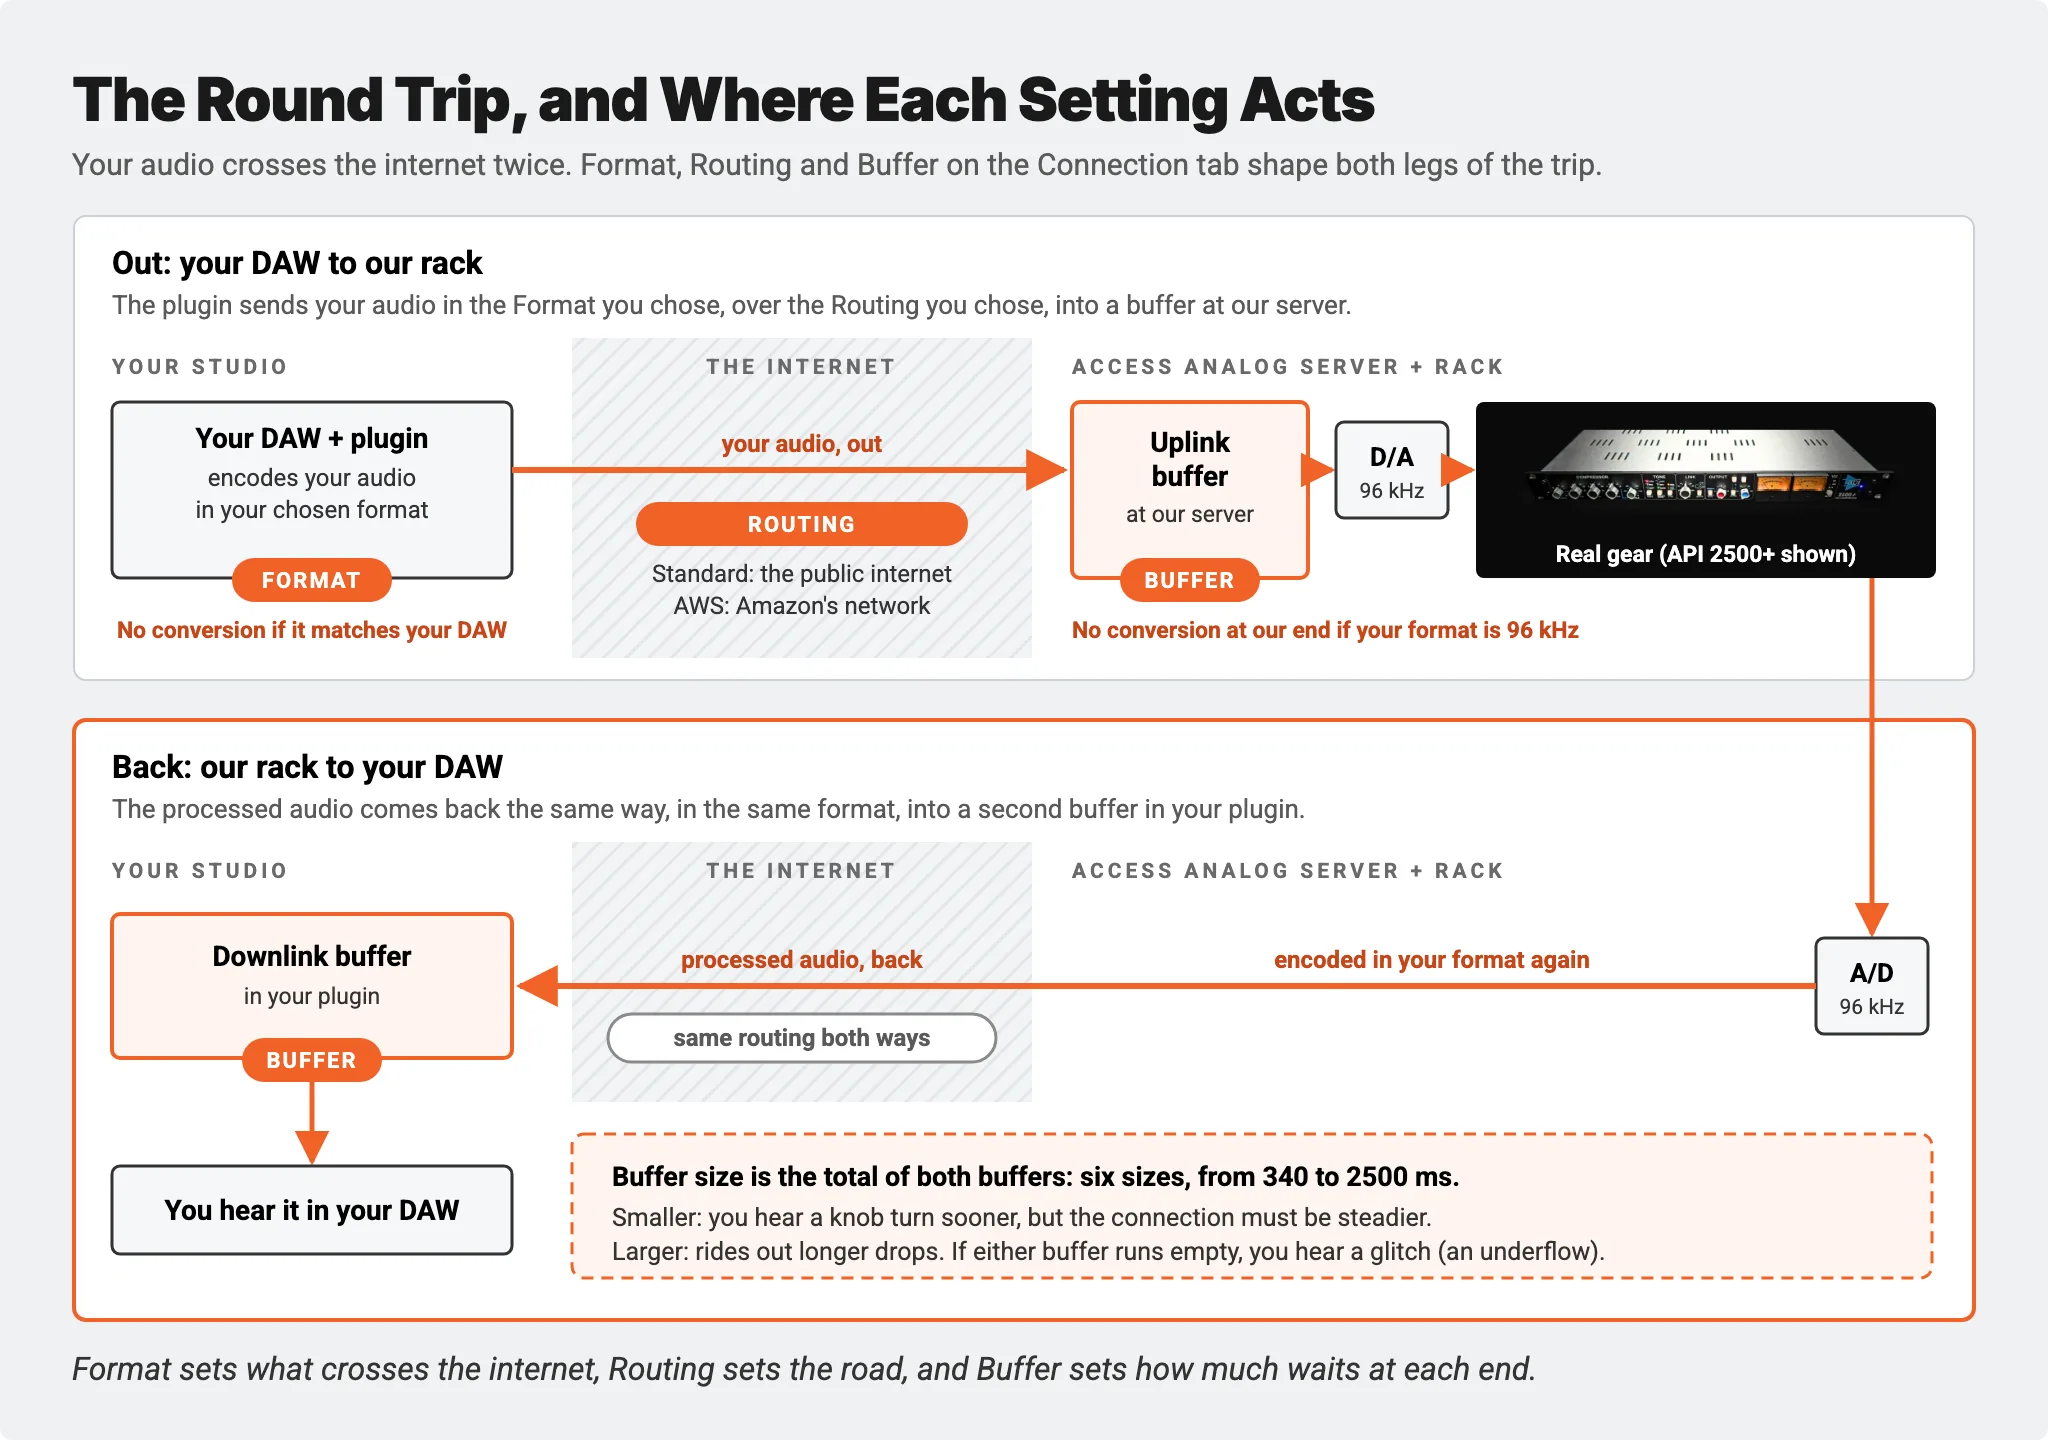
Your audio travels over the internet twice: out from your DAW to our rack, and back again processed. Three settings decide how well that round trip holds up:
- Format, what we send: lossless at full resolution, lossless at 16-bit, or compressed.
- Buffer, how much audio is held at each end to ride out short drops in your connection.
- Routing, which way it travels: over the public internet, or over Amazon's network.
Set them well and you get a smoother stream, a faster response when you turn a knob, and better sounding audio, because the fewer conversions your audio goes through, the cleaner it stays.
The Two Sides of the Connection Tab
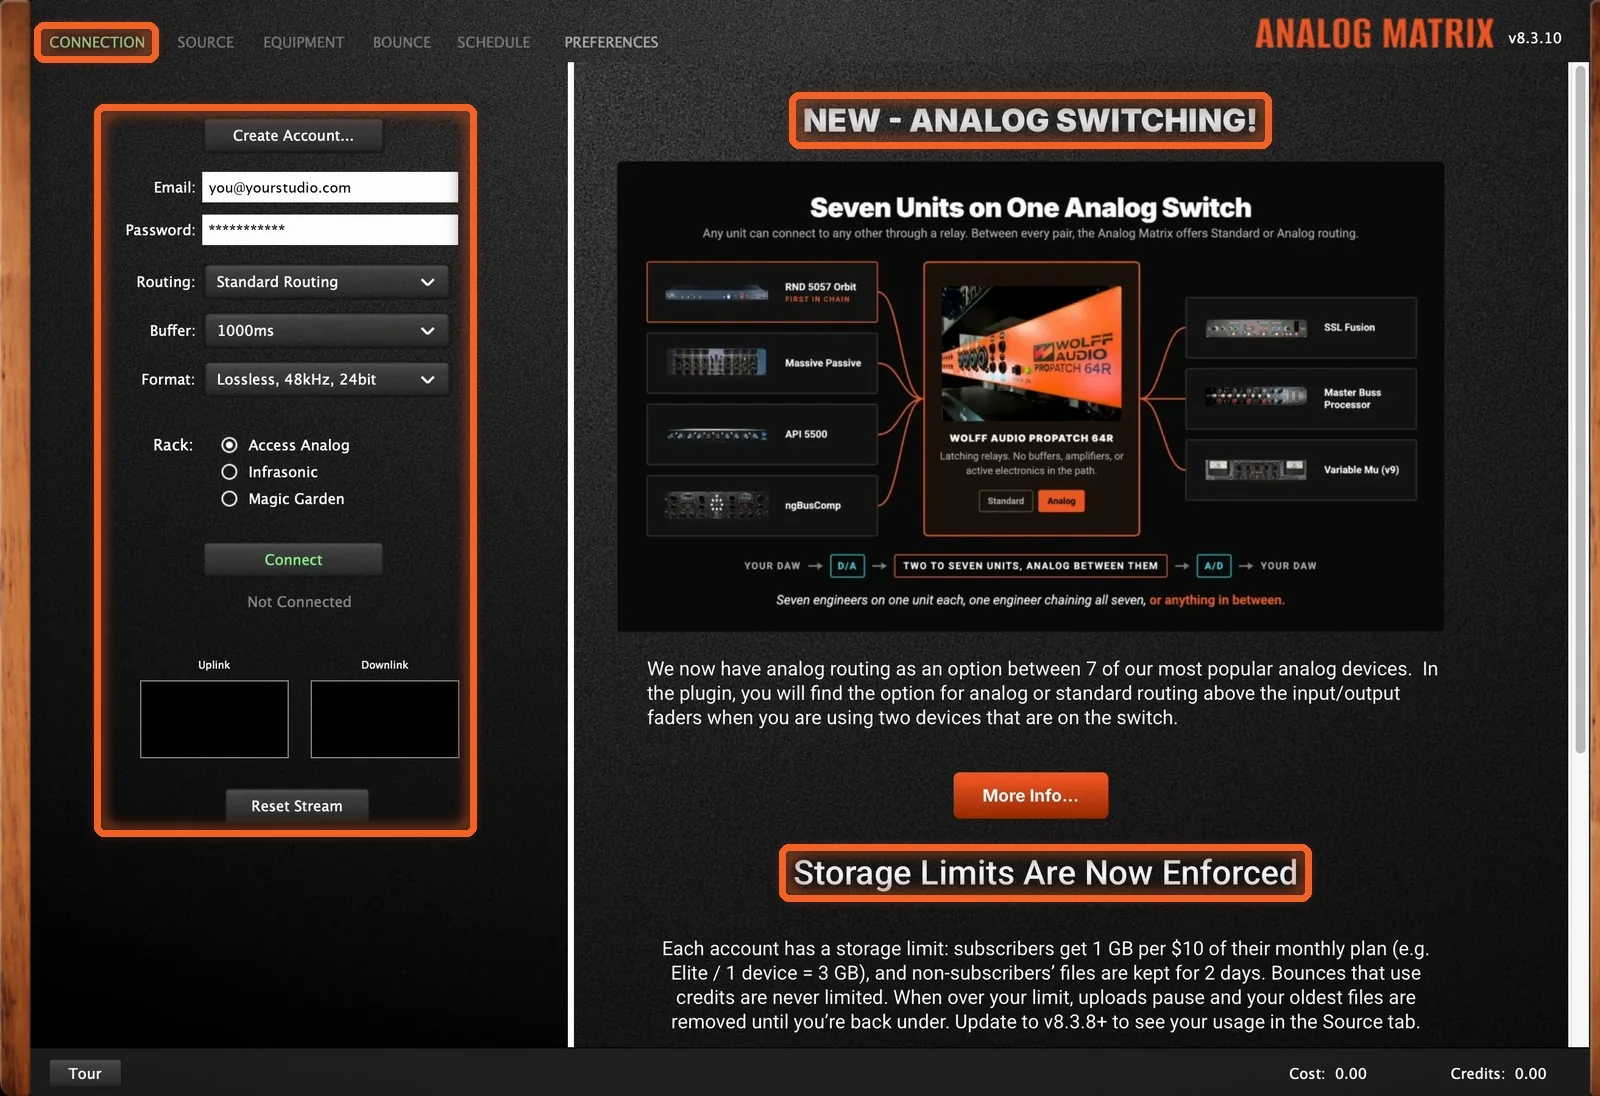
The Connection tab has two sides. On the left are the settings you use to connect. On the right, you'll find our latest news and updates, such as Analog Switching and storage updates.
Sign In
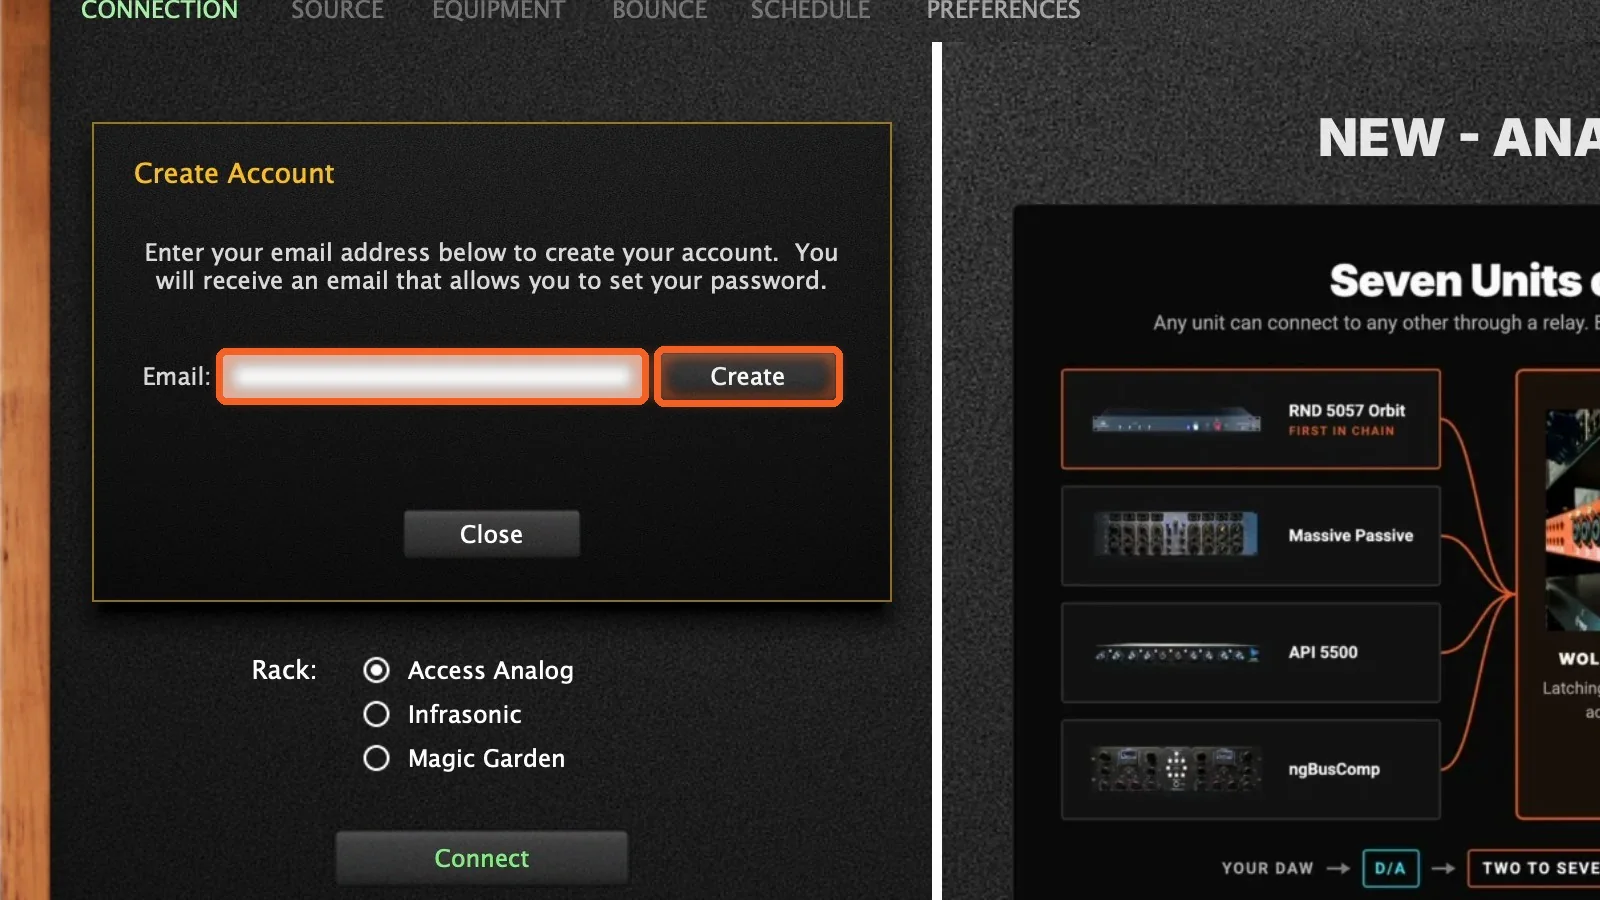
Start by signing in with the email and password from your Access Analog account.
New here? Click Create Account, enter your email, and we'll send you a link to set your password.
Step-by-Step: Set Up Your Stream
Dan's routine starts safe, then tunes. Set the format and rack first, connect, and only bring the buffer down once the stream is solid.
Step 1: Choose Your Format
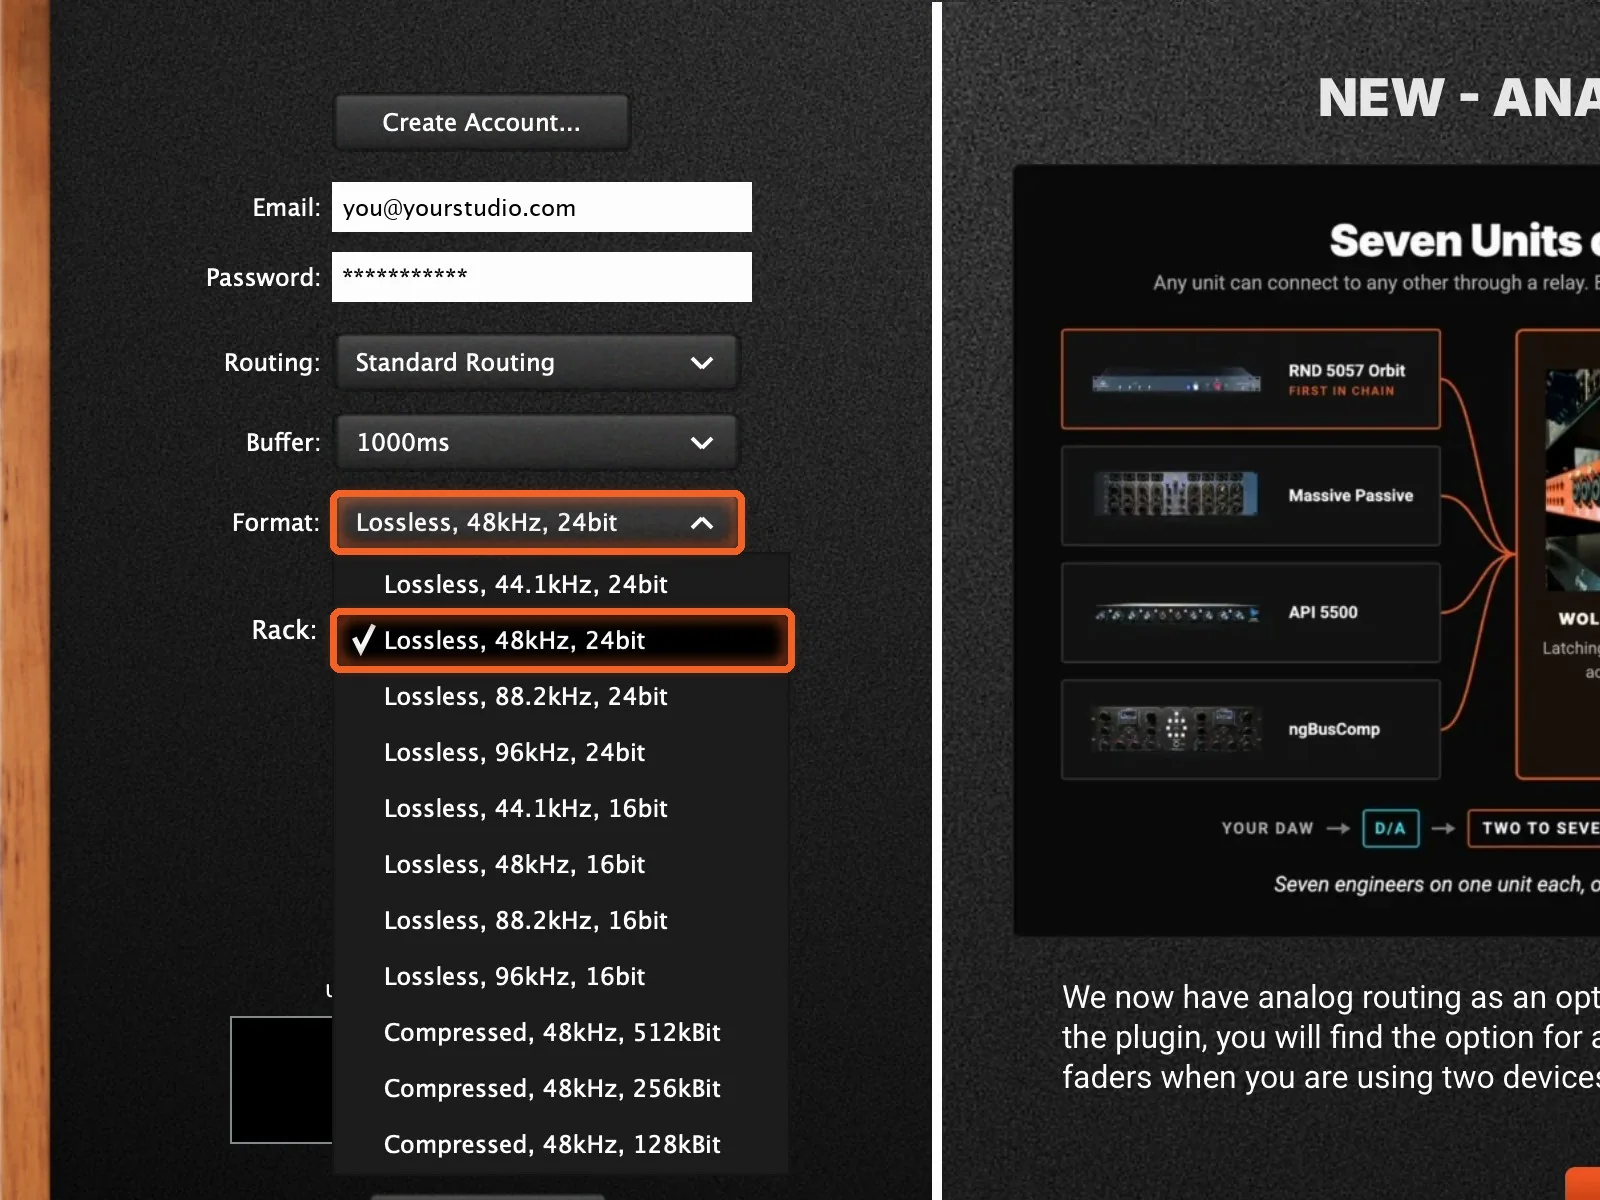
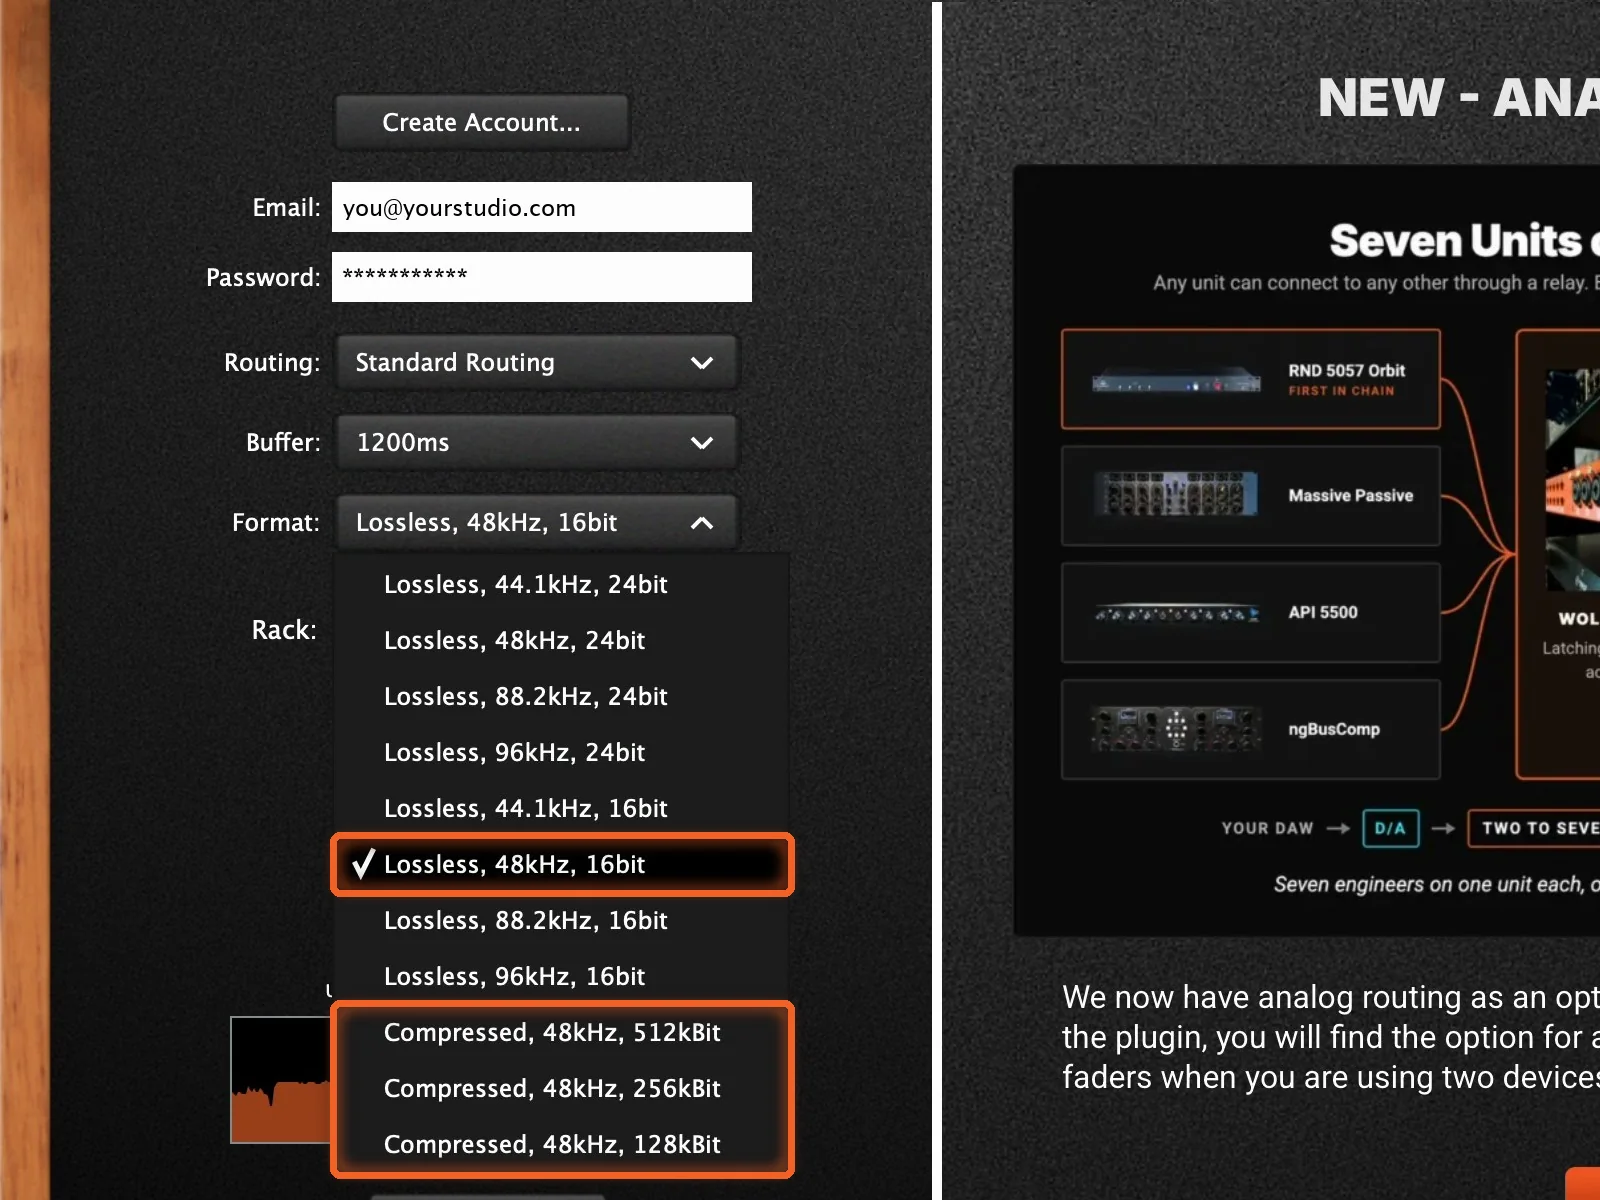
Format is the most important setting. Choose lossless, at the same sample rate as your DAW. When the two match, there's no sample rate conversion in the plugin. Dan's session is at 48 kHz, so he picks Lossless, 48kHz, 24bit.
While you're setting up, keep the buffer on the larger side. You'll bring it down later.
Step 2: Pick a Rack
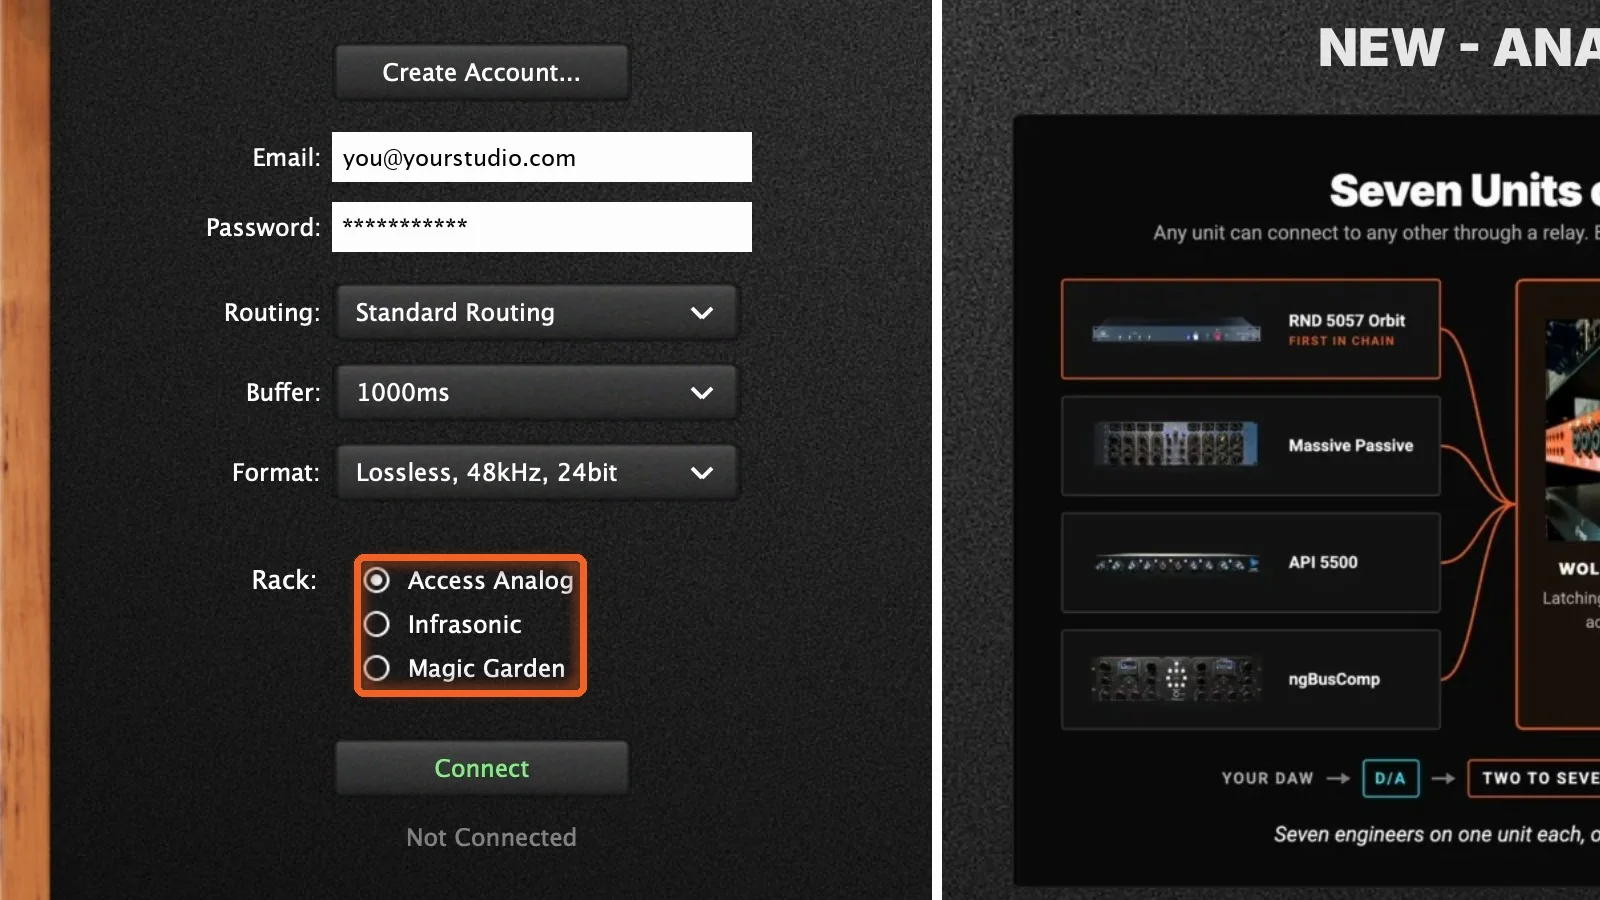
Our gear is installed in three racks, and you connect to one at a time:
- Access Analog has most of our gear.
- Infrasonic and Magic Garden are our two mastering chains, the Infrasonic Mastering Chain and the Magic Garden Chain, each in its own rack.
Connect to either mastering rack, and that rack switches its own sample rate to match your DAW, so no conversions happen in those chains.
Step 3: Connect
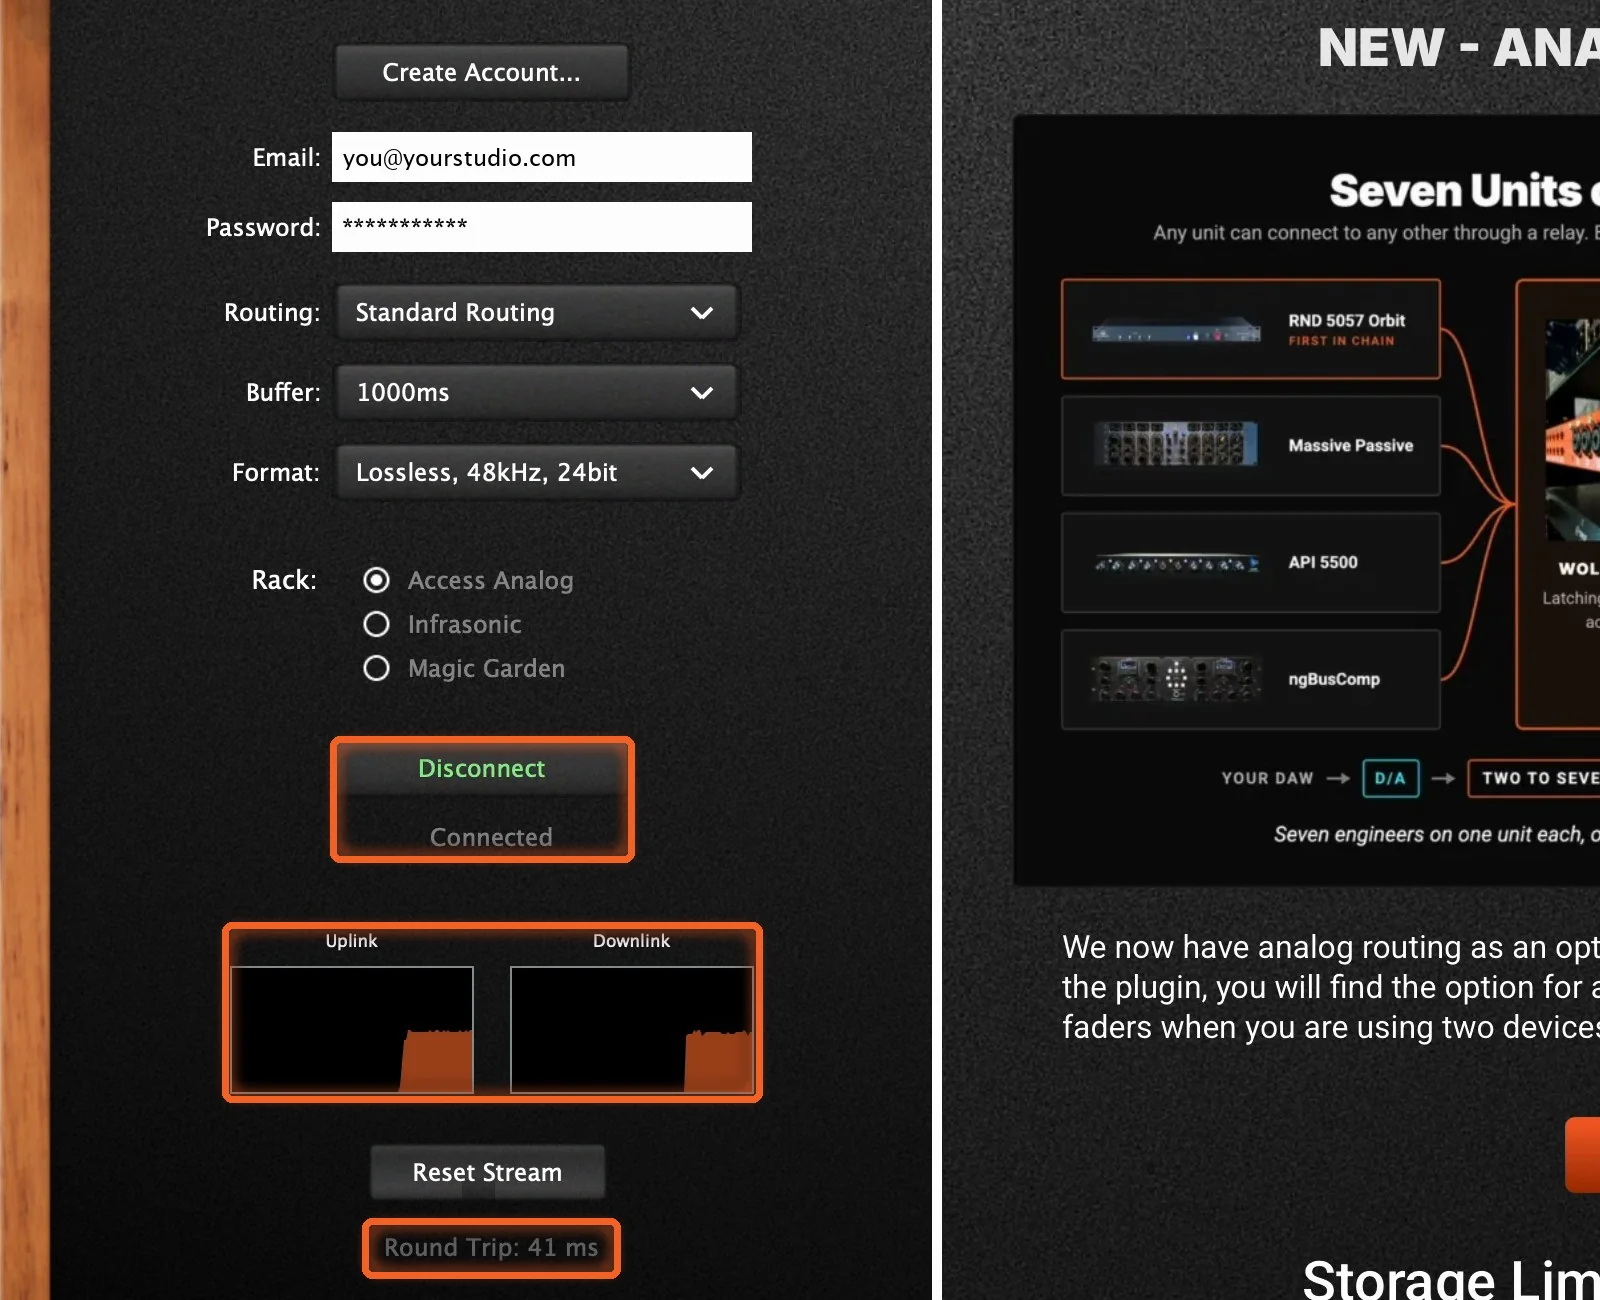
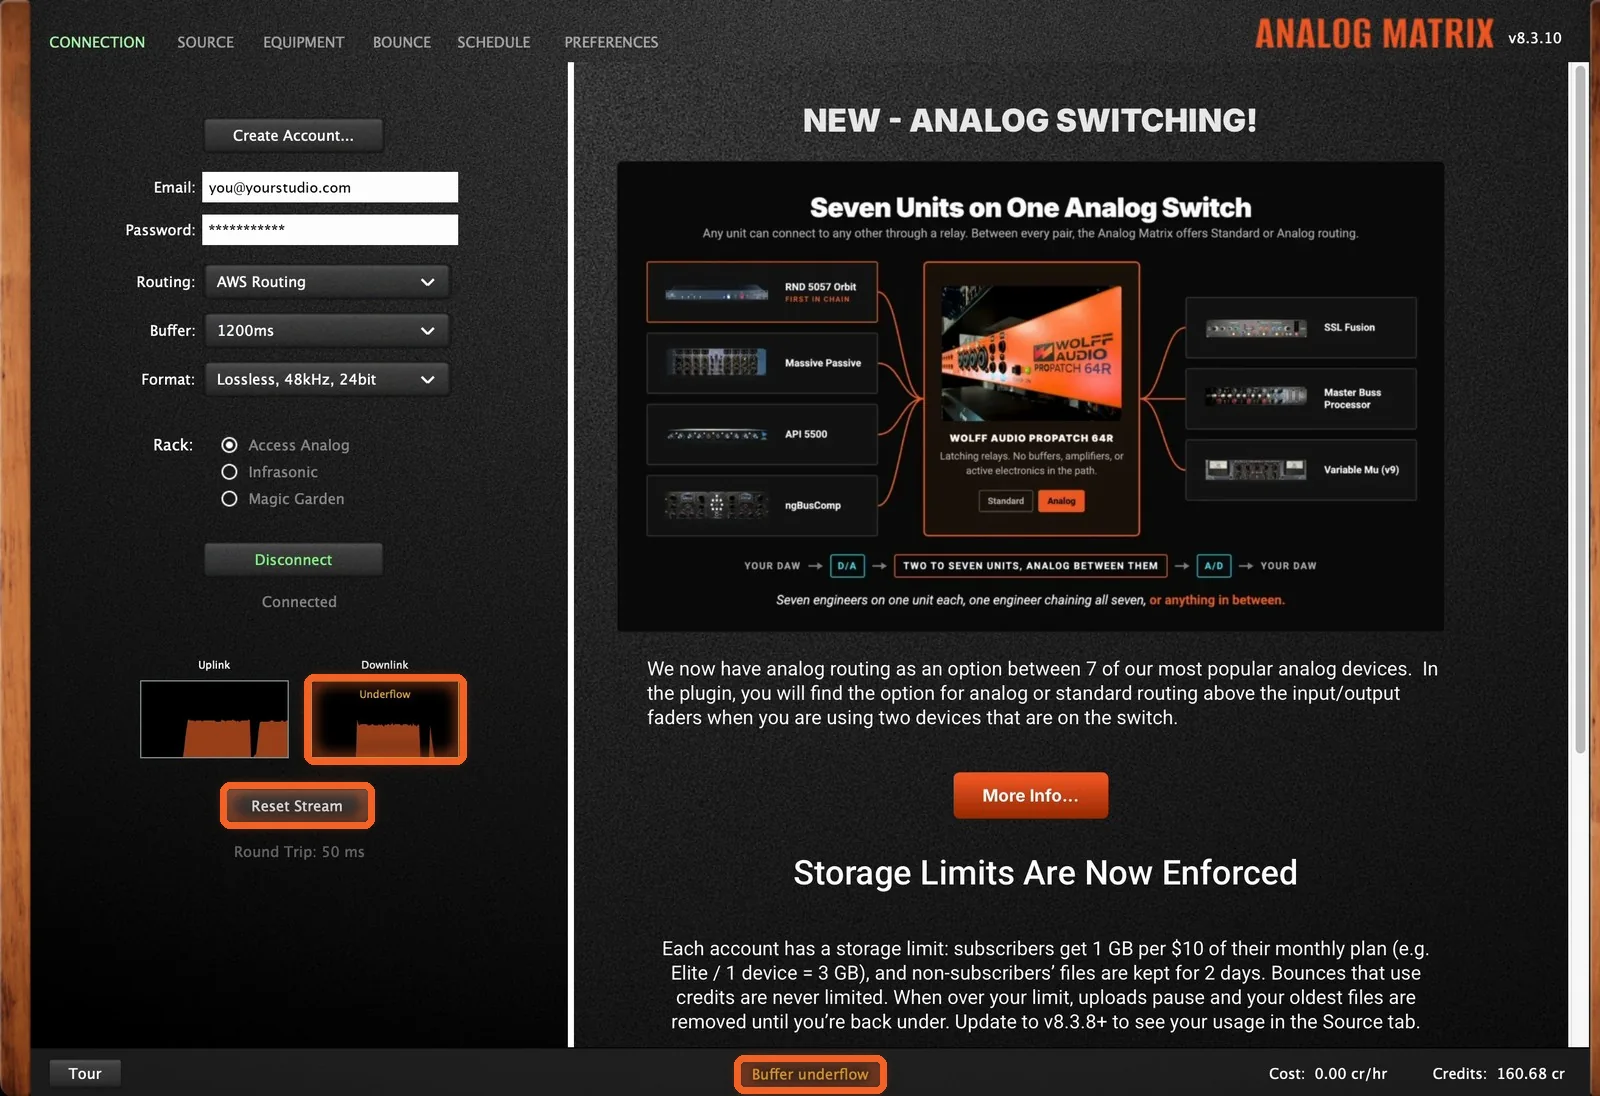
Click Connect, then press play in your DAW. The status reads Connected, the two buffer graphs start to fill, and a Round Trip time appears under Reset Stream.
Read the Buffer Graphs
The two graphs are your buffers. Uplink is the buffer at our server, and Downlink is the one in your plugin. A steady orange block about half full means the stream is healthy.
If either buffer drains to zero, you'll hear a glitch, the graph shows Underflow, and the footer reads Buffer underflow. Click Reset Stream to start the stream fresh. If one graph sits much higher than the other, Reset Stream clears that up too.
Getting Dropouts? Send Less Data
If you keep hearing dropouts, your connection may not keep up with that format. Try lossless at 16-bit, and if that still drops out, a compressed format.
That's fine for dialing in your settings. When it's time for the final print, use an offline bounce: your audio goes to our server losslessly, so you still get full lossless quality. Our Offline Bounce guide covers every setting.
Step 4: Bring the Buffer Down
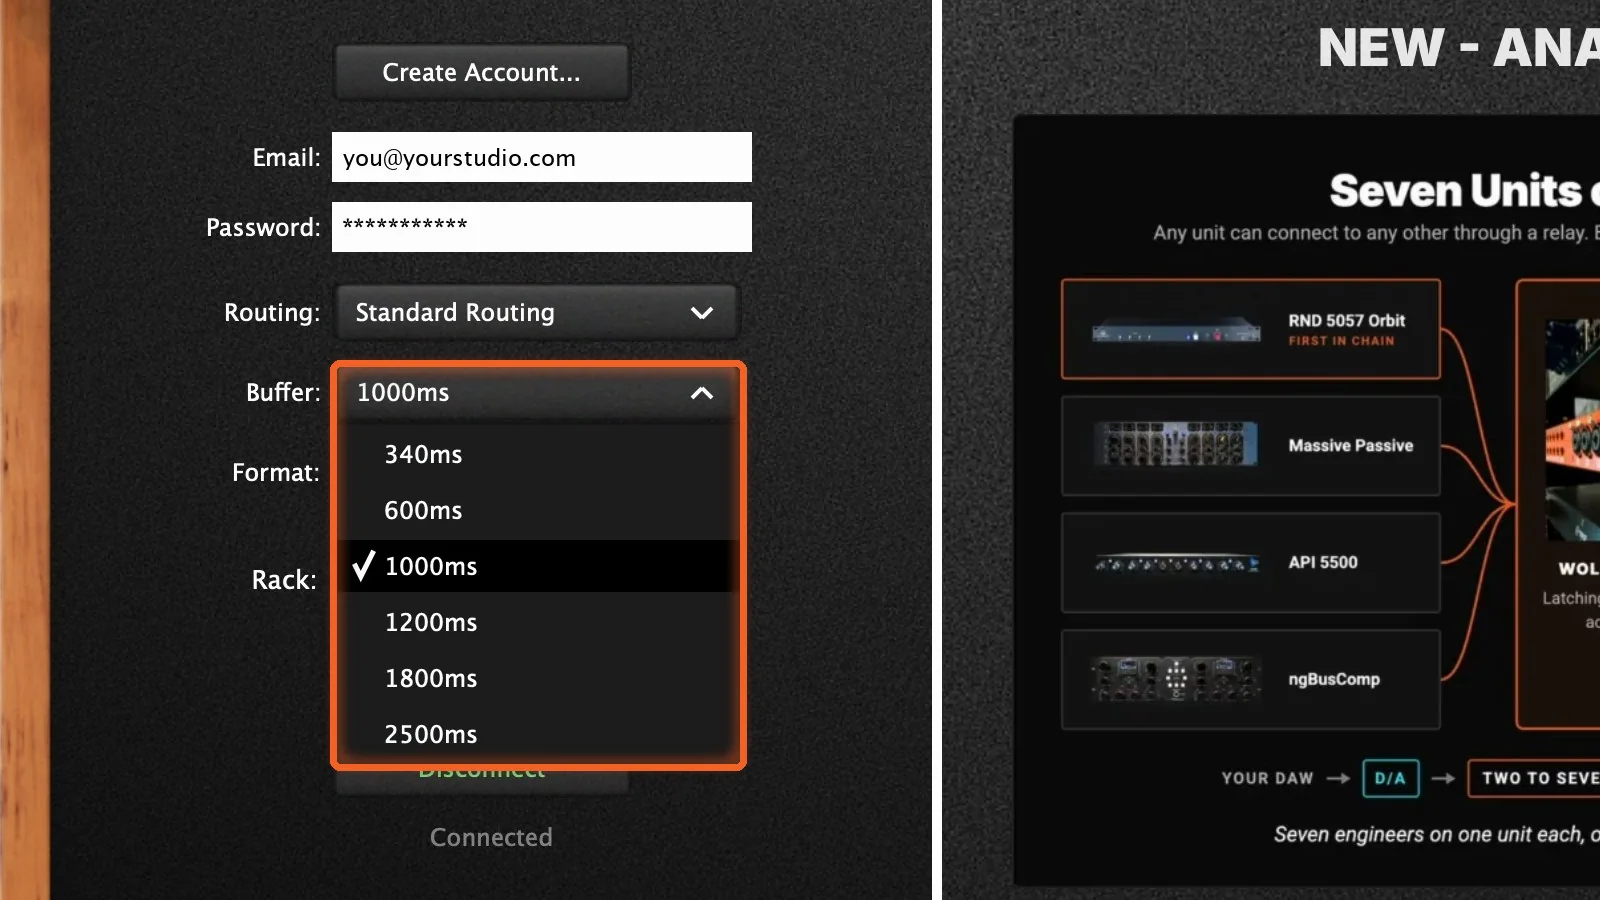
Once the stream is solid, bring the buffer down. The buffer covers short drops in your connection, and there are six sizes, from 340 to 2500 ms. The size you pick is the total for the whole system, split between the two buffers. The smaller it is, the faster you hear a change when you turn a knob, but the steadier your connection has to be.
Step it down and listen. Keep the smallest size that plays cleanly. Dan's connection holds at 340 ms.
Step 5: Choose Your Routing
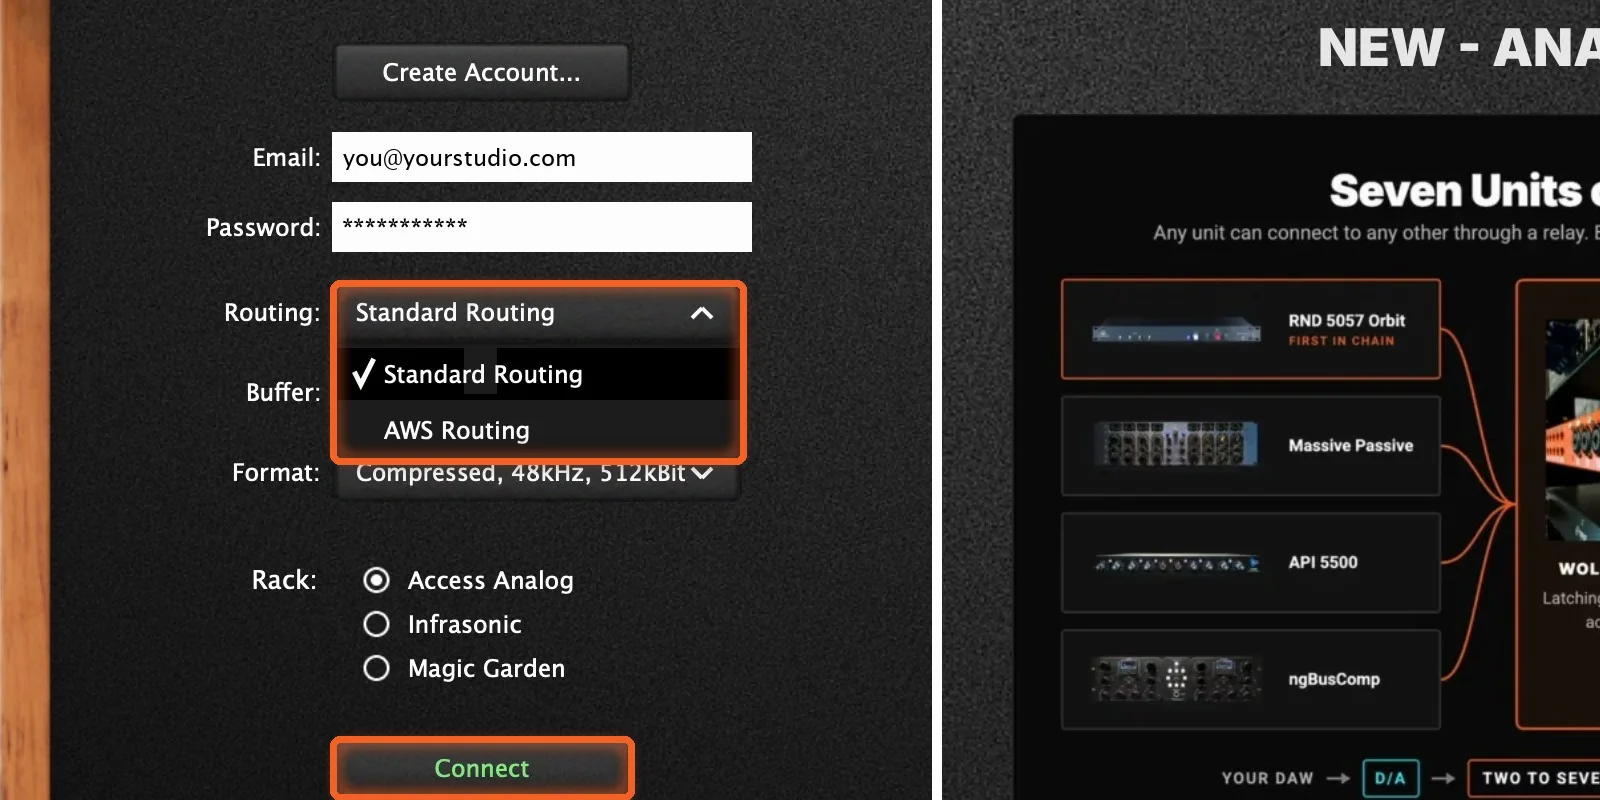
Disconnect before you change the routing. There are two ways to route the stream:
- Standard routing goes over the public internet, directly to us.
- AWS routing travels on Amazon's global network.
In North America, start with Standard. Elsewhere, try AWS first. Either way, try both and keep the one that streams best.
This is network routing. It's separate from the Standard and Analog routing between units on the Analog Switch, which you choose above the faders.
Best Quality: Work at 96 kHz
Our converters run at 96 kHz, 24-bit. For the cleanest path on the Access Analog rack, work at 96 kHz in your DAW and set the format to Lossless, 96kHz, 24bit. Then there's no sample rate conversion anywhere along the way, from your session to our gear and back. (The mastering racks already match your DAW's rate.)
Working at 44.1 or 48 kHz is fine too: the plugin converts, and the difference sits in frequencies so high it's negligible in practice. The 96 kHz path is simply the cleanest one.
How Do I Get Started?
Download the Analog Matrix. One free download from our downloads page installs the plugins (VST, VST3, AU and AAX) and the standalone app, for Mac and Windows. It is not an emulation: every knob you move turns a real control on real hardware in our racks.
Dial in your connection for free. A new account starts with 12 free credits, roughly an hour on an average device. The Iron Age LH95 EQ and the AudioScape Buss Compressor never use credits, so they're a good place to find your format, buffer and routing before you connect to anything else.
Pick how you pay for gear time. Buy credits on demand, reserve a unit for a set time, or move to the Access Analog Subscription (Essential, Pro or Elite) for the best rate.
Format, Buffer, Routing
Match your format to your DAW, find the smallest buffer that plays cleanly, and pick the routing that streams best. Do it once, and every session after it starts from a stream that holds up.
Set up a smooth, clean stream, then hear your mix through real Neve, SSL, API and more.
FAQs
What format should I use in Analog Matrix?
Lossless, at the same sample rate as your DAW. If your connection can't keep up, try lossless 16-bit, then a compressed format, and use an offline bounce for the final print.
What buffer size should I use?
The smallest one that plays cleanly on your connection, from 340 to 2500 ms. As a guide: 340 ms for low latency and Pro Tools individual tracks (it needs a strong connection), 1000 ms for Logic individual tracks, and 2500 ms for the mix bus or a weaker connection. The support page covers buffering in depth.
What do the Uplink and Downlink graphs show?
How much audio is buffered at each end. Uplink is the buffer at our server, Downlink is the one in your plugin. A steady block about half full means a healthy stream.
What is a buffer underflow?
One of the buffers ran empty, so you hear a glitch and see an underflow warning. Click Reset Stream to restart the stream. If it keeps happening, send less data (16-bit or compressed), raise the buffer, or try the other routing.
Should I use Standard or AWS routing?
In North America, start with Standard. Elsewhere, try AWS first. Then try both and keep the one that streams best.
Which rack should I connect to?
Access Analog for most of our gear. Connect to Infrasonic or Magic Garden to use those mastering chains. Each has its own rack, and you connect to one rack at a time.
Does the sample rate matter?
Our converters run at 96 kHz, so a 96 kHz session with a Lossless, 96kHz, 24bit format means no sample rate conversion at all. At 44.1 or 48 kHz the plugin converts, and the difference is negligible in practice.
What else helps with dropouts?
Use Ethernet or sit close to your Wi-Fi router, turn off any VPN, and start and stop playback a few times so the buffering can adapt to your connection. Our FAQ has the full checklist.
Hear what real analog gear does to your own mix, before you buy a single piece of it.
Run real outboard hardware from your DAW. New accounts get 12 free credits.
Connect todayMore in Getting Started
All posts →