How to Use Playback From Server in Analog Matrix: Skip the Upload, Keep the Gear
Your track is already on our server. Why send it up again?
Normally, the Analog Matrix plugin streams your track from your DAW to our racks and back, in real time. That works beautifully on a strong connection. But most home connections upload far more slowly than they download, and when the upload struggles, you hear dropouts.
Playback From Server fixes that. Your file plays from our server, through the real analog gear, and only comes back down to you. In this guide, Dr. Dan shows how it works in four steps, plus the sync setting, the channel controls and how to switch back.
Key Takeaways
- Play from the server, not from your DAW. A file in your cloud storage plays from our end, through the real gear, and only comes back down to you.
- It takes the uplink out of the picture. Most connections upload far more slowly than they download. With no audio sent up, streaming is steadier, and a smaller buffer is often worth a try.
- Four steps: get the file onto the server, drag it onto the channels, add your gear, and press play in your DAW.
- Sync server file playback to DAW keeps the file in step with your session. Uncheck it, and playback always starts from the top of the file.
- Each loaded file has mute, solo and a level knob (-20 dB to +20 dB) at the right end of its row.
- Reset takes channels 1 and 2 back to DAW.L and DAW.R, and your DAW track is the source again.
What Playback From Server Does
There are two ways to run your audio through our gear:
- Streaming (the default): your DAW sends the track up to our racks, the gear processes it, and it comes back down to you, in real time. Your connection has to keep up in both directions.
- Playback From Server: the file is already on our server, so it plays from there, through the gear, and only comes back down to you. No audio is sent up from your computer.
Why It Helps: The Uplink
Most internet connections are asymmetric: your download is much faster than your upload. If you're getting dropouts, the upload is often the weak side.
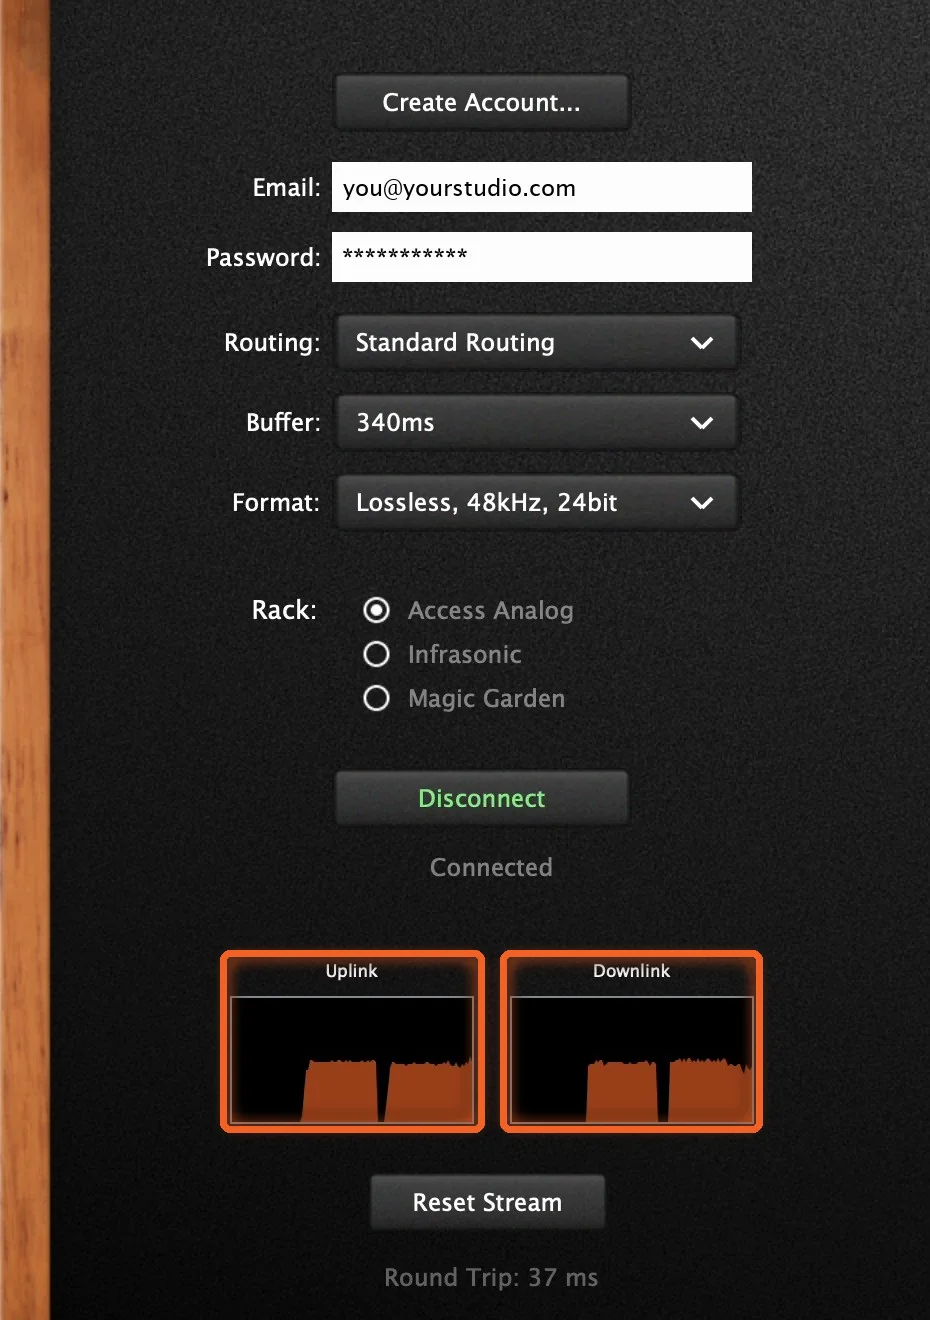
You can see it on the Connection tab. Once you're connected, two buffer graphs show how much audio is buffered at each end. Uplink is the buffer at our server, and Downlink is the one in your plugin. If either one runs down to zero, you hear a glitch and the plugin shows an underflow warning. Our Connection Tab guide covers the graphs and settings in full, and our FAQ has a checklist for a steadier connection.
Playing from the server takes the uplink out of the picture. With only the download to keep up, streaming is steadier, and you can often try a smaller buffer for lower latency.
Playback From Server, Step by Step
Step 1: Get Your File Onto the Server
Your audio needs to be in your cloud storage first. There are two ways to get it there, and they differ in one detail:
- Upload From DAW sends your track straight from your session, and the file keeps its place on your timeline. Upload bars 5 to 20, and the file knows it starts at bar 5. Our Upload From DAW guide shows how.
- A file uploaded from your computer (dragged into the Files list on the Source tab) is placed at the start of your session. Our Cloud Storage guide covers the Files list.
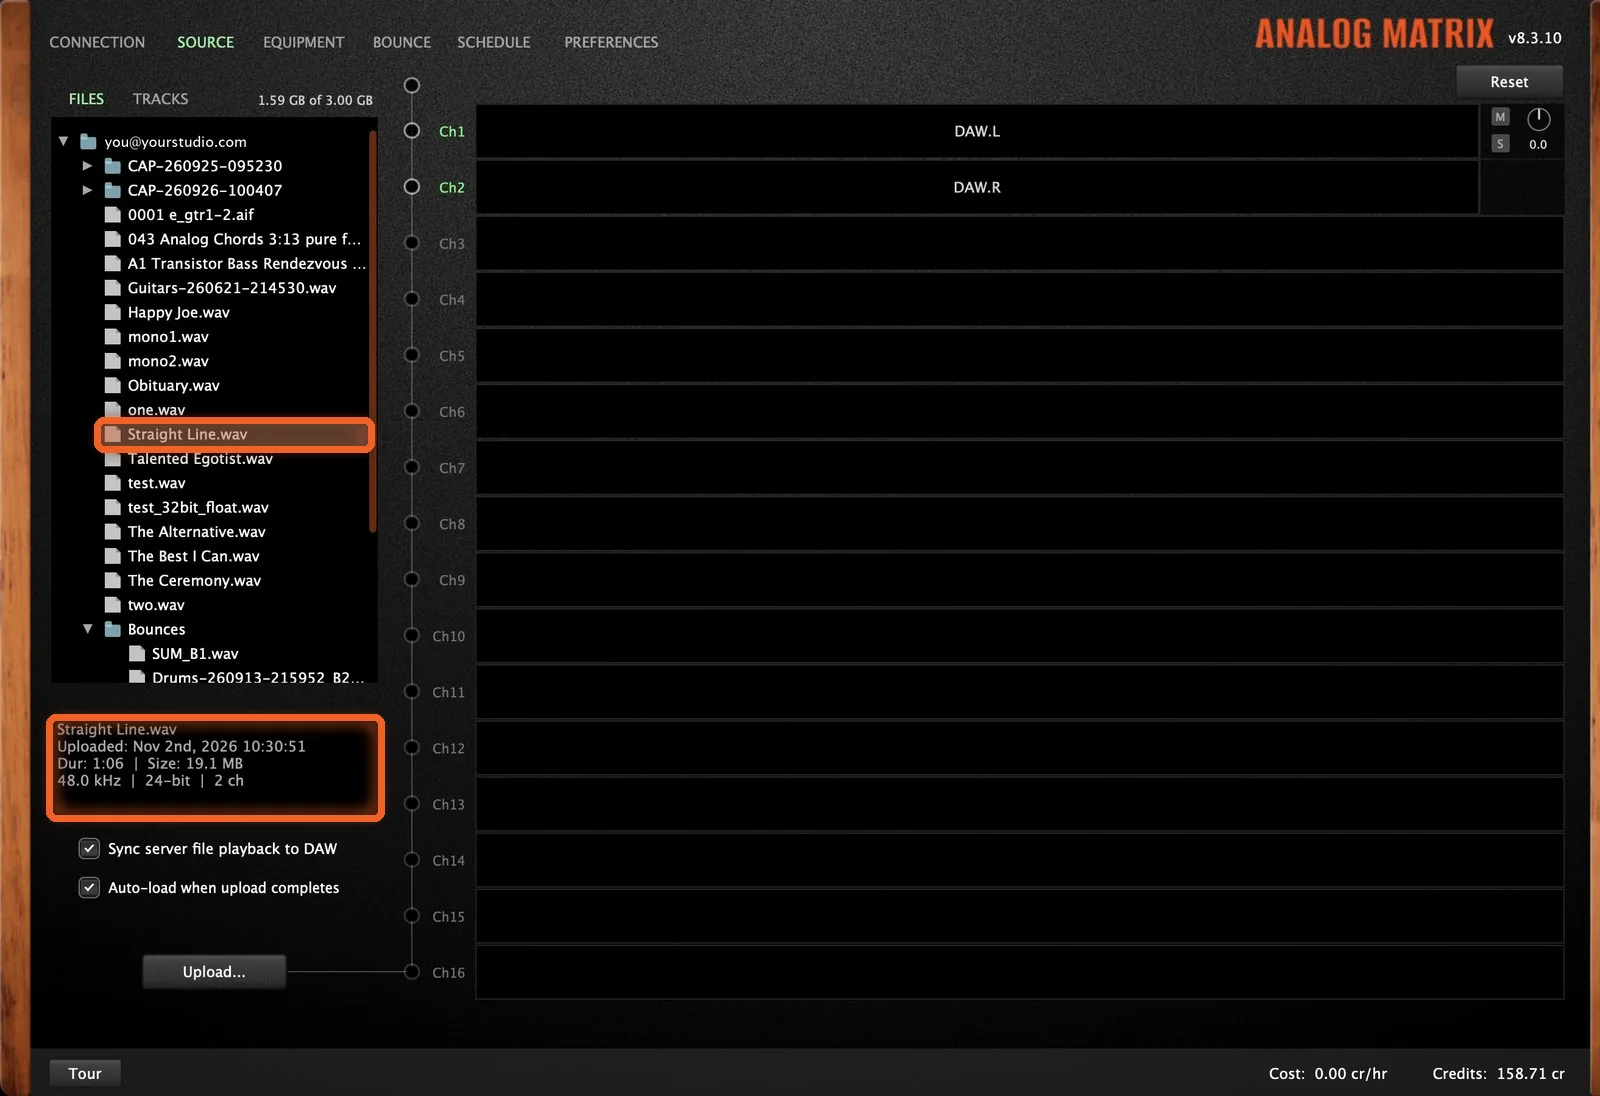
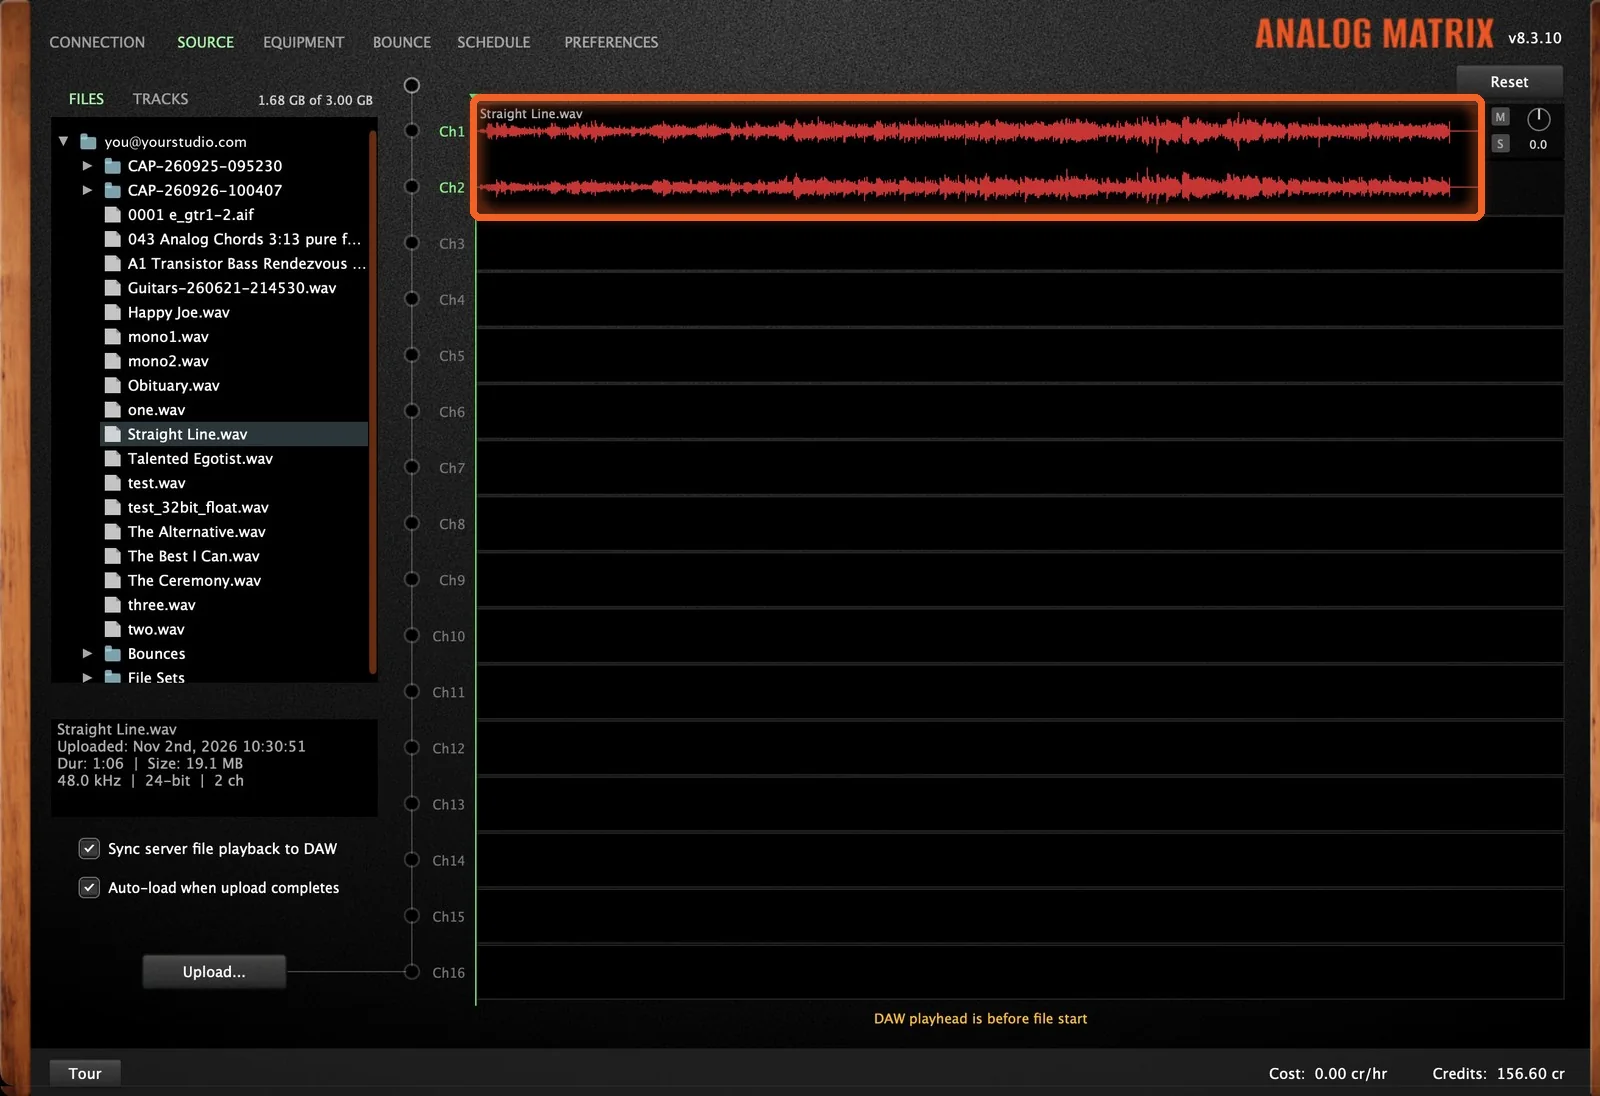
Select a file in the Files list, and the panel below it shows its details: when it was uploaded, its length, size, sample rate, bit depth and channel count.
Step 2: Load It Onto the Channels
Drag the file from the Files list onto the channels. Channels 1 and 2, which read DAW.L and DAW.R while you stream, now show the file's waveform. From here on, the file is what goes into the gear, not your DAW input.
If you used Upload From DAW with Auto-load when upload completes checked, this step is already done: the new file lands on channels 1 and 2 by itself.
Step 3: Add Your Gear
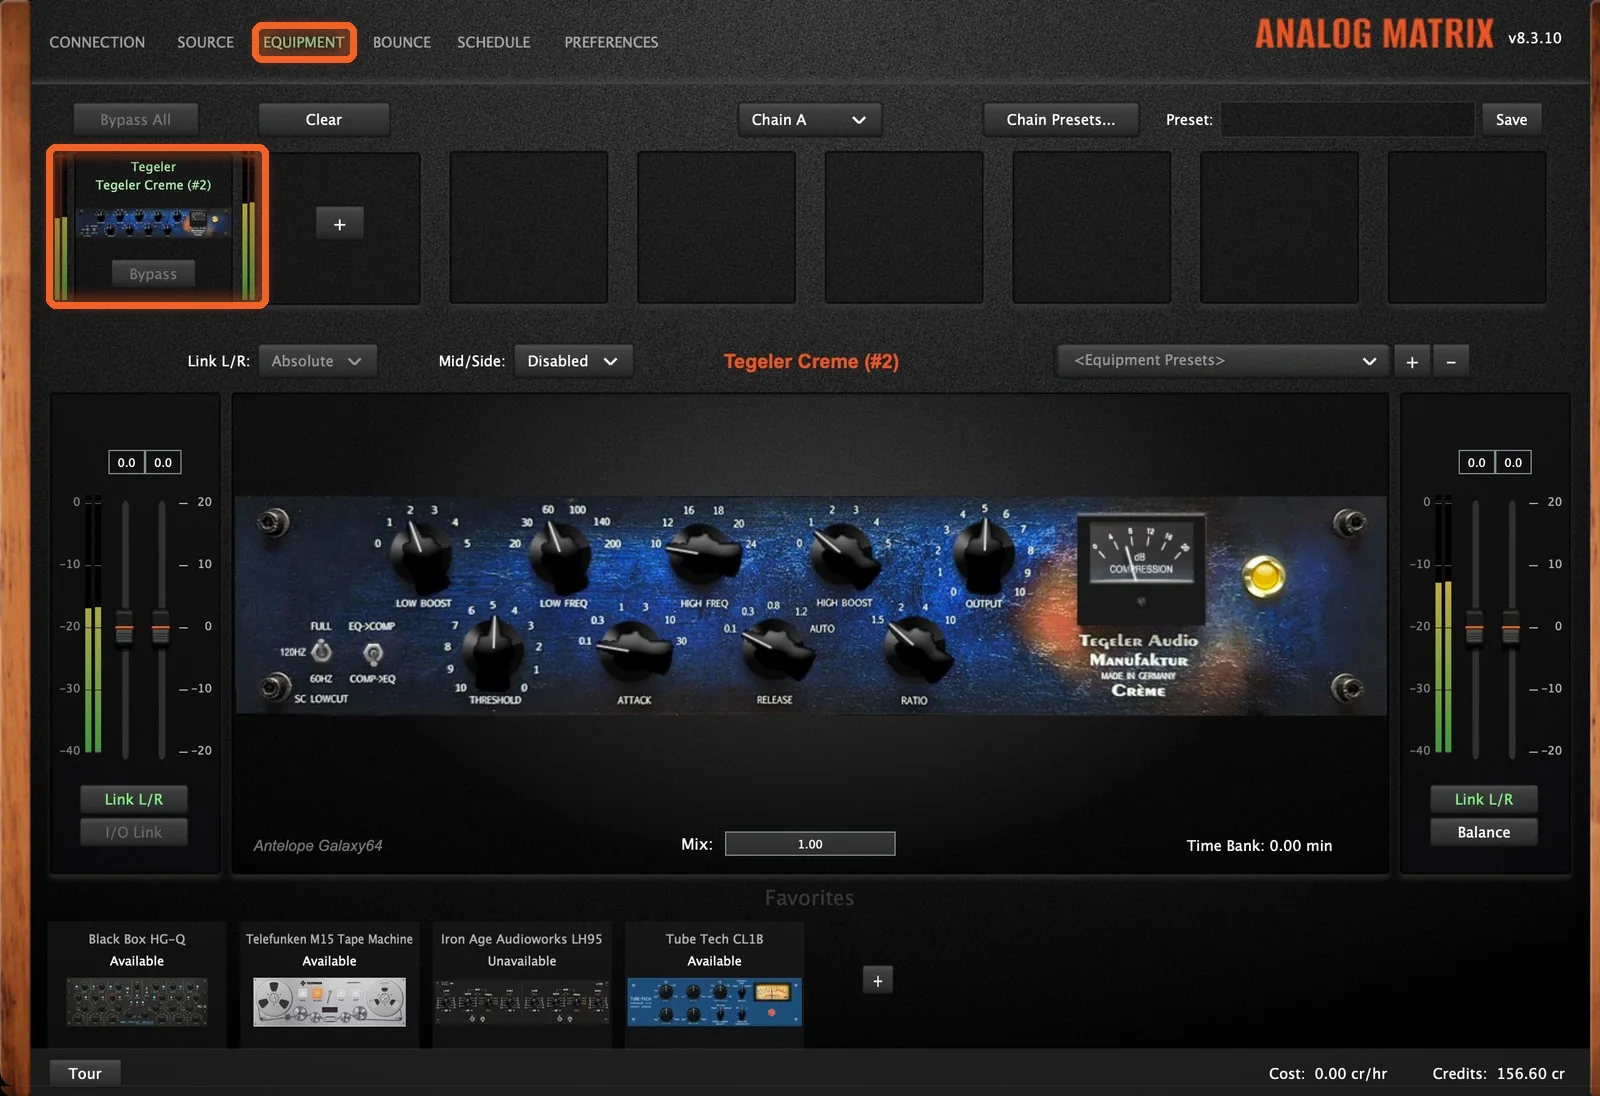
Open the Equipment tab and build your chain just as you would when streaming. Dan adds a Tegeler Creme from the + menu, under Multi Function.
Step 4: Press Play in Your DAW
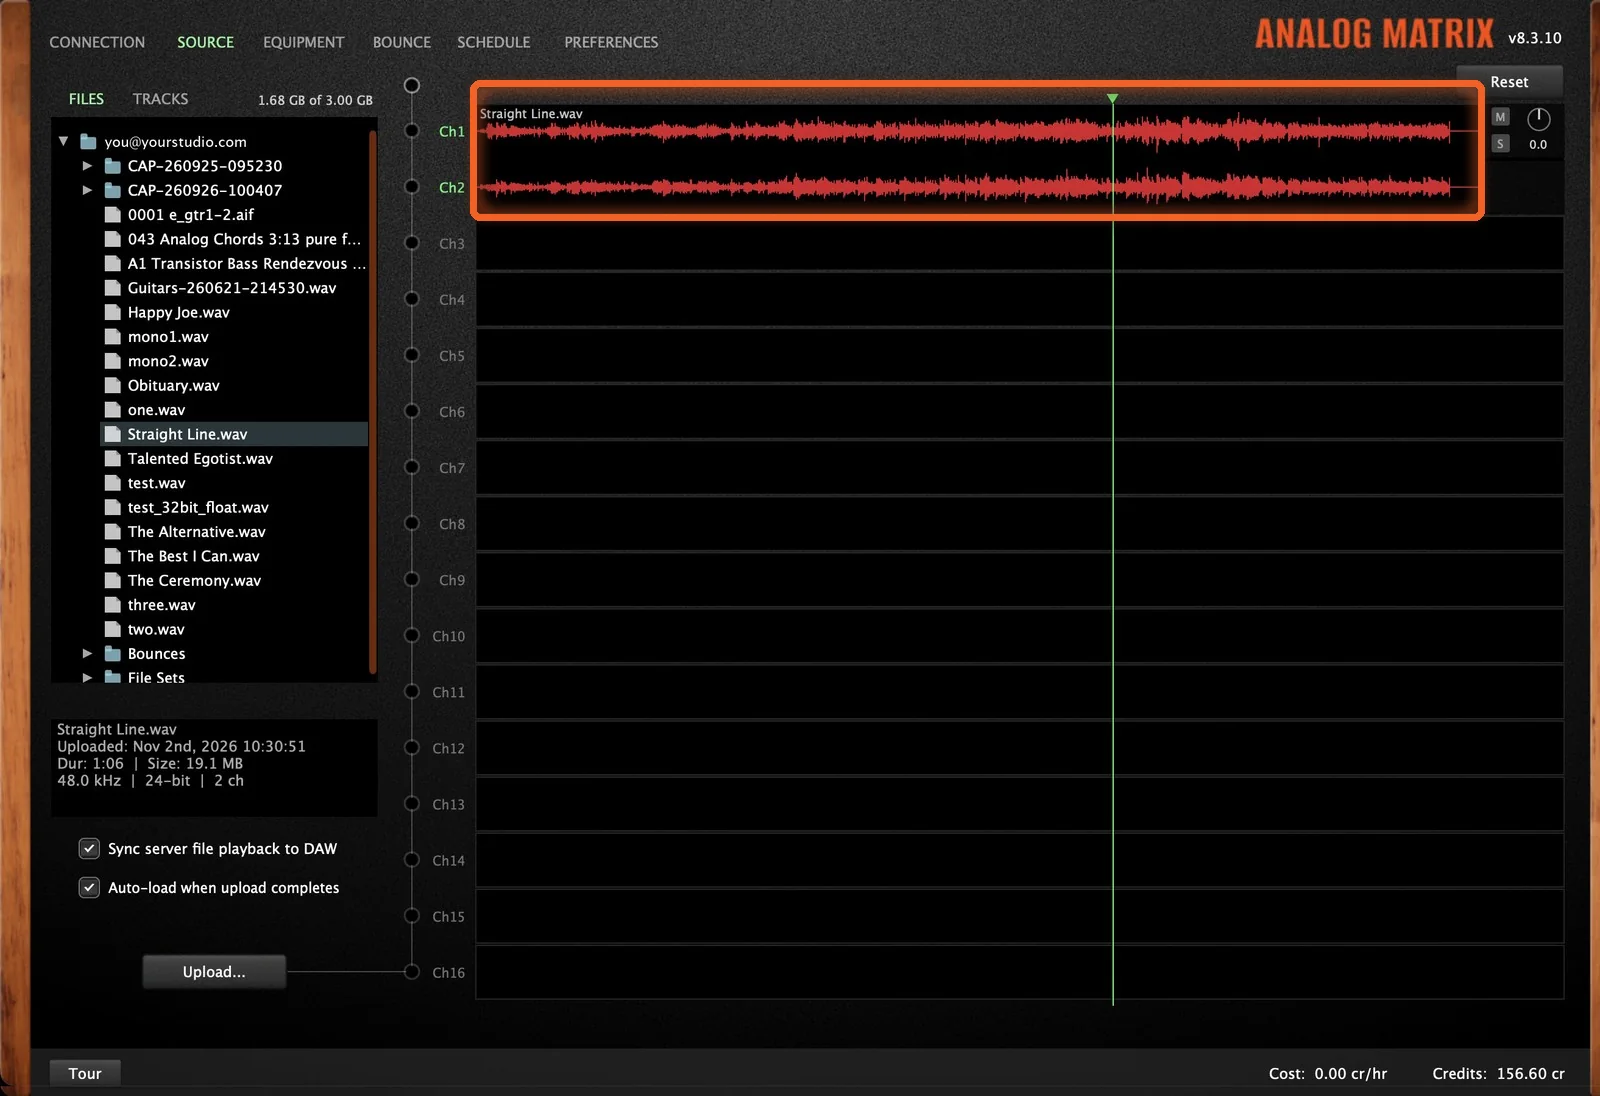
Press play in your DAW. In the plugin, your DAW's transport starts and stops playback from the server. The file plays from our server, through the gear, and back to you, and no audio is sent up from your computer.
Sync Server File Playback to DAW
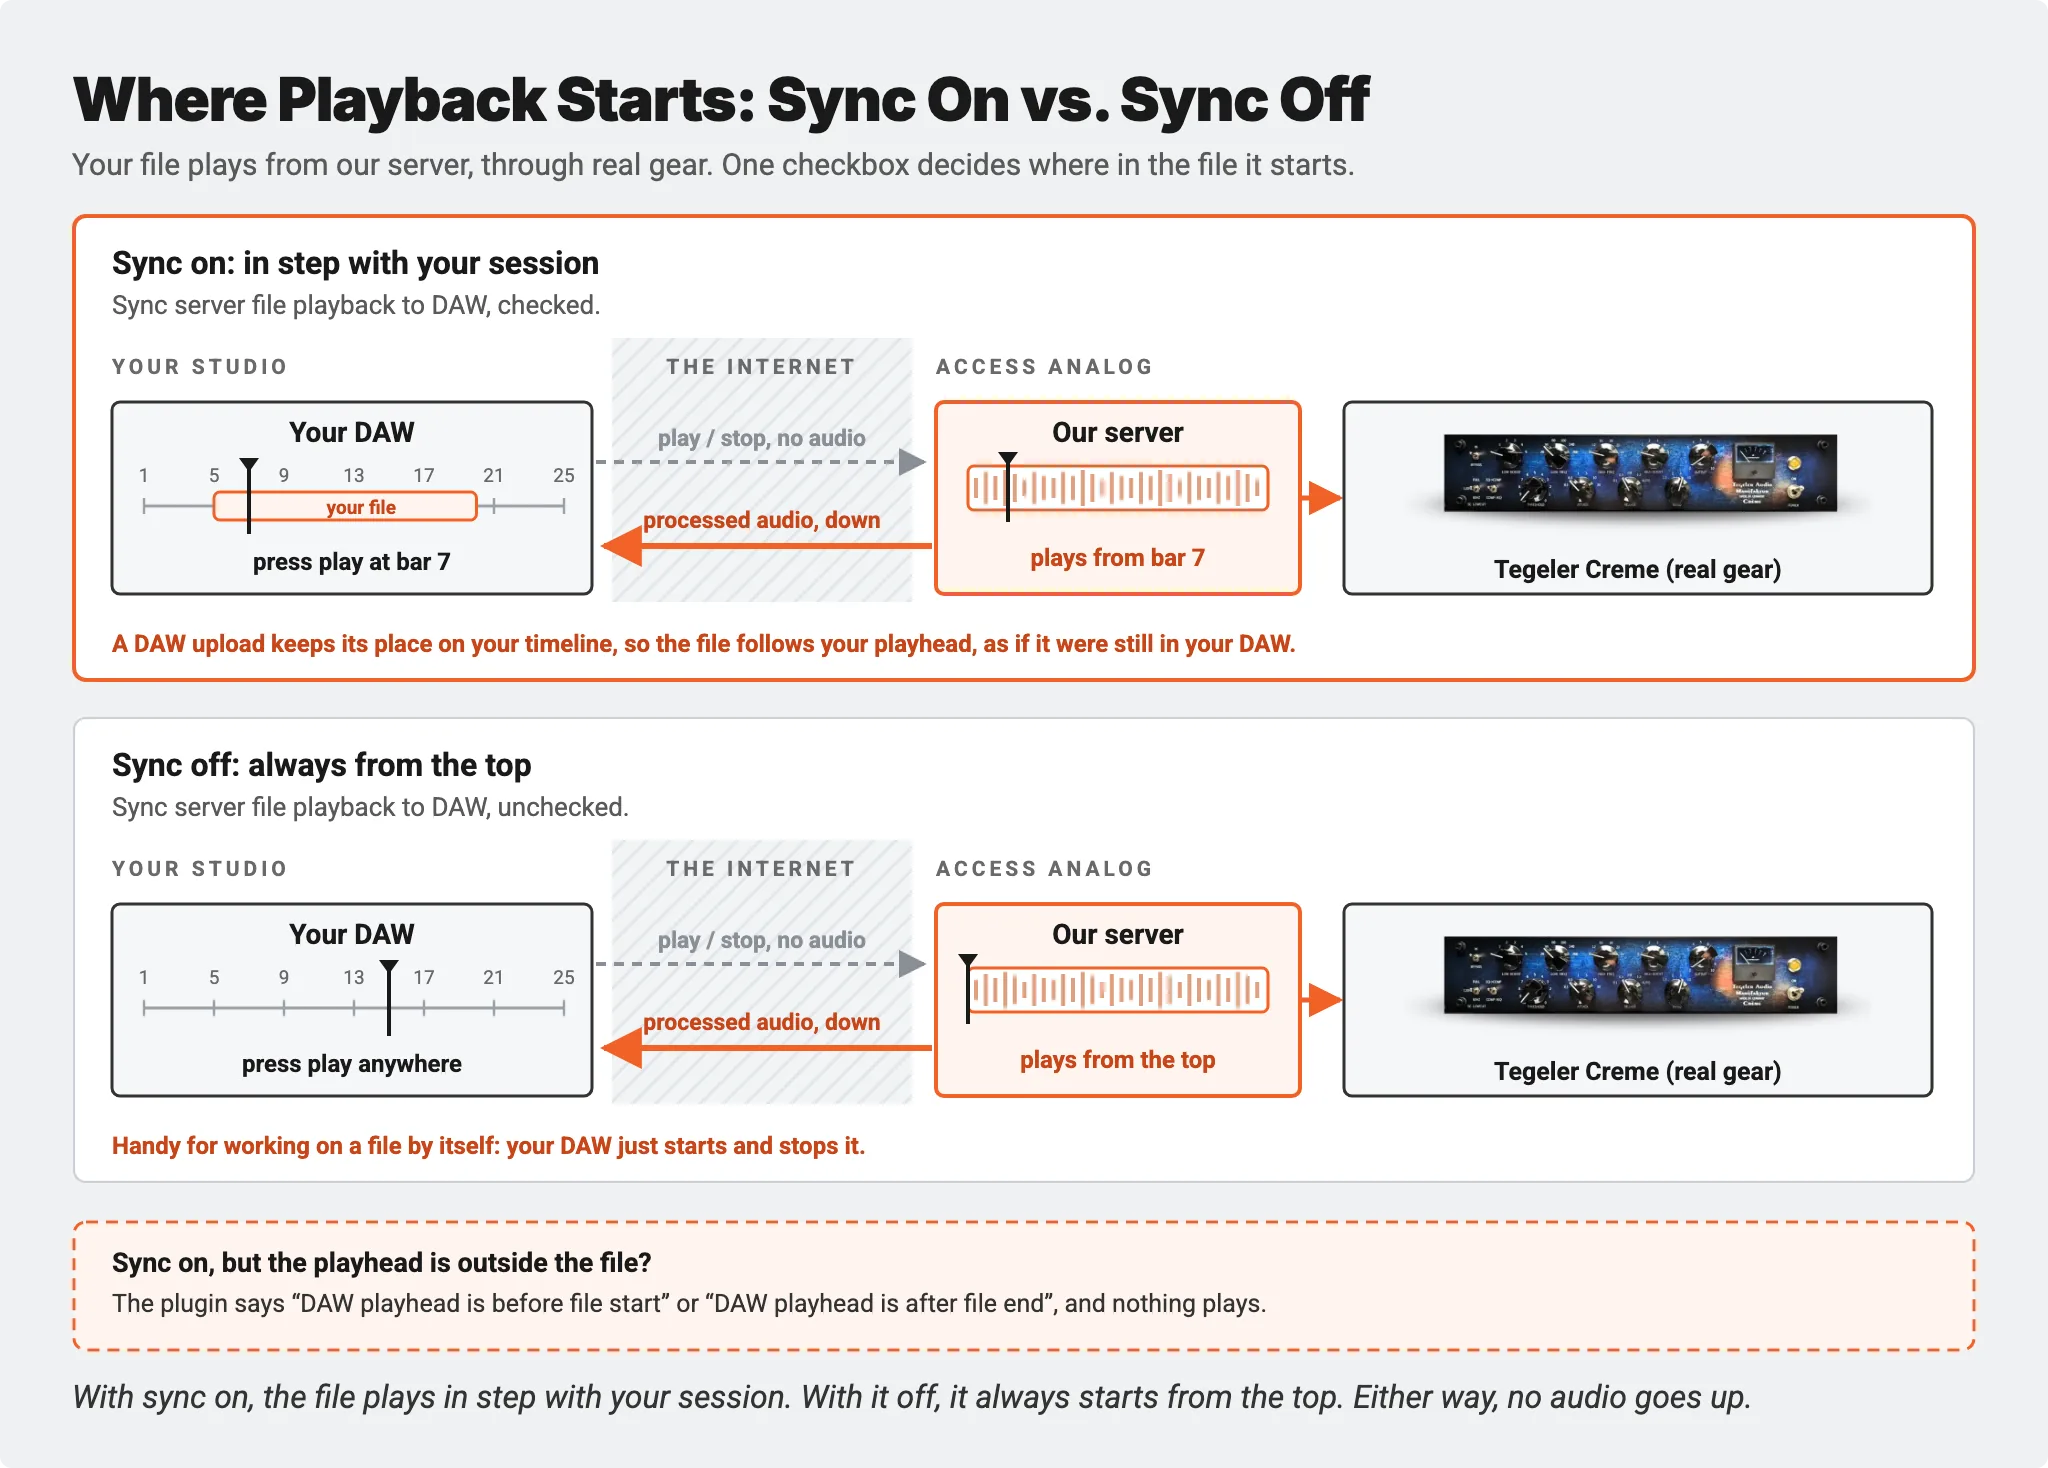
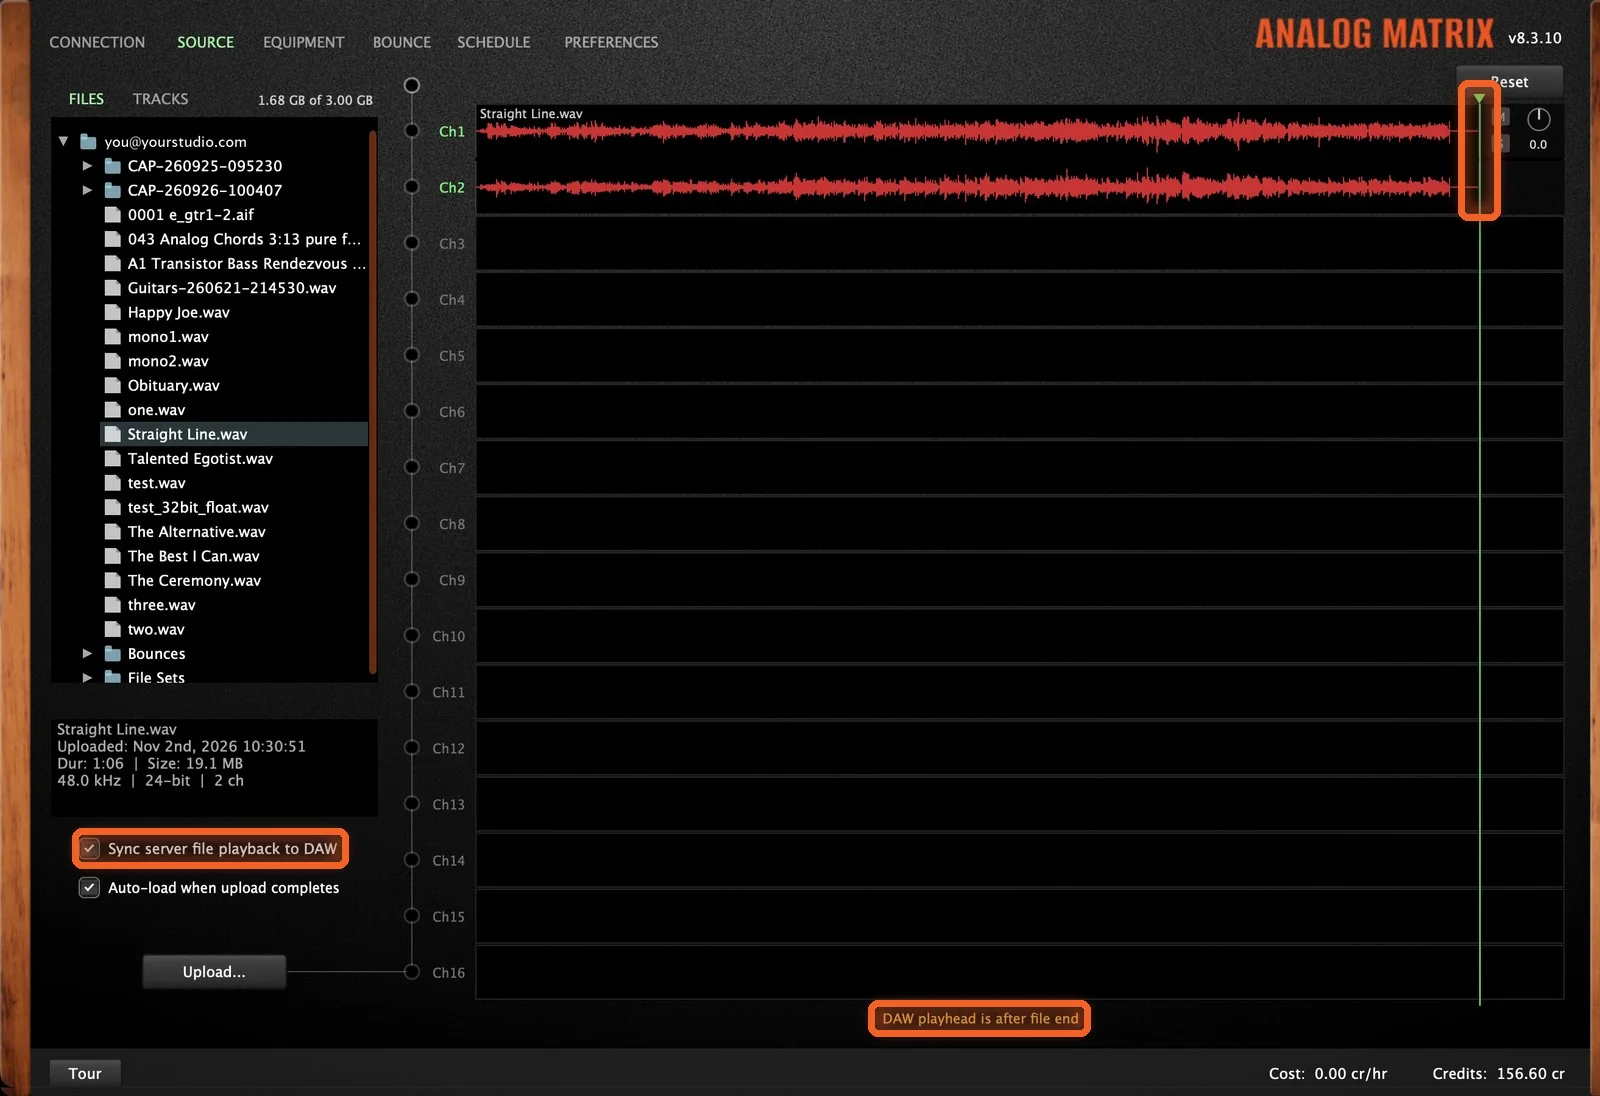
One checkbox on the Source tab, Sync server file playback to DAW, decides where playback starts.
Sync On: In Step With Your Session
With sync checked, the file plays in step with your session, as if your track were still in the DAW. Start in the middle, and it starts in the middle. A file uploaded from bars 5 to 20 starts at bar 5, so press play at bar 7 and you hear it from bar 7.
If your playhead is outside the file, the plugin tells you so at the bottom of the window ("DAW playhead is before file start" or "DAW playhead is after file end"), and nothing plays. Move the playhead inside the file, and you're back in business.
Sync Off: Always From the Top
Uncheck it, and playback always starts from the top of the file, wherever your playhead is. That's handy when you want to work on a file by itself and just hear it through the gear, with your DAW starting and stopping it.
Channel Controls, Another File and Reset
Mute, Solo and Level
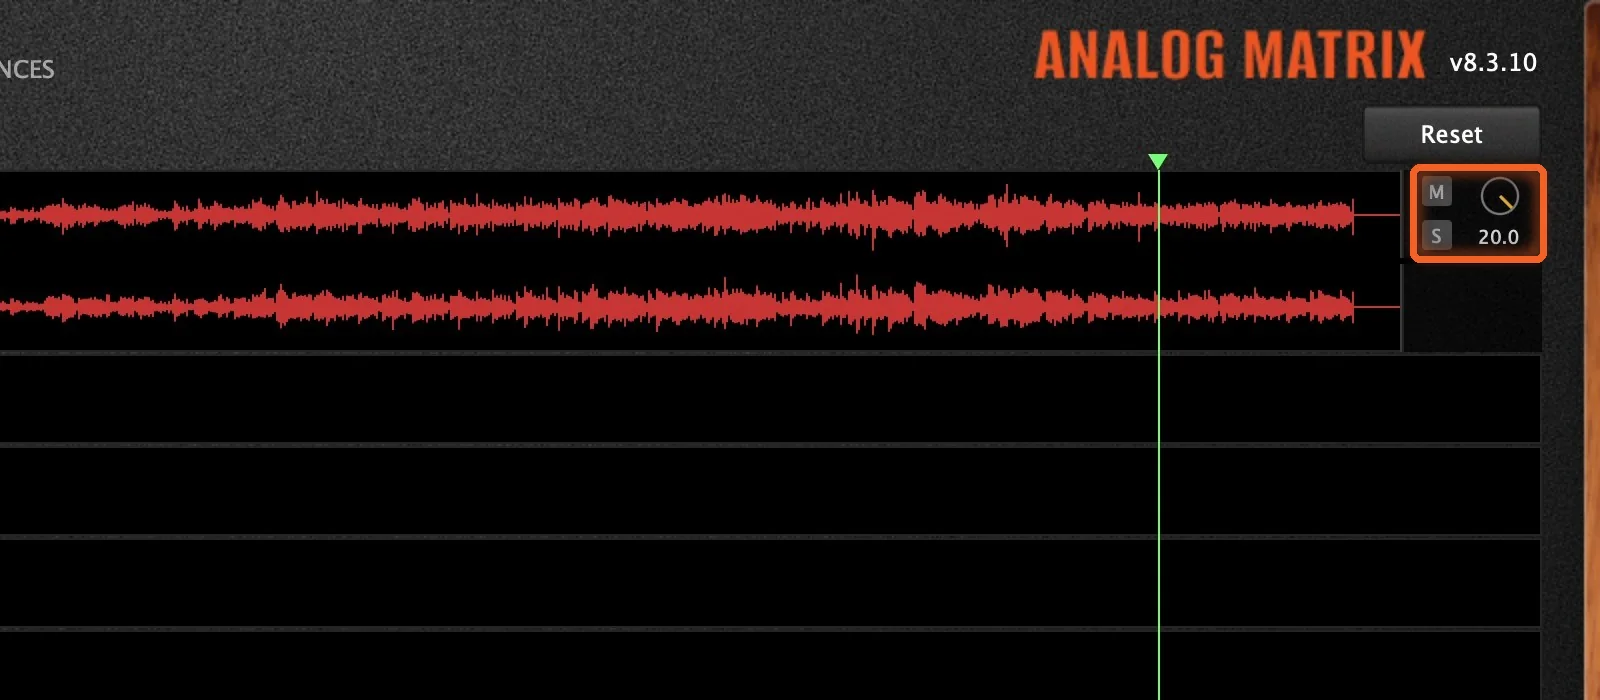
Each loaded file has its own controls at the right end of its row: M to mute it, S to solo it, and a level knob that turns it up or down by as much as 20 dB either way.
Try Another File
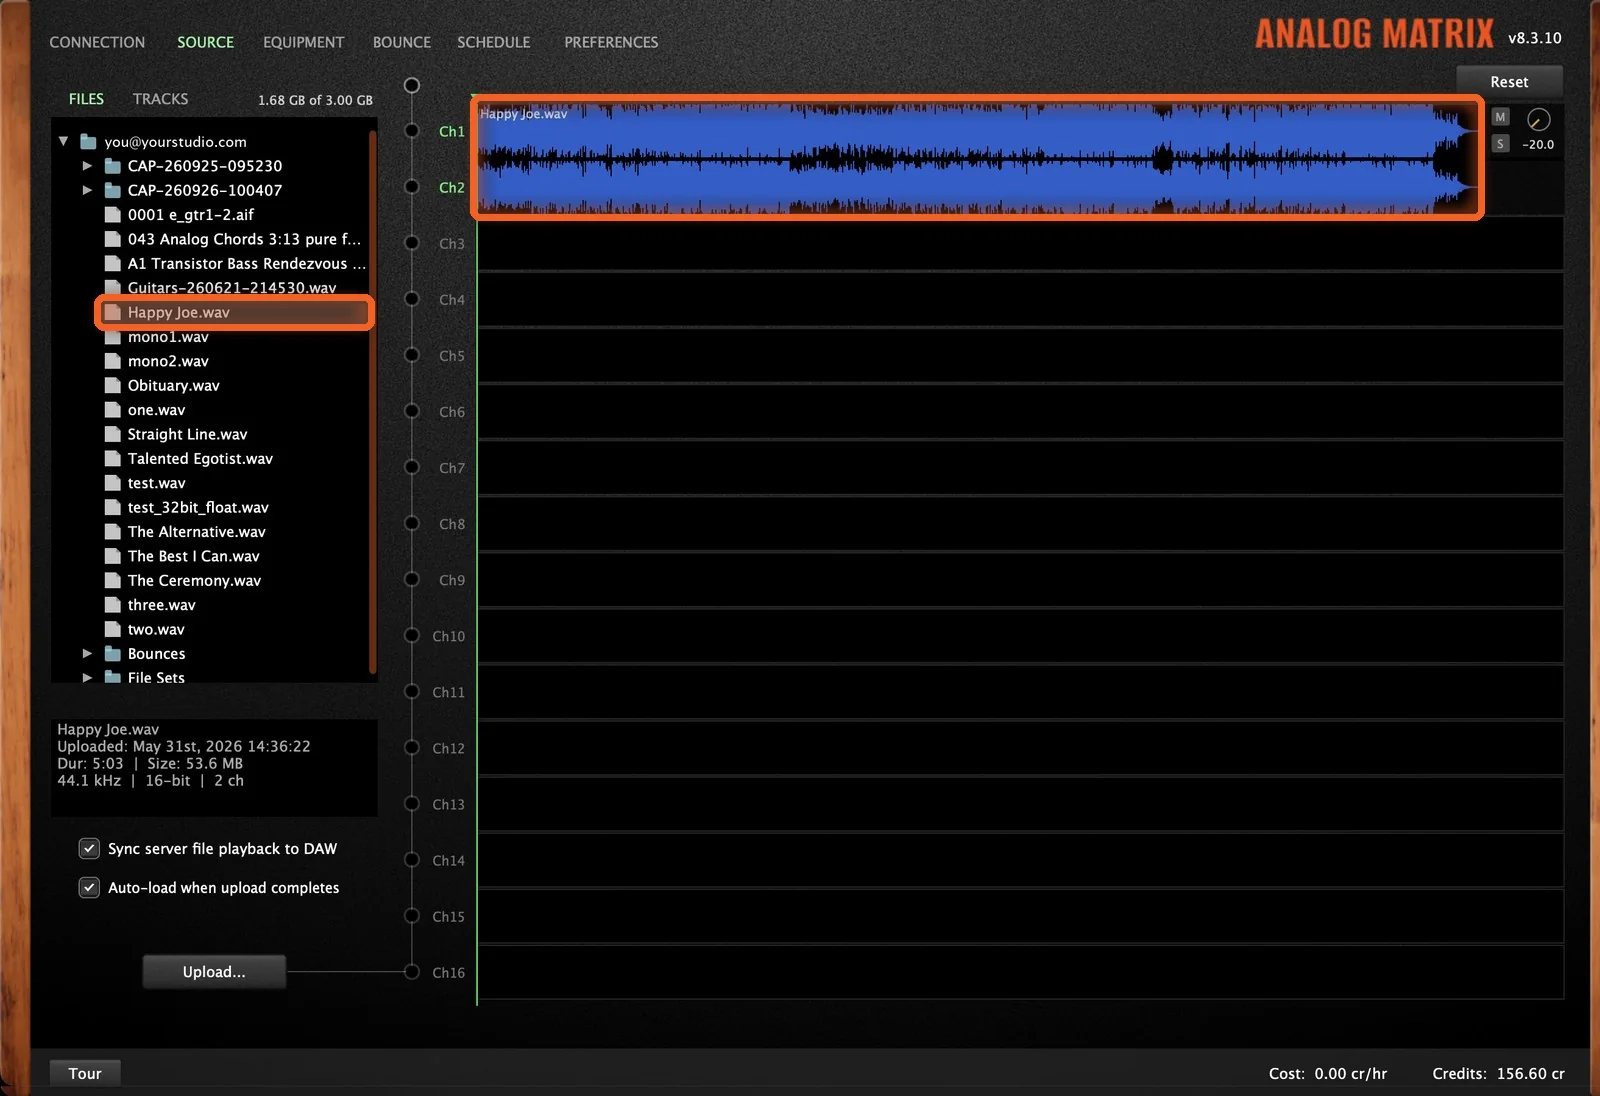
To try another file, drag it onto the channels. It takes the place of the one that was there and plays through the same chain.
Back to Streaming: Reset
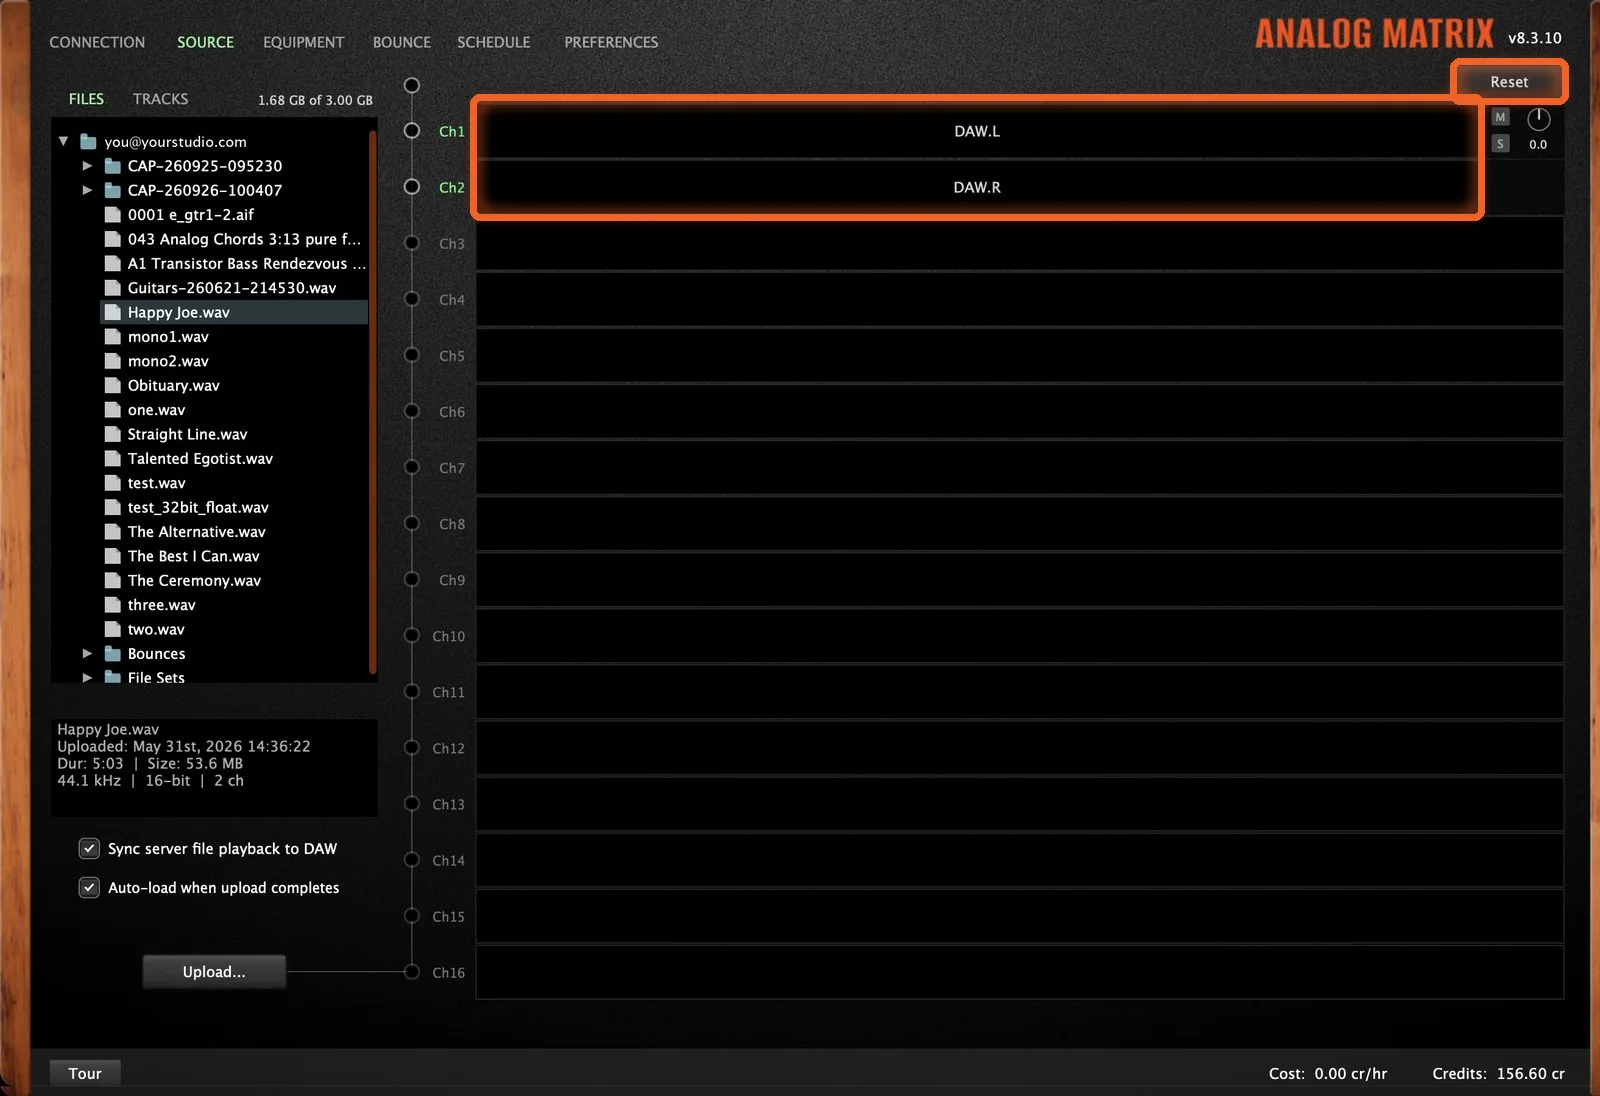
To go back to streaming from your DAW, click Reset at the top right of the channels. Channels 1 and 2 show DAW.L and DAW.R again, and your DAW track is the source once more. Your file stays in the Files list for next time.
When to Use Playback From Server
- Your upload is struggling. If the Uplink graph keeps running low or you hear dropouts, take the uplink out of the picture.
- You want a smaller buffer. With only the download to keep up, you can often run a smaller buffer for lower latency.
- You'd like to work on a file by itself. Load a file, build a chain around it, and try different gear on the same audio.
When the sound is right and it's time to print, an offline bounce runs from the same file on our end, so a dropout can't touch the result. Our Offline Bounce guide walks through it.
How Do I Get Started?
Download the Analog Matrix. One free download from our downloads page installs the plugins (VST, VST3, AU and AAX) and the standalone app, for Mac and Windows. It is not an emulation: every knob you move turns a real control on real hardware in our racks.
Try it for free. A new account starts with 12 free credits, roughly an hour on an average device: enough to upload a track, load it onto the channels and hear it through real gear from our server.
Pick how you pay for gear time. Buy credits on demand, reserve a unit for a set time, or move to the Access Analog Subscription (Essential, Pro or Elite) for the best rate.
Upload Once, Play It Through the Gear
Upload once, load it onto the channels, add your gear and press play. Your track still plays in step with your session, through real analog gear, and only the download has to keep up.
Run your track through real Tegeler, Neve, SSL, Manley and more, straight from our server.
FAQs
What is Playback From Server in Analog Matrix?
It plays an audio file that's already in your cloud storage through real analog gear, instead of streaming your track up from your DAW. The processed audio comes back down to you, so only your download has to keep up.
Does Playback From Server use my upload bandwidth?
No audio goes up. It needs only download bandwidth from our server to your DAW, which is why it helps when your uplink is the weak side of your connection.
Will the file stay in sync with the rest of my session?
Yes, with Sync server file playback to DAW checked. A file sent with Upload From DAW keeps its place on your timeline, so it plays in step with your other tracks, wherever you start playback.
Why does the plugin say "DAW playhead is after file end"?
With sync on, your playhead is past the end of the file, so there's nothing to play. Move the playhead inside the file, or uncheck sync to always play from the top of the file.
Can I lower my buffer with Playback From Server?
Often, yes. With no audio sent up from your computer, streaming is steadier, so a smaller buffer is worth a try for lower latency.
Can I change a file's level?
Yes. Each loaded file has mute, solo and a level knob that goes from -20 dB to +20 dB.
How do I get my files onto the server?
Use Upload From DAW to send your track from your session, or drag a file from your computer into the Files list on the Source tab. Our Cloud Storage guide covers the Files list in full.
How do I switch back to streaming from my DAW?
Click Reset at the top right of the channels. Channels 1 and 2 go back to DAW.L and DAW.R.
Hear what real analog gear does to your own mix, before you buy a single piece of it.
Run real outboard hardware from your DAW. New accounts get 12 free credits.
Connect todayMore in Getting Started
All posts →