How to Use Cloud Storage in Analog Matrix: Upload, Organize and Reuse Your Files
Upload a file once, and it waits for you on our servers, ready to play, bounce or download whenever you need it.
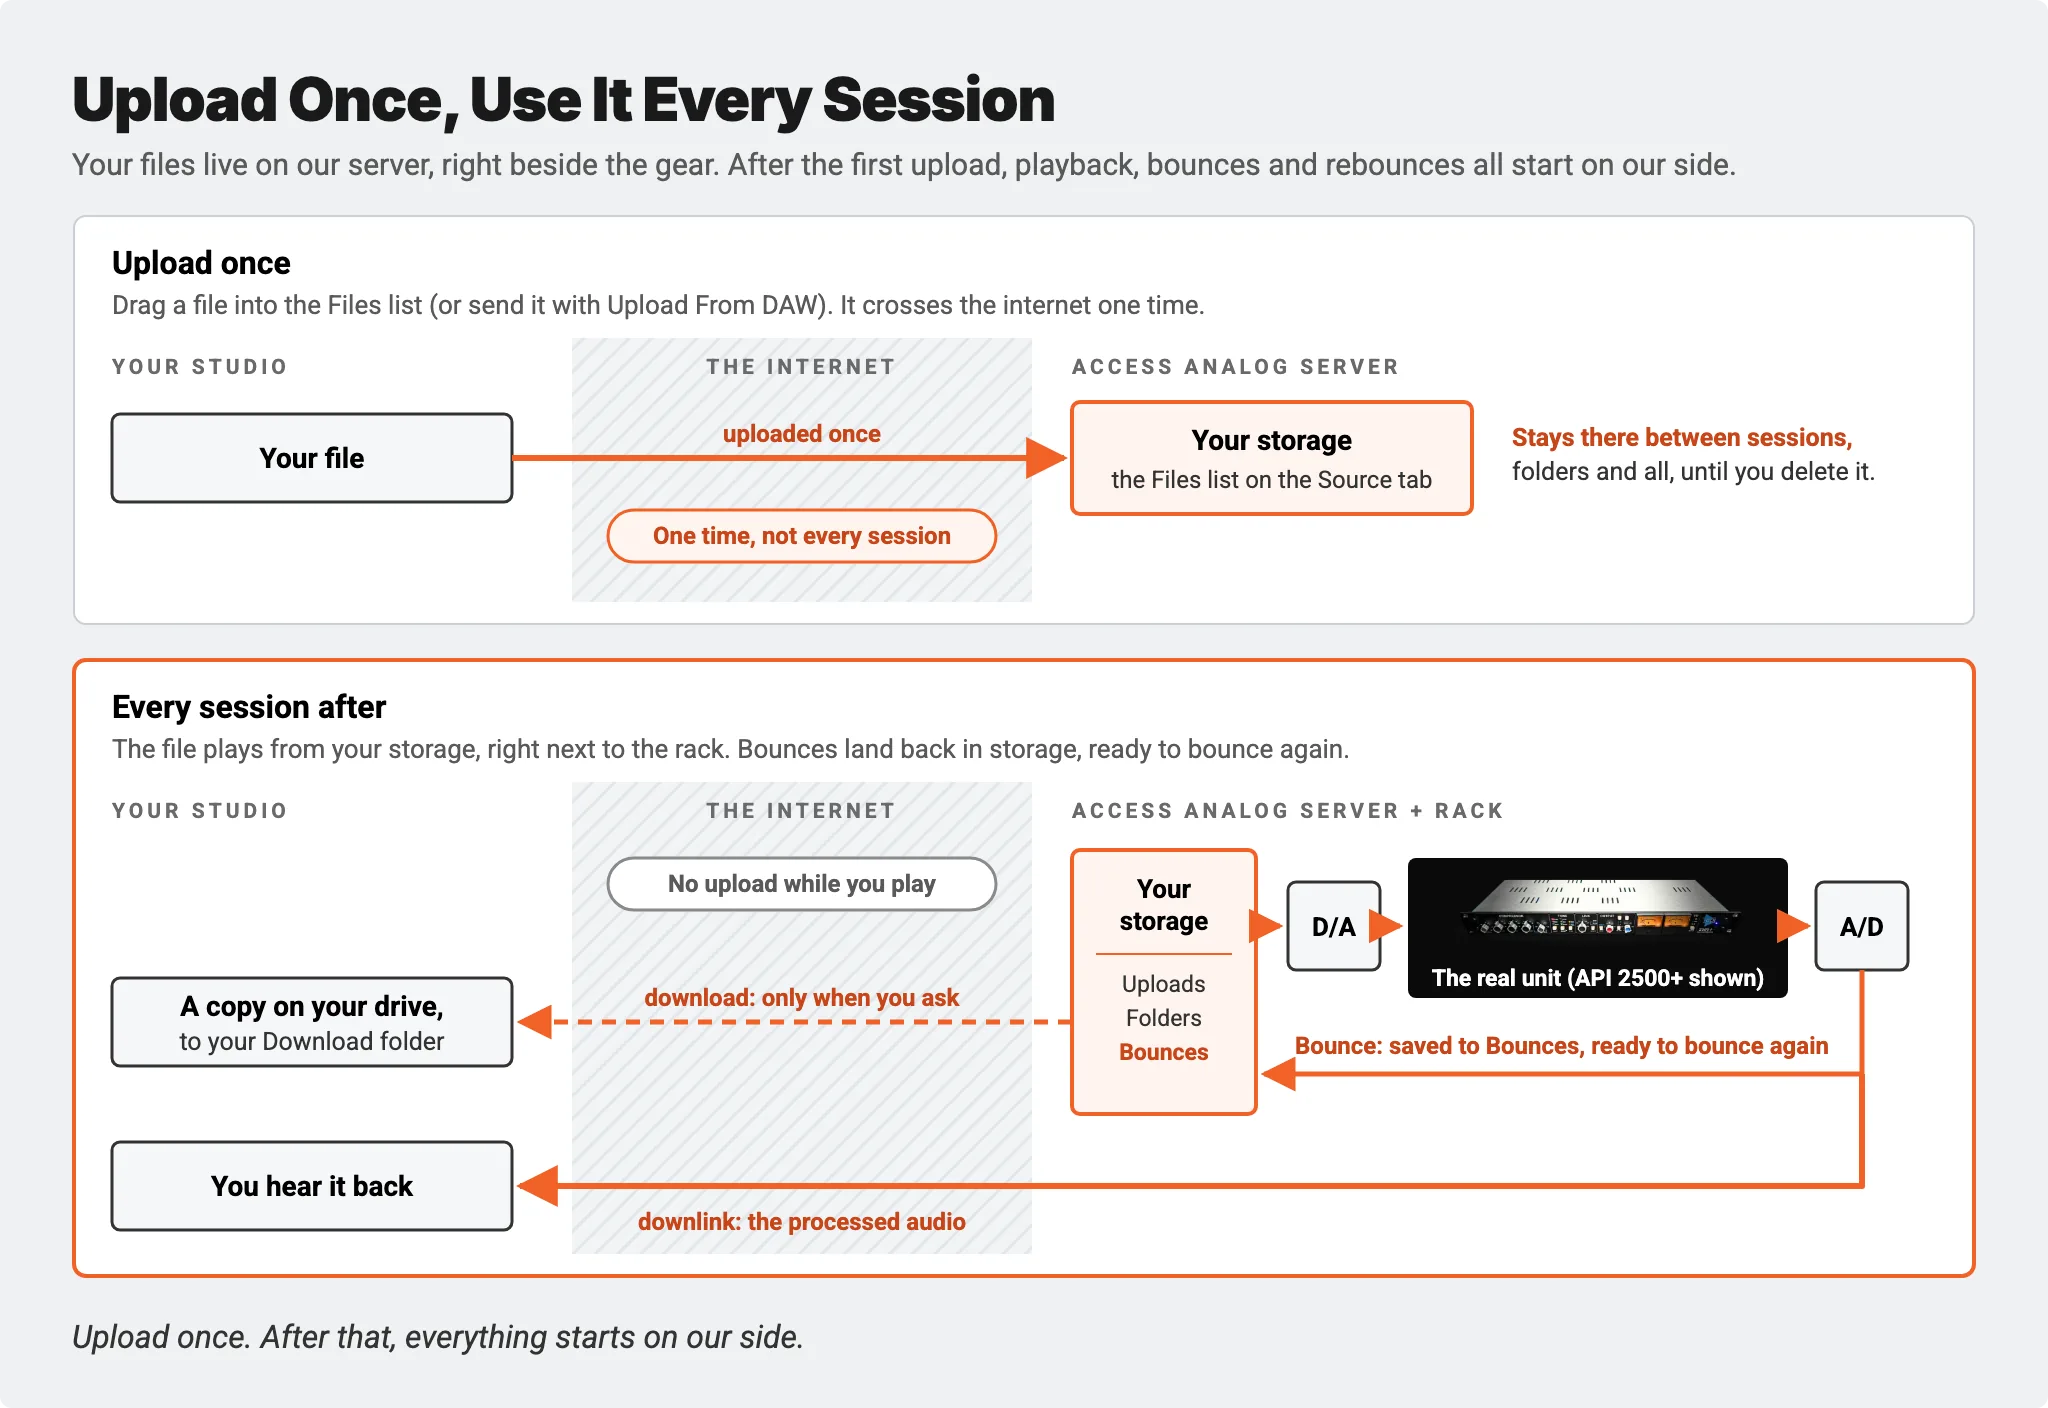
Every file you send us lives in your own storage area on our servers. It's what makes playback from the server, offline bounces and the standalone app work in the Analog Matrix plugin. You don't have to upload the same file again each session, and you're never waiting on an upload while you're holding gear.
In this guide, Dr. Dan walks through where your files live, how to upload, load and organize them, how to download, duplicate, rename and delete them, where your bounces are kept, and the simple rules for how much space you have.
Key Takeaways
- Upload once: every file you send lives in your own storage on our servers, so you never upload it again each session.
- It's all on the Source tab, under Files: your uploads, Upload From DAW captures (CAP folders), Bounces and File Sets in one tree, with a storage meter above it.
- Upload by dragging files into the list (several queue up), or with right-click › Upload or the Upload... button.
- Load a file by dragging it onto a channel. Reset takes the channels back to your DAW input.
- Right-click a file to download, duplicate, rename or delete it, and use folders to keep a project together.
- Your bounces are stored here too, ready to download or bounce again through more gear. Over your limit, uploads pause and your oldest files are removed.
Why Cloud Storage Matters
Your files on our servers are what three of the plugin's best features run on:
- Playback from the server. A file loaded on a channel plays from our end, so nothing has to stream up from your computer. Our Upload From DAW guide shows how to keep it in step with your session.
- Offline bounces. Upload your audio first, then bounce it through the gear. An offline bounce is immune to connection dropouts and always uses lossless 24-bit audio, whatever your transmit format. Our Offline Bounce guide covers every setting.
- The standalone app. Process files with no DAW at all, from the same storage. Our Standalone App guide shows four ways to use it.
Upload a file once, and it's there whenever you need it. Do your uploads before a session, and your files are ready when the gear is.
Where Your Files Live
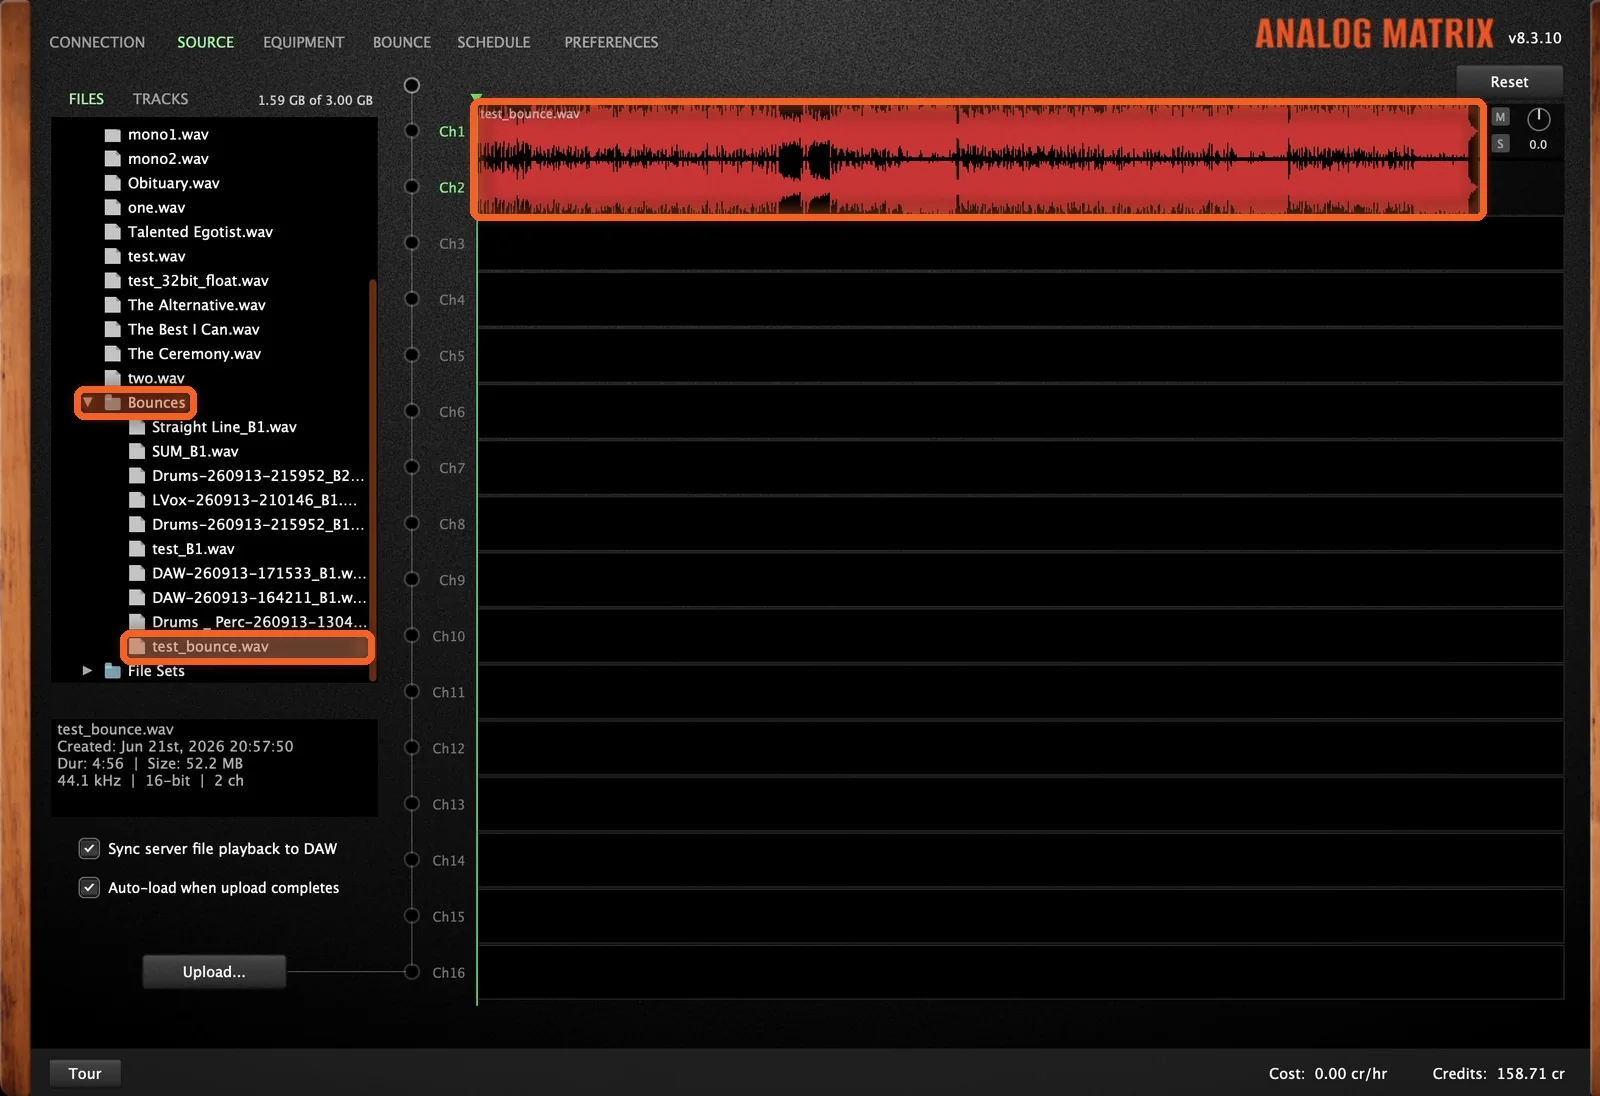
Cloud storage lives on the Source tab, under Files. It's one file tree:
- Your account folder at the top. Everything you store sits inside it.
- Your uploads, listed by name.
- CAP folders, one per multi-track capture from Upload From DAW.
- Bounces, every file you've bounced.
- File Sets, the groups of files you bounce together.
Above the list, a meter shows how much of your storage you're using.
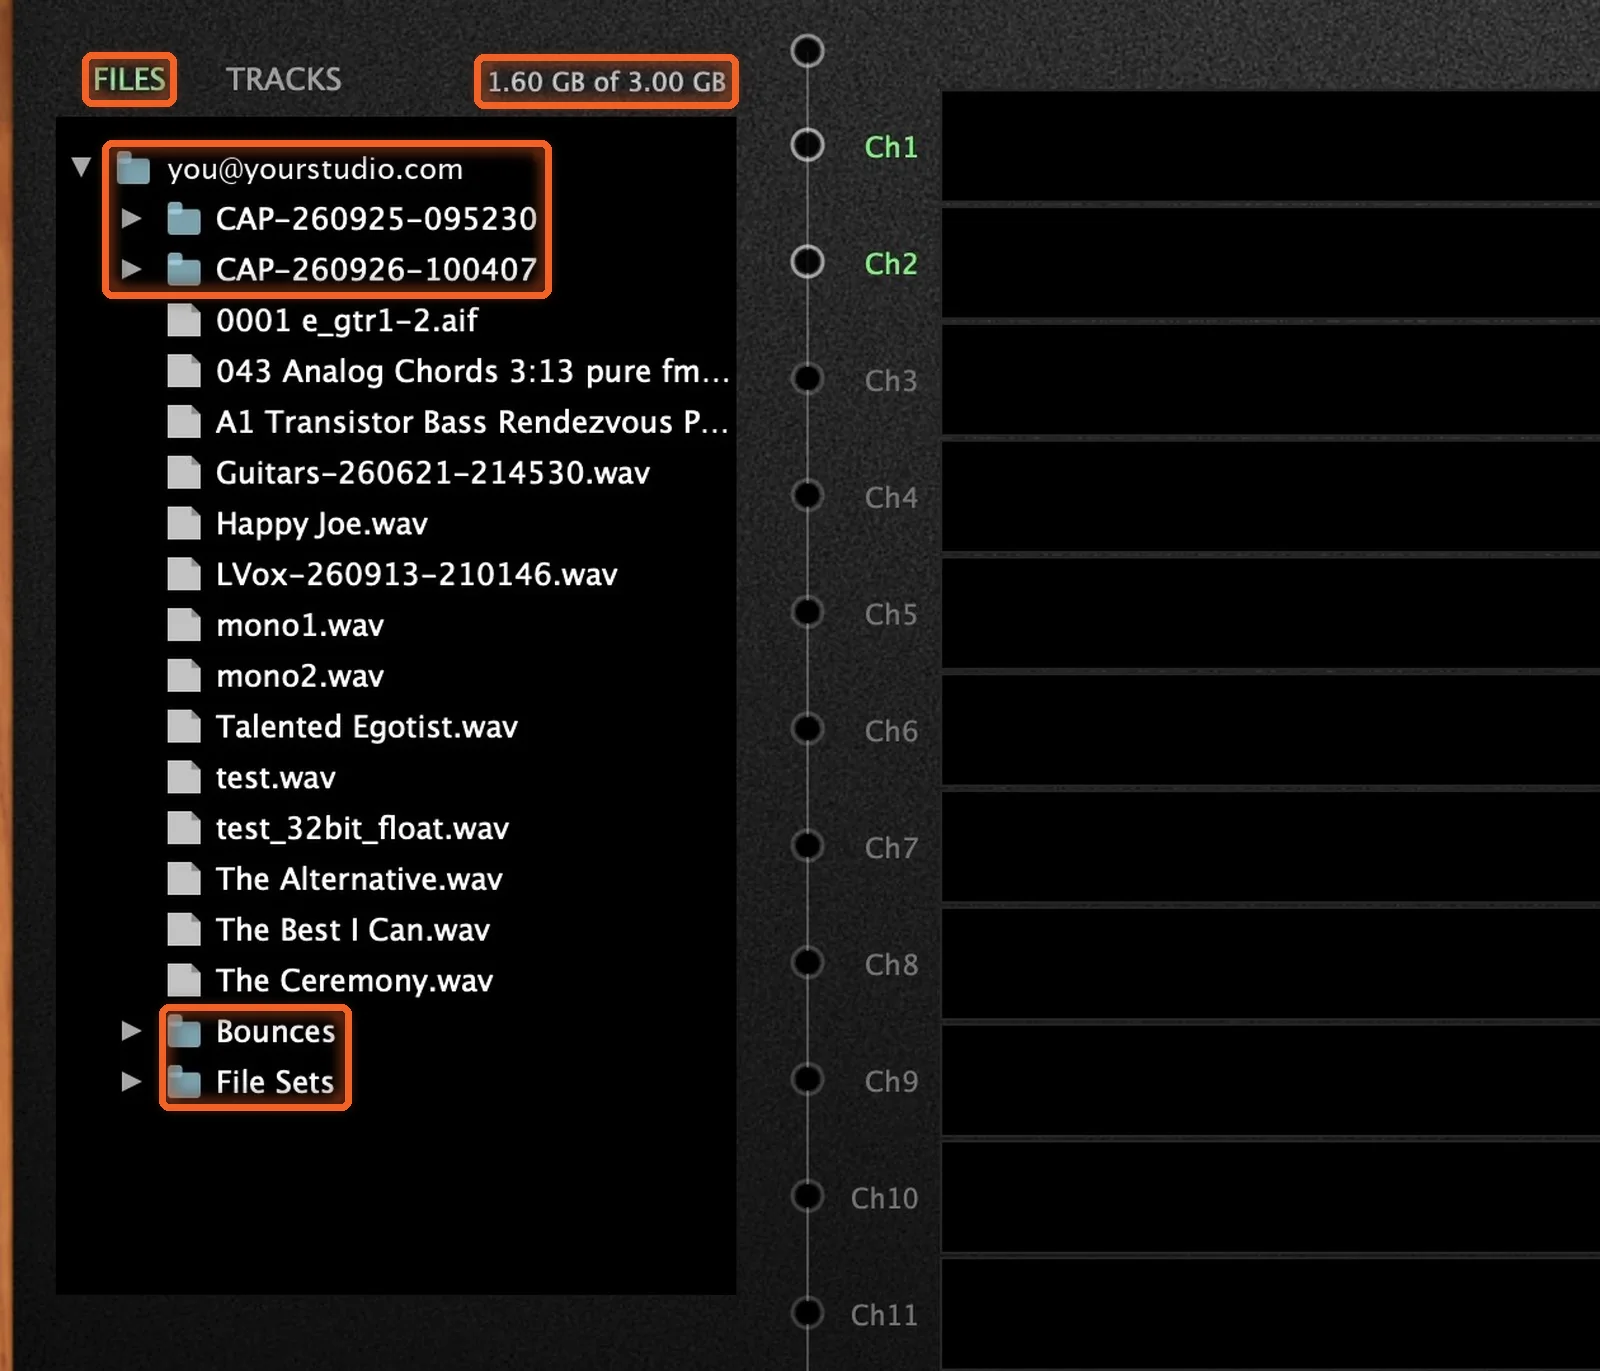
Step-by-Step: Upload, Load and Organize
Step 1: Upload Your Files
Drag files from your computer straight into the Files list. Or right-click your account folder, choose Upload, and pick a file from the browser that opens (the Upload... button under the list does the same). The new file appears in the list, and the storage meter goes up.
Drop in several files at once, and they queue up and upload one after another. If a file with the same name is already there, the plugin asks before it overwrites it.
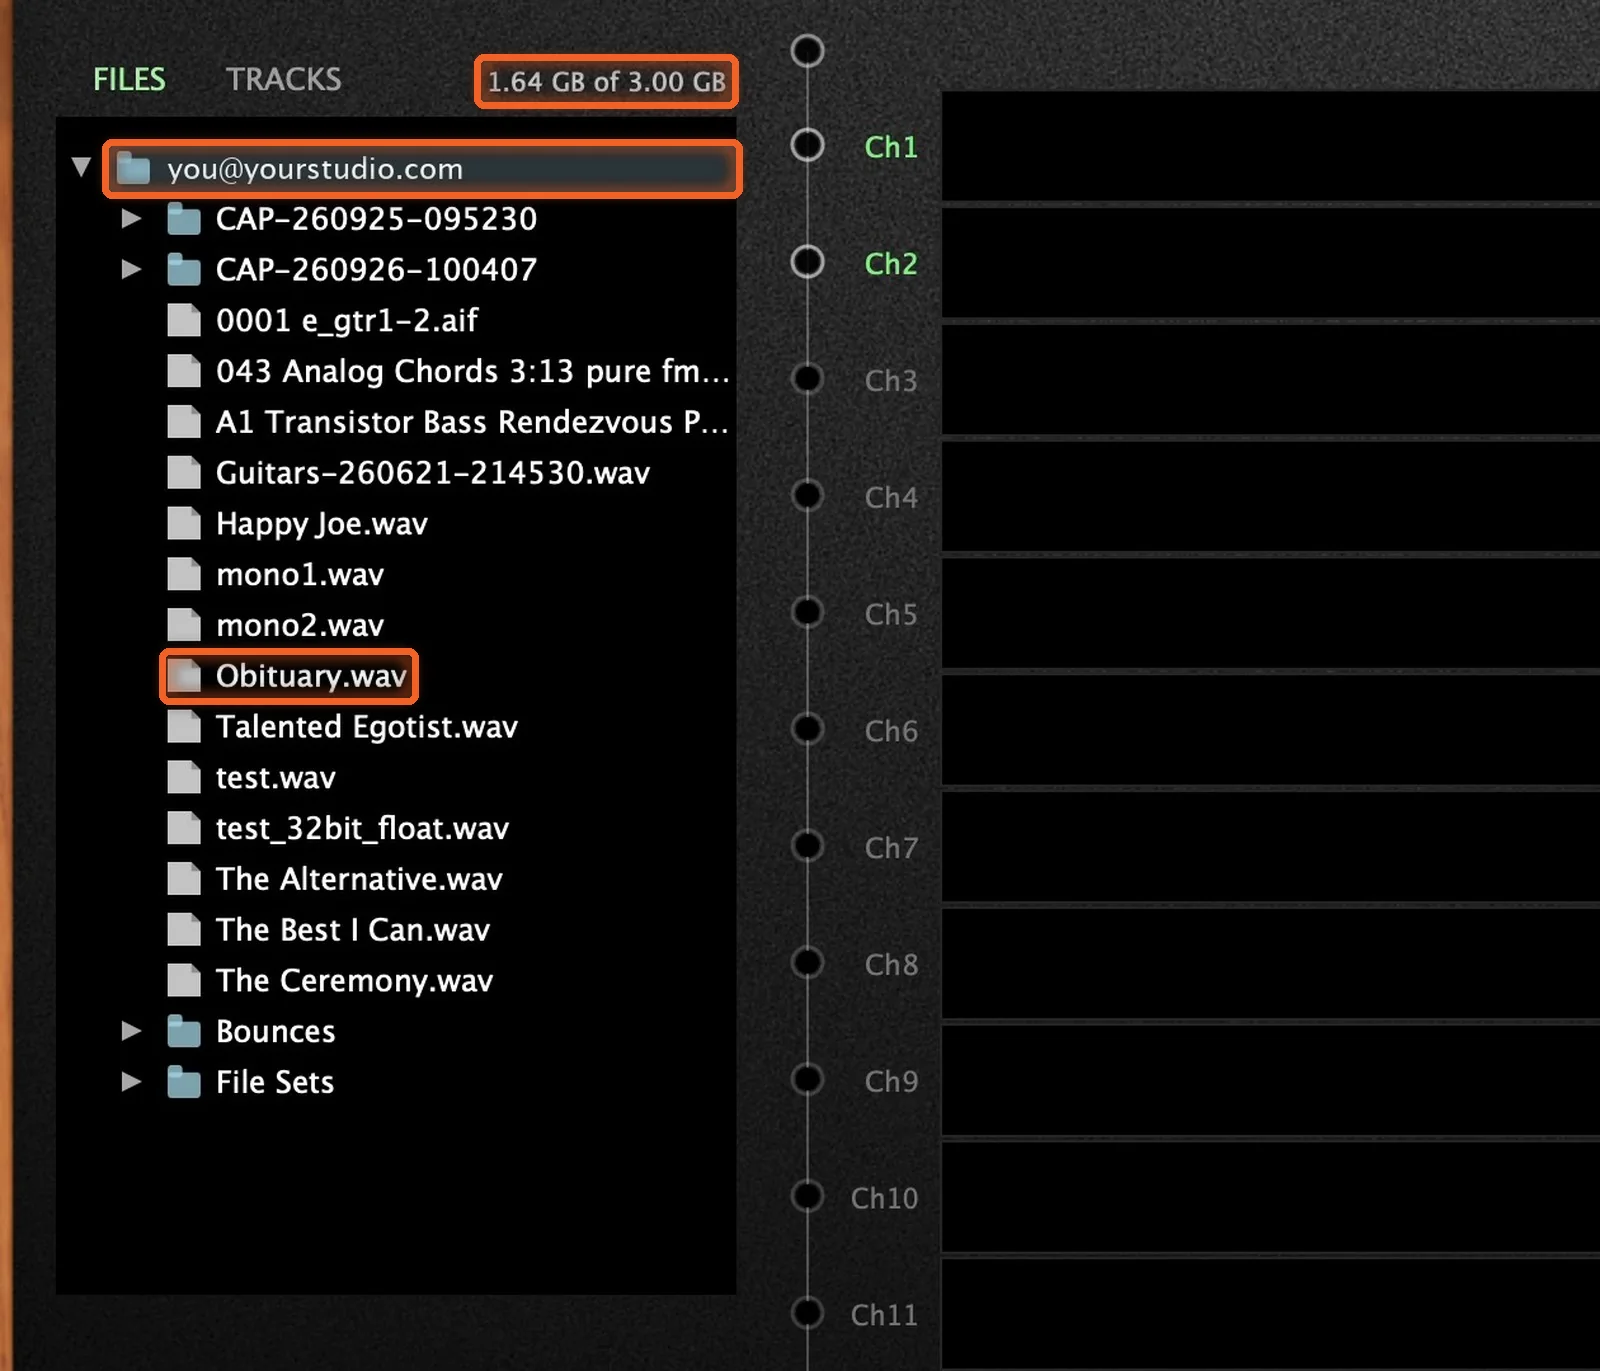
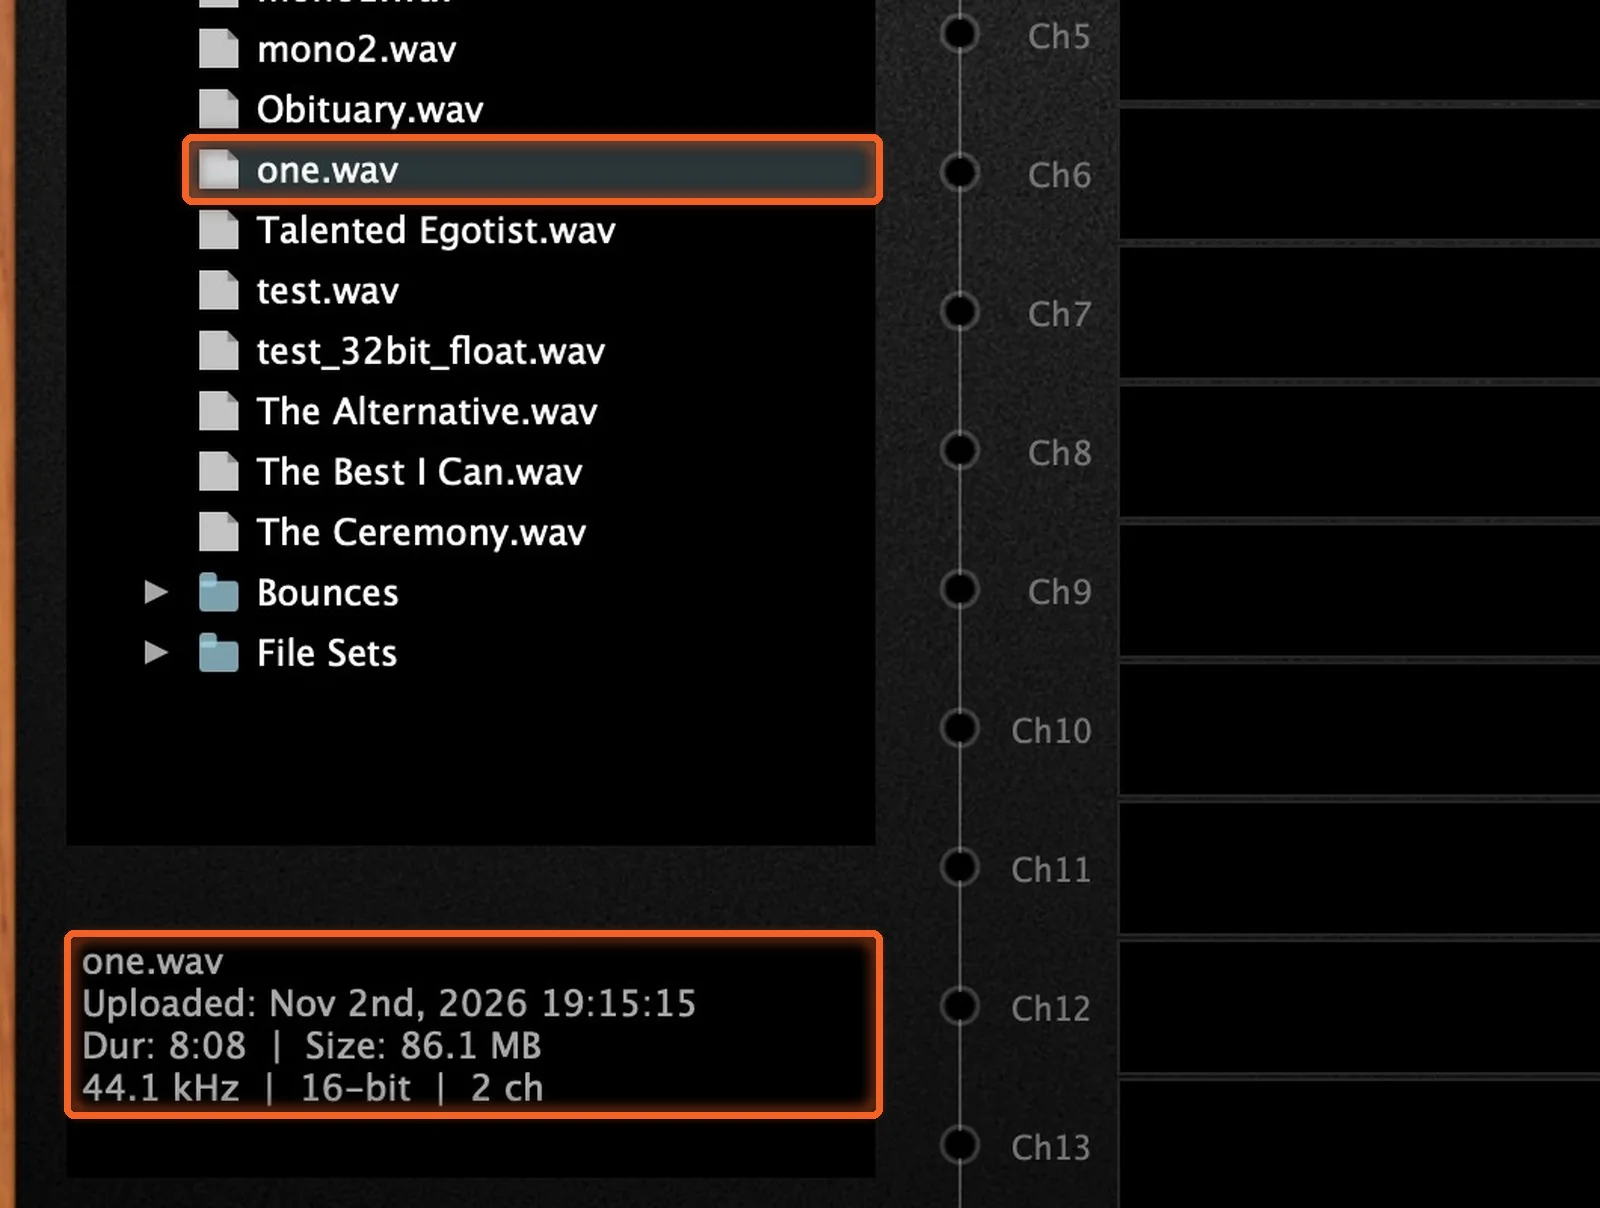
Check a File's Details
Click any file to see its details in the panel under the list: when it was uploaded, how long it is, its size, and its format (sample rate, bit depth and channels).
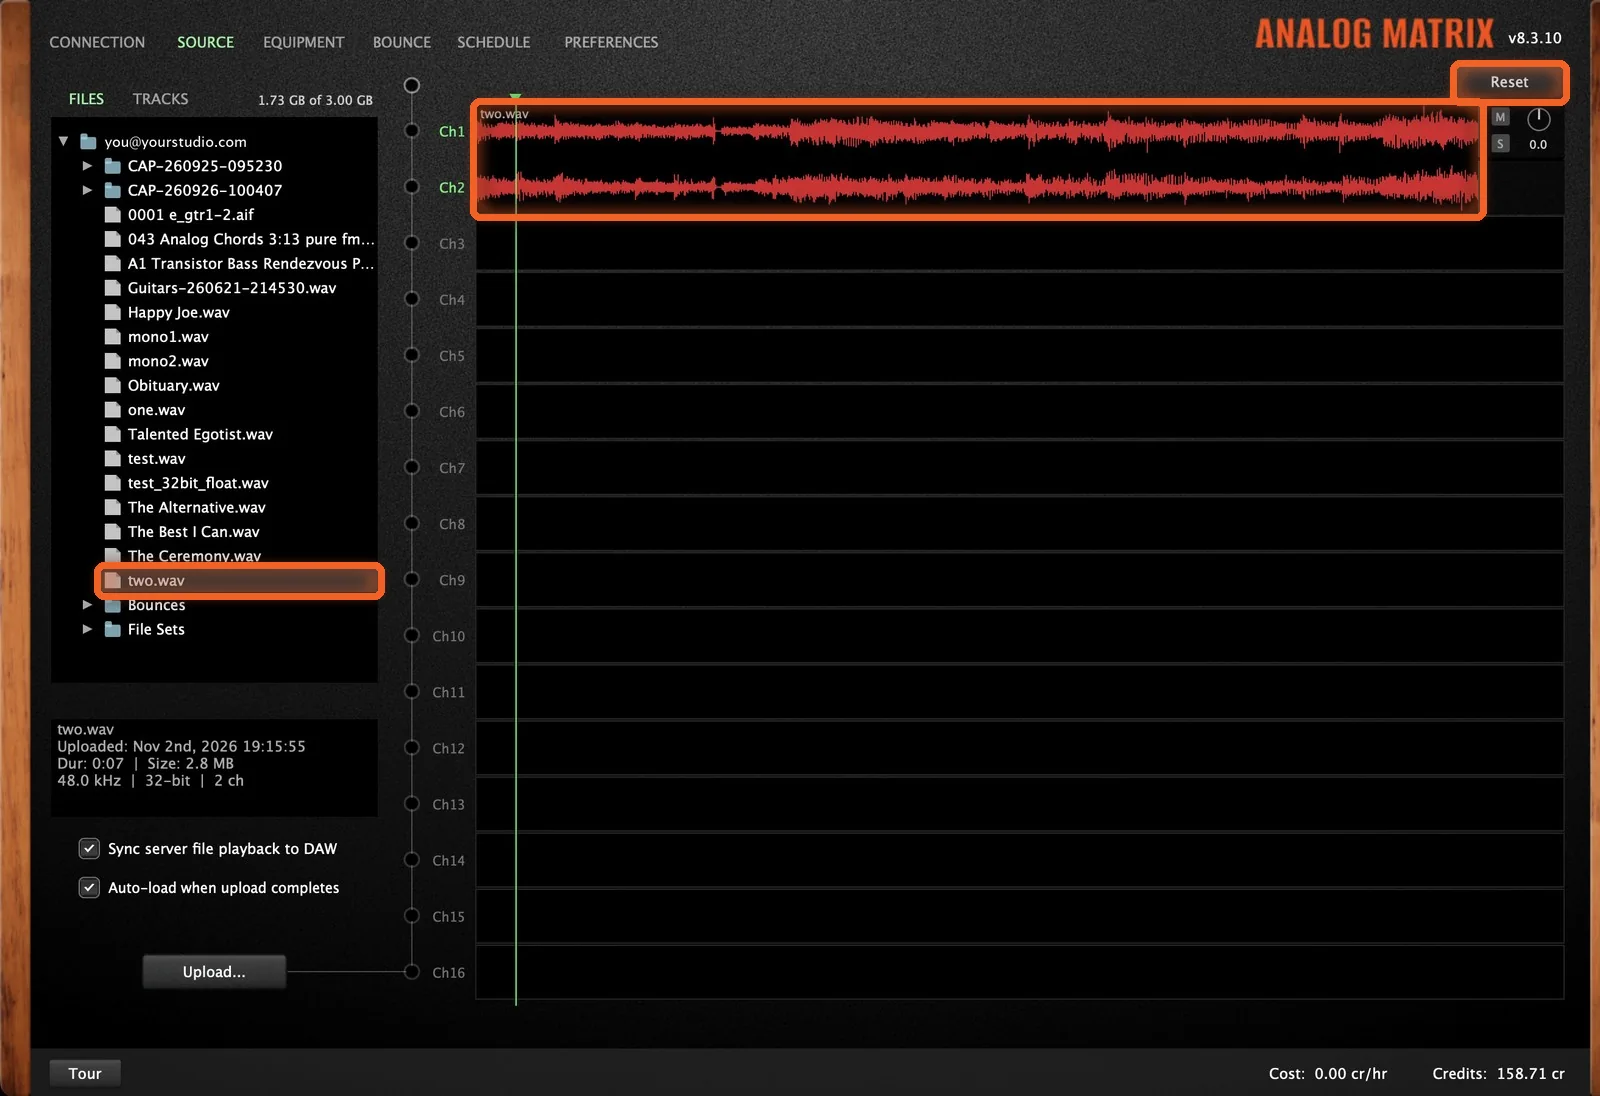
Step 2: Load a File
To use a file, drag it onto a channel. Its waveform fills the channels in place of your DAW input, and it's ready to play or to bounce. Drag another file on to swap it. Reset, at the top right, takes the channels back to your DAW input.
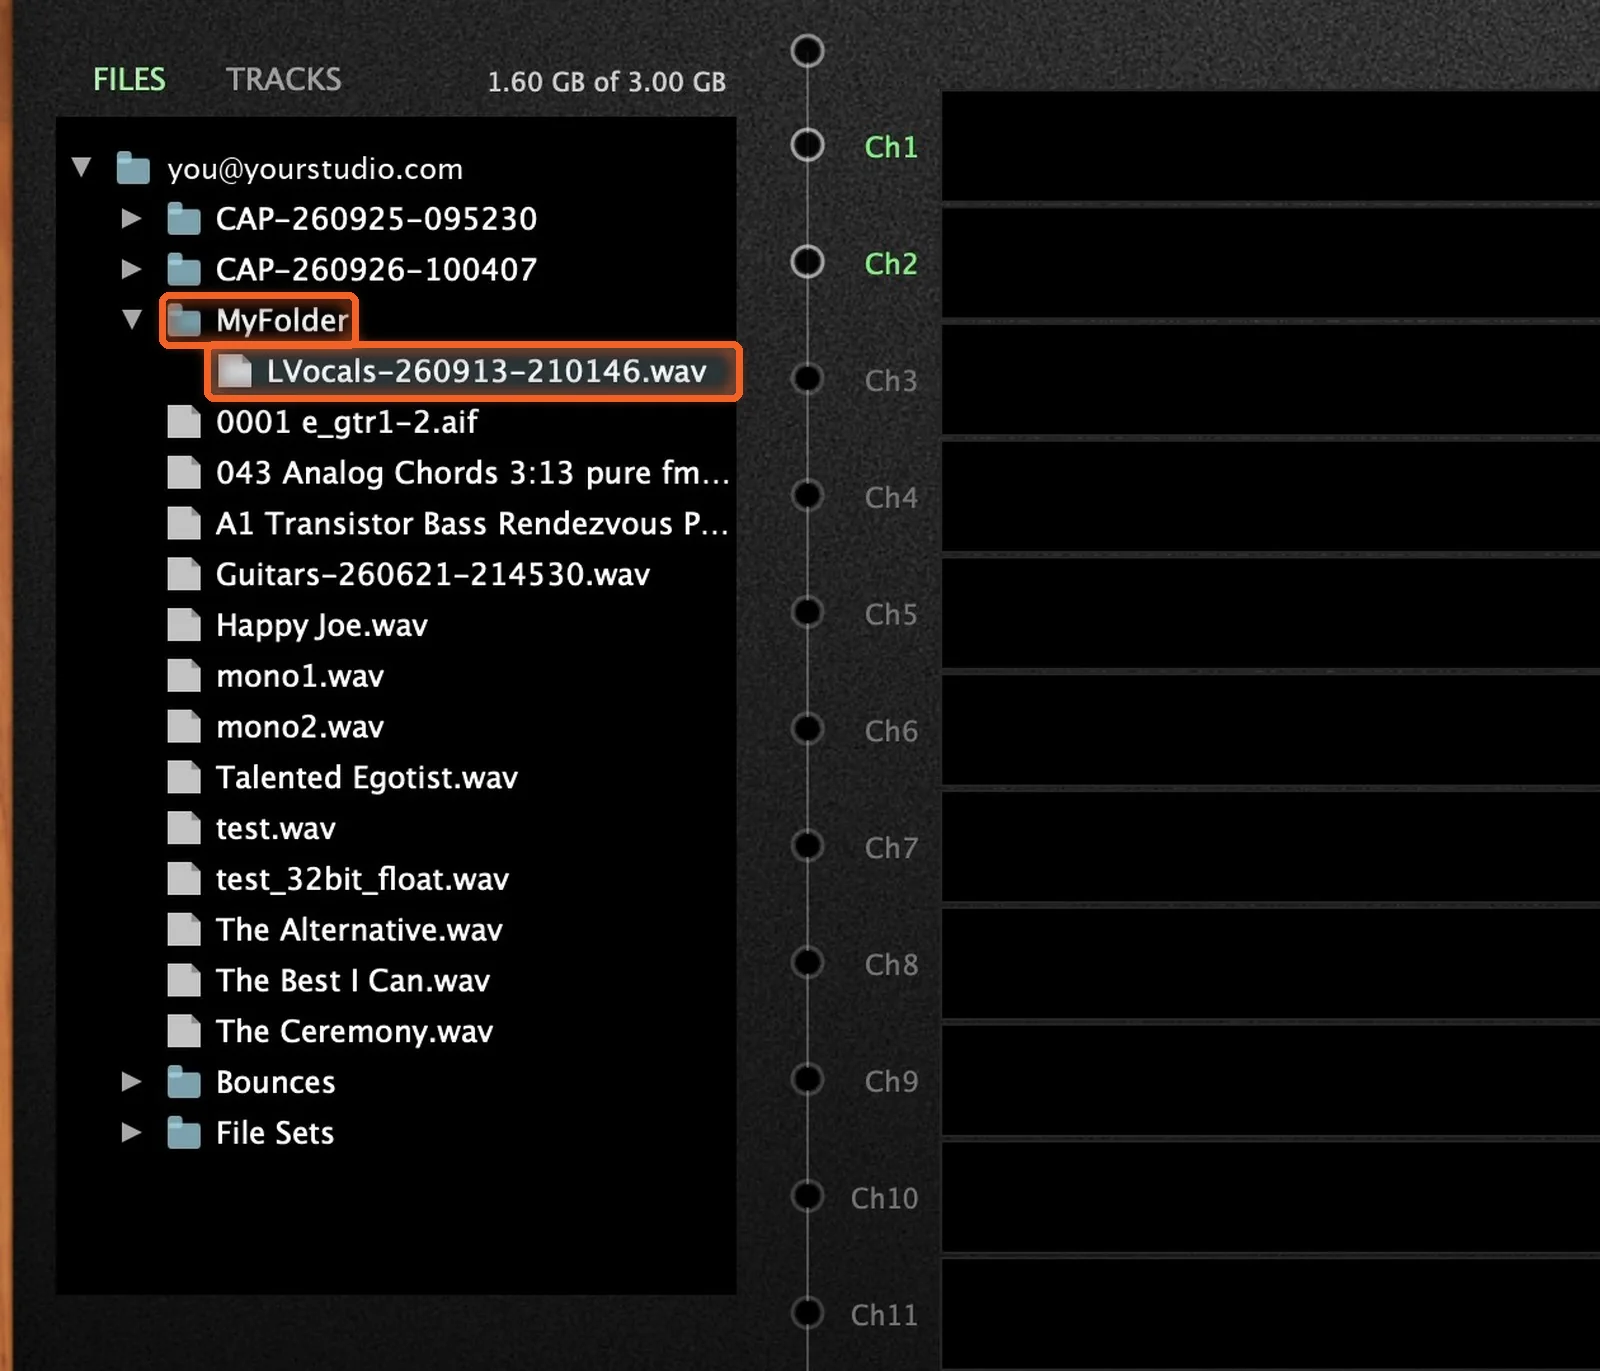
Step 3: Organize With Folders
Right-click to make a New Folder, and give it a name. Drag files in to keep a project together. You can rename any file the same way, with right-click › Rename.
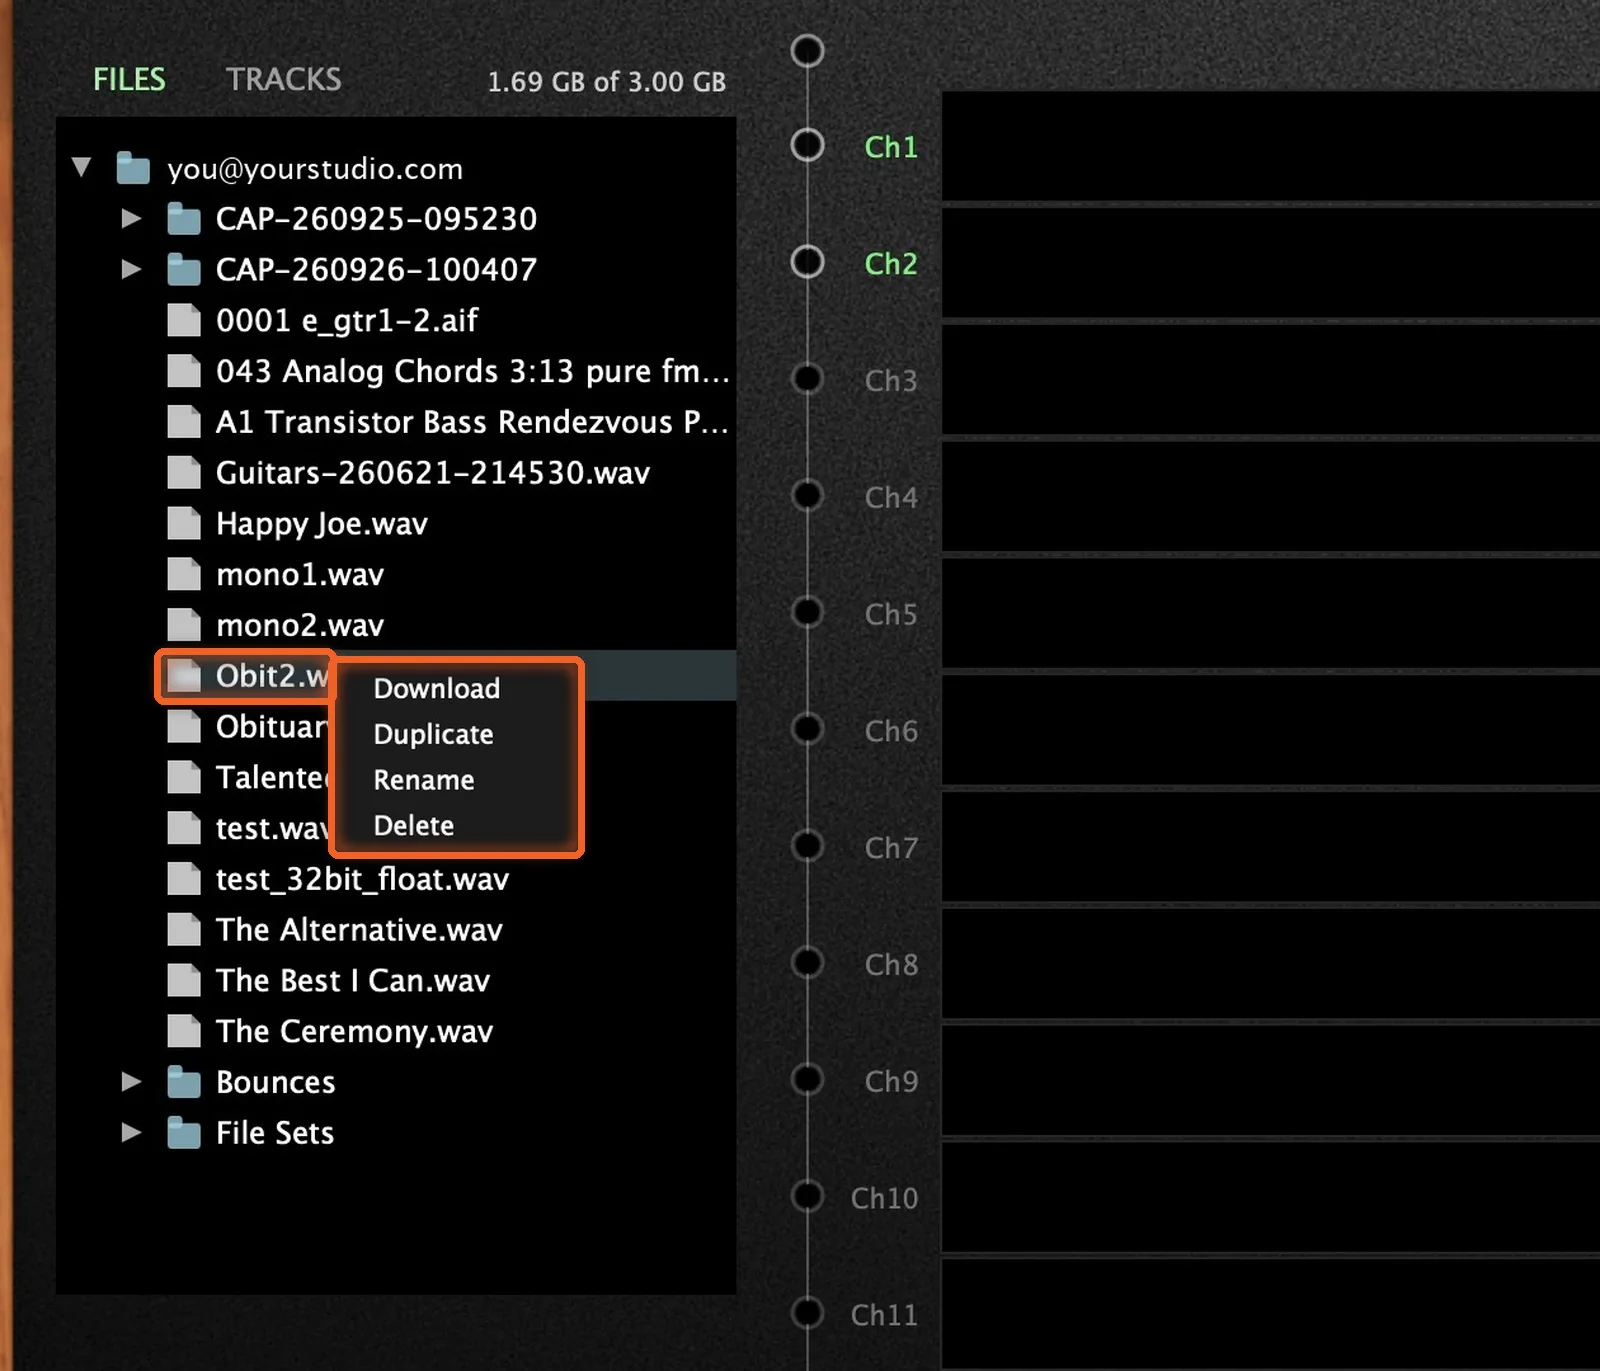
Download, Duplicate, Rename and Delete
Right-click a file for the rest of what you can do with it:
- Download saves a copy to your computer.
- Duplicate makes a copy on the server (for example, Obituary_copy1.wav).
- Rename lets you type a new name in place.
- Delete removes the file and frees up its space right away.
Delete a folder, and everything in it goes too, so the plugin asks you first.
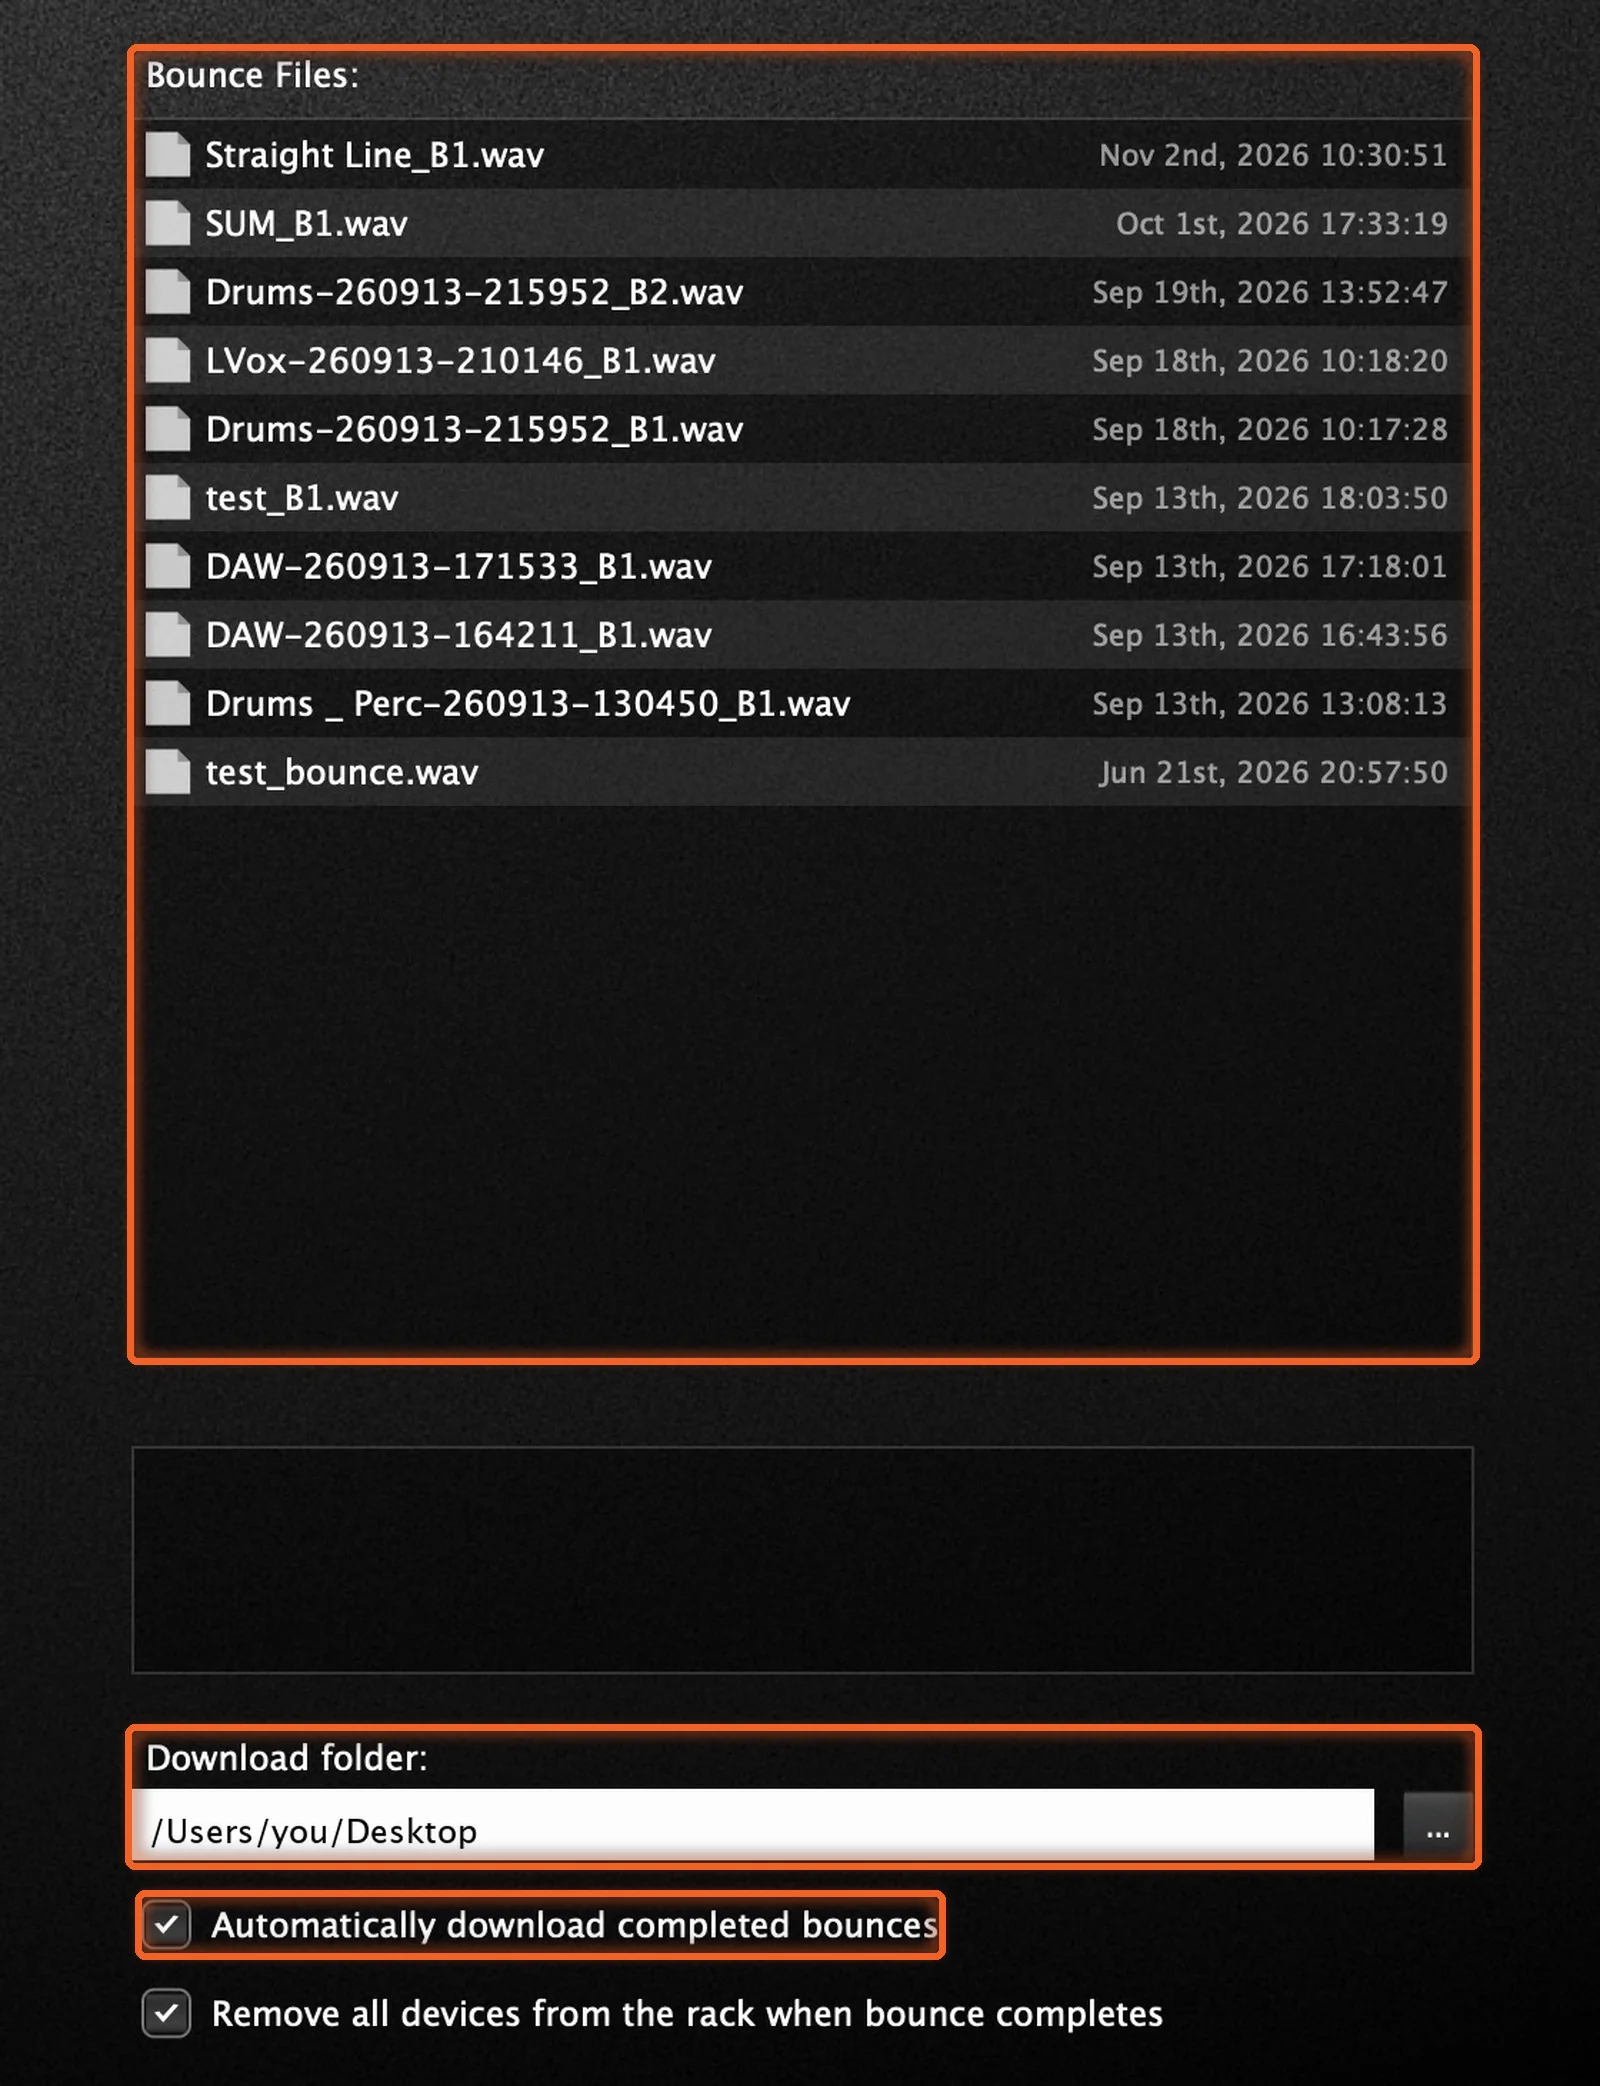
Where Downloads Go
Downloads go to the folder set on the Bounce tab, in the Download folder field under the list of bounce files. Click the ... button beside it to choose a different folder. Tick Automatically download completed bounces below it, and each bounce downloads to that folder as it's made.
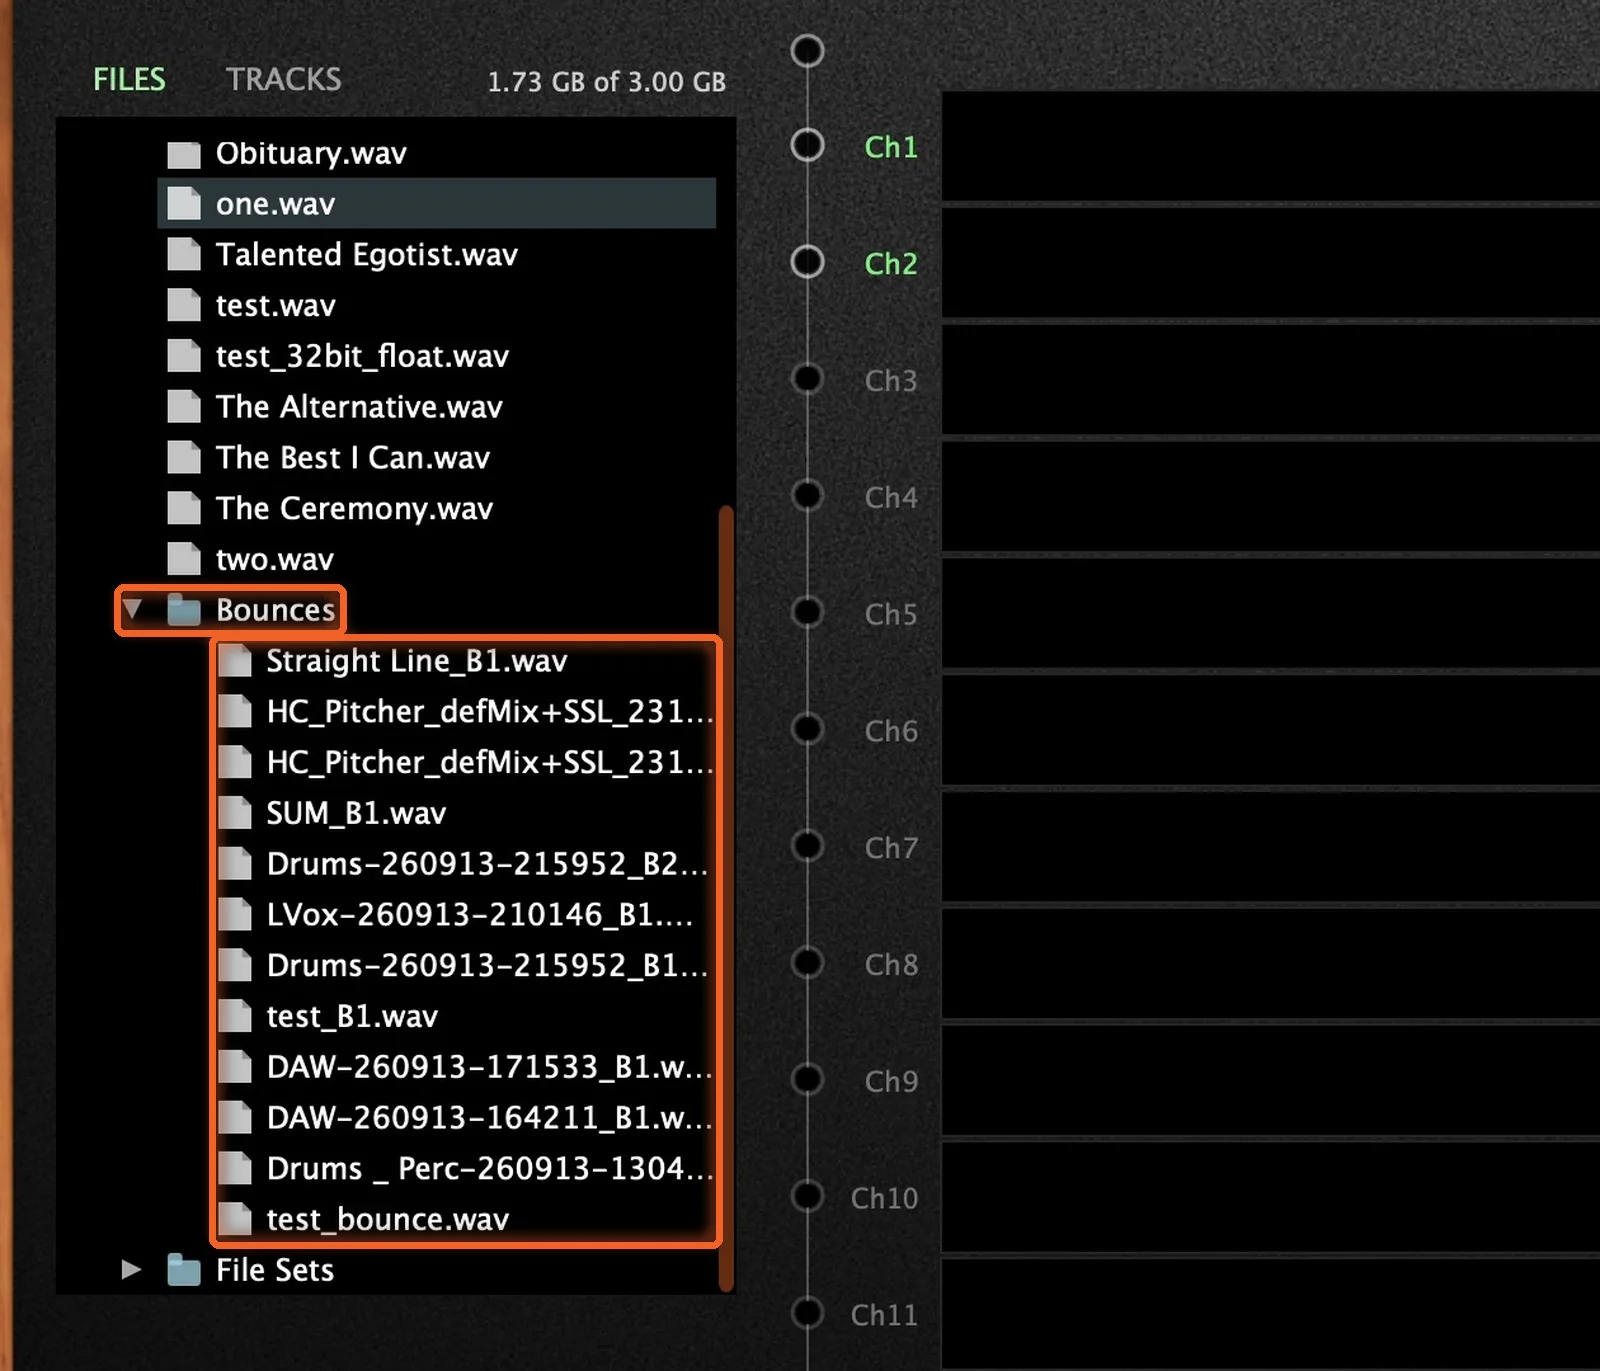
Your Bounces Live Here Too
Every bounce is stored in your cloud storage, in the Bounces folder of the Files list. Every bounce you see under Bounce Files on the Bounce tab is here too, ready to load, download or delete. Clear out the ones you're done with the same way: right-click › Delete.
Bounce a Bounce Again
Want to run a bounce through more gear? Drag it from the Bounces folder onto the channels like any other file, change your chain, and bounce it again.
Your Files Stay Put
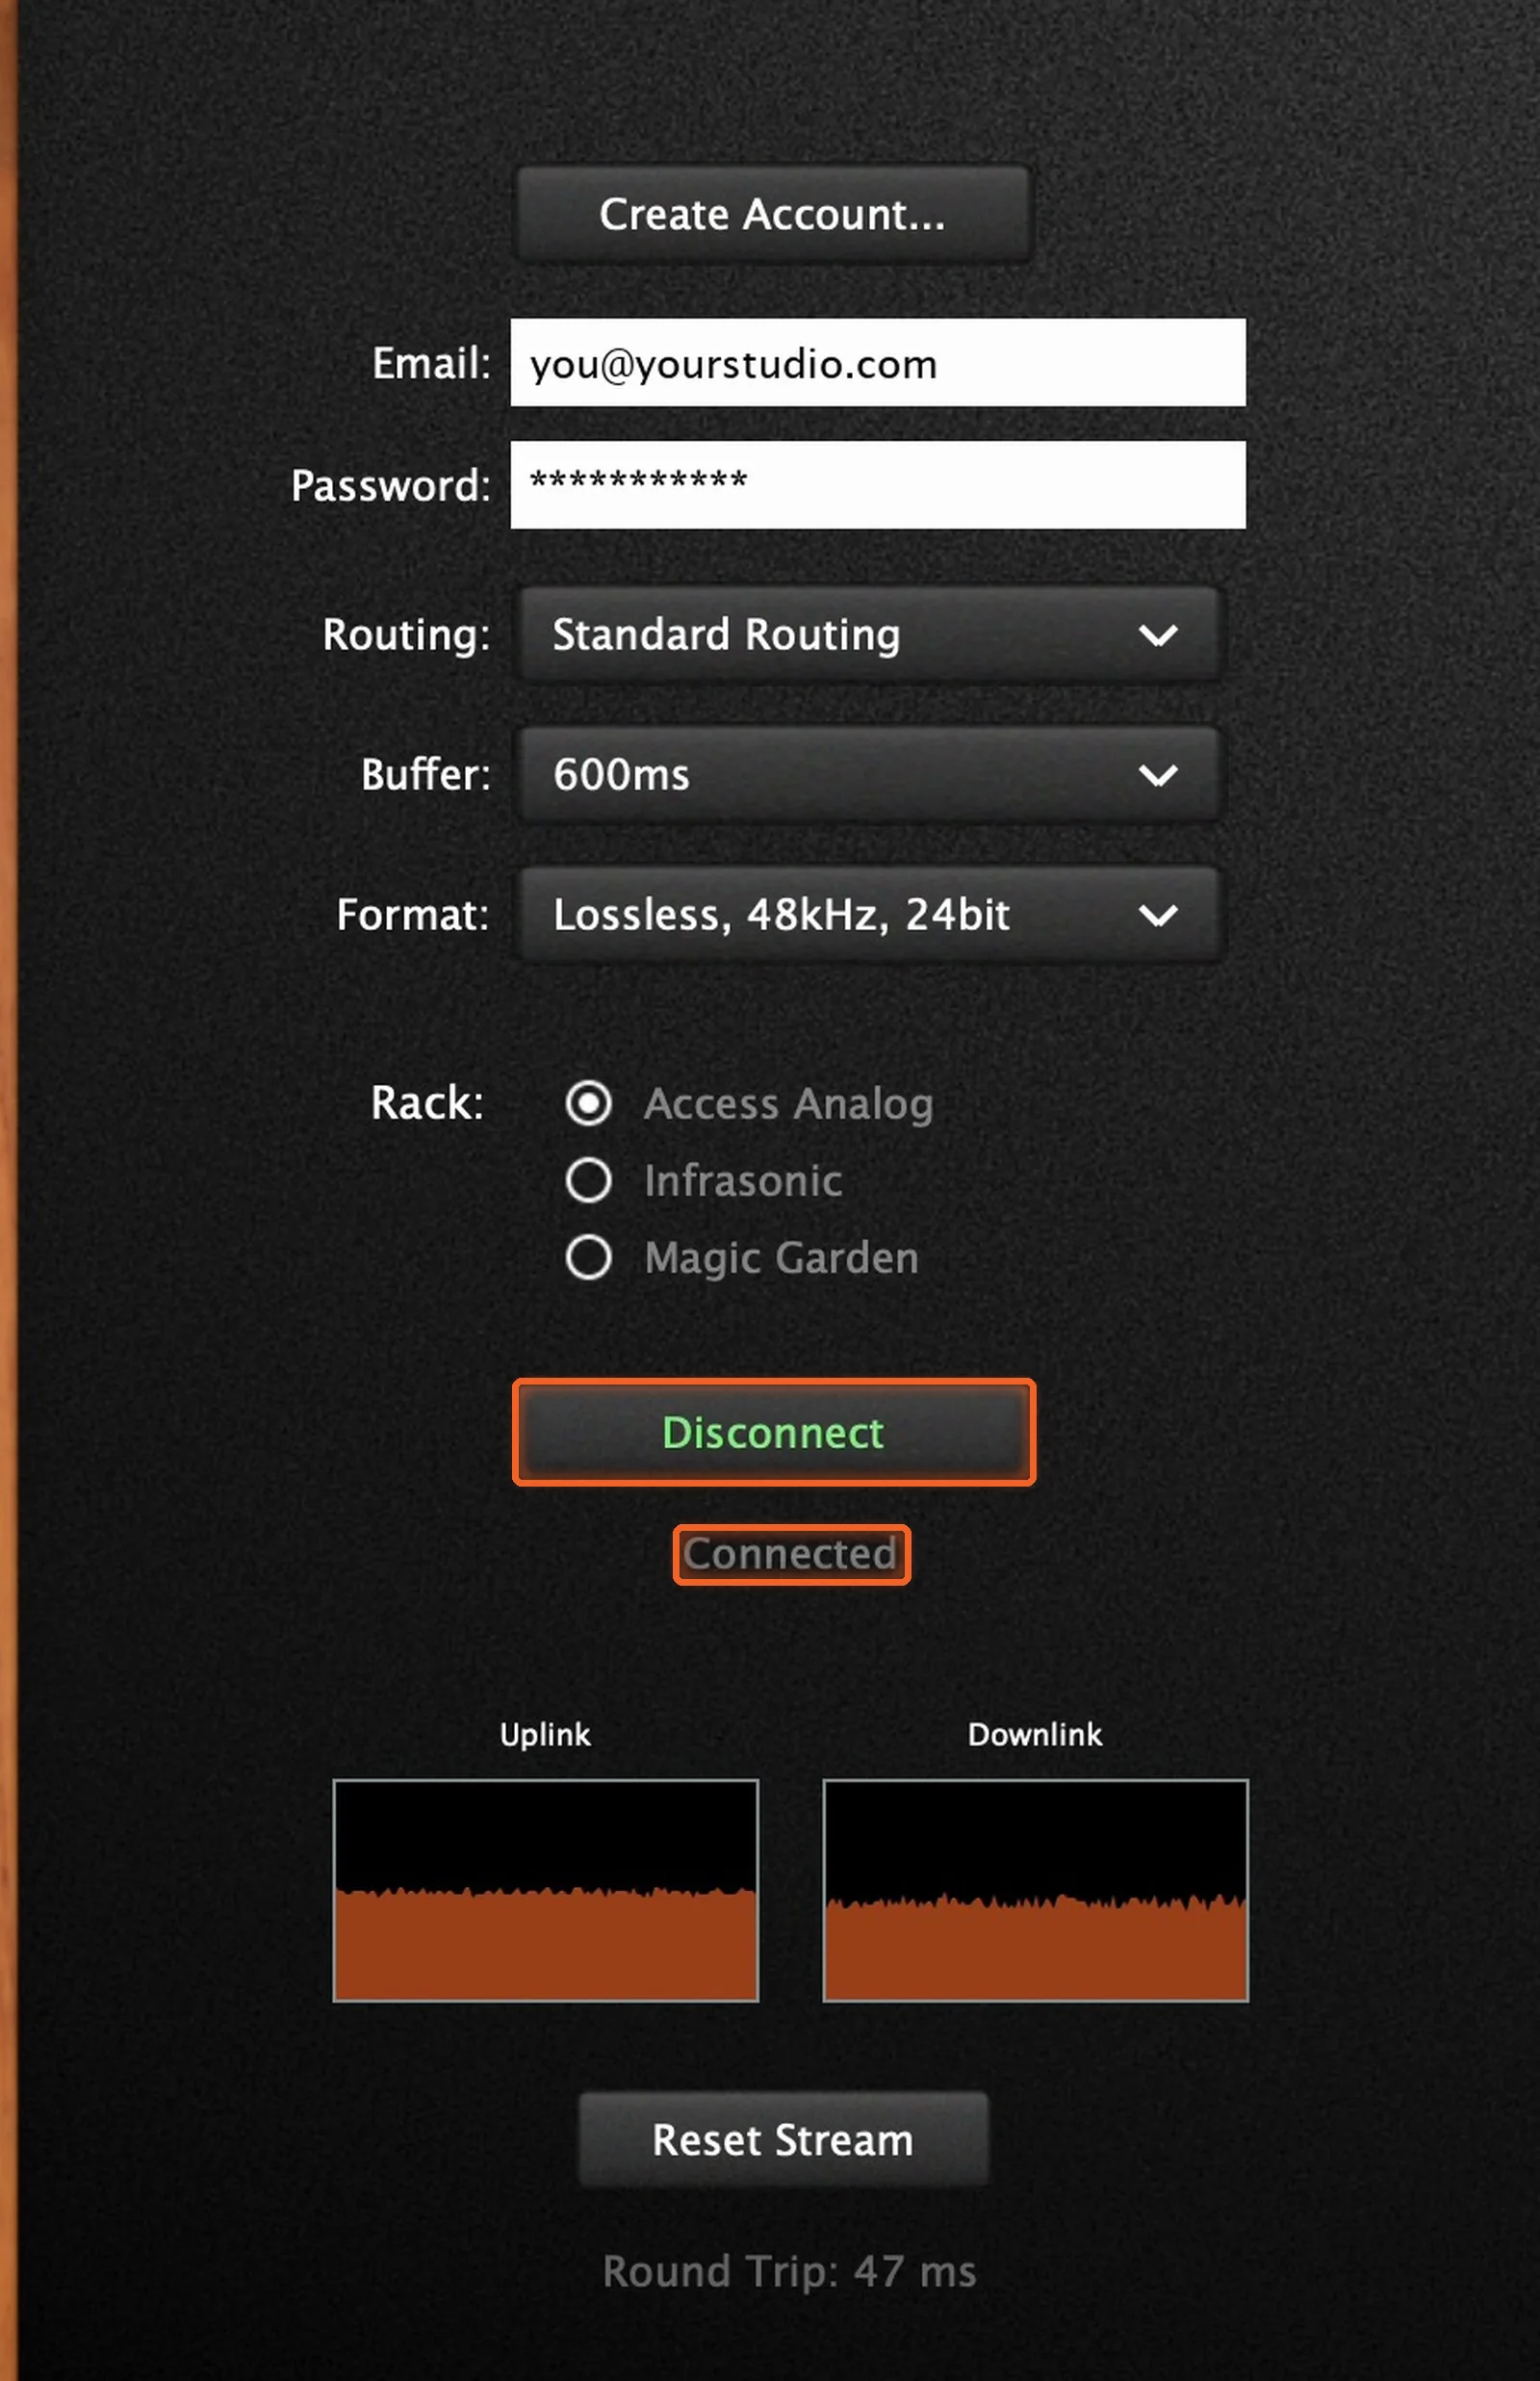
Your files stay on the server when you disconnect. Connect again on the Connection tab, go back to Source, and they're right where you left them, folders and all.
How Much Space You Have
How much space you get depends on your plan (see the Access Analog Subscription), and the meter on the Source tab shows how much you're using. If you go over your limit, uploads pause, and your oldest files are removed until you're back under. So keep an eye on the meter, and clear out what you don't need.
How Do I Get Started?
Download the Analog Matrix. One free download from our downloads page installs the plugins (VST, VST3, AU and AAX) and the standalone app, for Mac and Windows. It is not an emulation: every knob you move turns a real control on real hardware in our racks.
Practice the workflow for free. A new account starts with 12 free credits, roughly an hour on an average device. The Iron Age LH95 EQ and the AudioScape Buss Compressor never use credits, so they're a good place to try an upload and an offline bounce before you print through anything else.
Pick how you pay for gear time. Buy credits on demand, reserve a unit for a set time, or move to the Access Analog Subscription (Essential, Pro or Elite) for the best rate.
Upload, Load, Organize
Upload your files, load them, keep them organized. Your sessions wait on our servers, ready for real analog gear in our racks whenever you are.
Upload once, then play, bounce and reuse your files on real Neve, SSL, API and more.
FAQs
What is cloud storage in Analog Matrix?
It's your own storage area on our servers. It holds your uploads, your Upload From DAW captures and your bounces, and you manage it from the Files list on the plugin's Source tab.
Do I have to upload my files again each session?
No. Once a file is uploaded, it stays on the server, including when you disconnect. Load it again any time.
Can I upload several files at once?
Yes. Drop several files into the Files list, and they queue up and upload one after another.
What happens if I upload a file with the same name?
The plugin asks whether to overwrite the file that's already there.
Where are my bounces stored?
In the Bounces folder of the Files list. Every bounce listed under Bounce Files on the Bounce tab is there too.
How do I download a file?
Right-click it and choose Download. It goes to the download folder set on the Bounce tab.
Can I run a bounce through more gear?
Yes. Drag the bounce from the Bounces folder onto the channels like any other file, and bounce it again.
How much storage do I get?
It depends on your plan, and the meter on the Source tab shows how much you're using. If you go over, uploads pause and your oldest files are removed until you're back under.
Why upload instead of streaming from my DAW?
Files on the server play from our end, so nothing streams up from your computer, and an offline bounce from an uploaded file is immune to connection dropouts.
Hear what real analog gear does to your own mix, before you buy a single piece of it.
Run real outboard hardware from your DAW. New accounts get 12 free credits.
Connect todayMore in Getting Started
All posts →