How to Use Hardware Presets in Analog Matrix: Save, Recall and Compare Your Sound
You found the sound on real analog gear. Now get it back next session in one click.
Every knob and switch on our gear is set by robotics, which means every setting can be saved and recalled exactly. Hardware presets are how you do that in the Analog Matrix plugin: save the settings for one device, save a whole chain, and compare two chains while your track plays.
In this guide, Dr. Dan walks through all of it: starting from a factory preset, saving and removing your own, building and recalling a chain preset, and comparing Chain A against Chain B.
Key Takeaways
- Two kinds of preset. An equipment preset saves one device. A chain preset saves the whole chain, in order, with every control.
- Start from a factory preset. The presets at the top of each device's menu were made by industry professionals, and the robotics set every knob for you.
- Save your own with +. Click + beside Equipment Presets and name it. It sits under the factory presets. Remove it with −; the factory presets always stay.
- Save a chain from Chain Presets › User › Add / Remove. Click Save beside the Preset field to update it later.
- Recall brings everything back, even on an empty rack: every device, every setting, bypass, gains, mix, linking and mid/side.
- Chain A and Chain B let you compare two chains, or the same chain with small changes, while your track plays.
Two Kinds of Preset
Analog Matrix has two kinds of preset, and they work the same way in the plugin and in the standalone app:
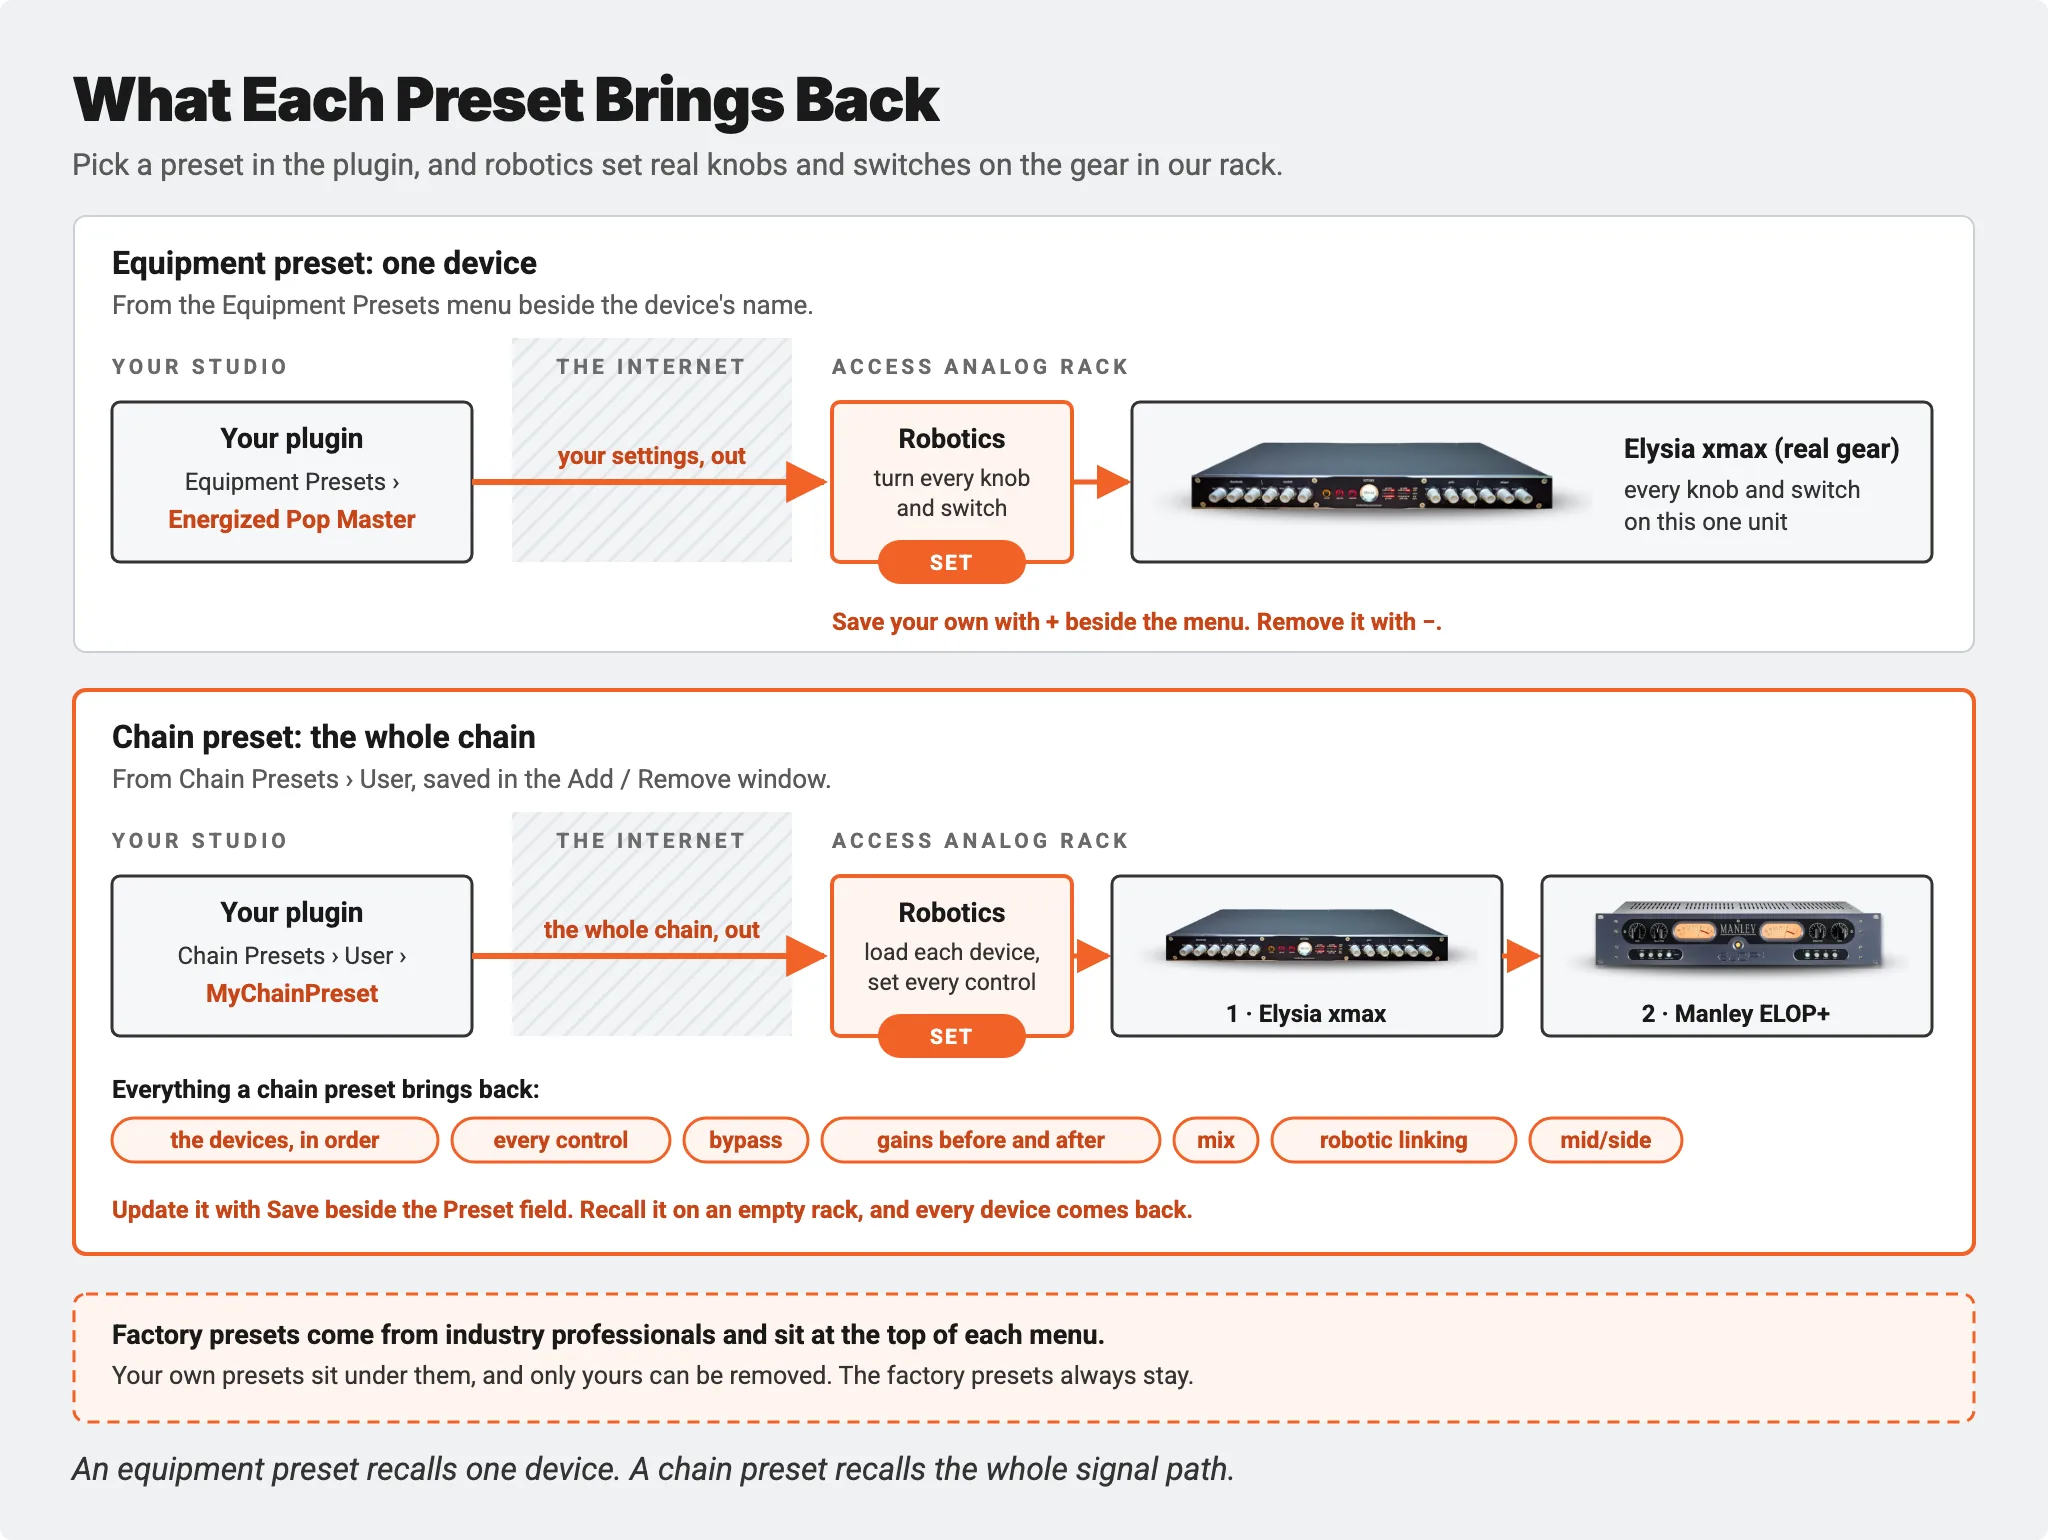
- Equipment presets save the settings for one device: every knob and switch on that unit.
- Chain presets save your whole chain: every device in order, with every control, plus bypass, the gains before and after each device, the mix level, robotic linking and mid/side.
Use an equipment preset when you have one unit dialed in. Use a chain preset when the whole signal path is the sound you want back.
Equipment Presets, Step by Step
Dan starts on the Equipment tab with one device, an Elysia xmax.
Load a Device
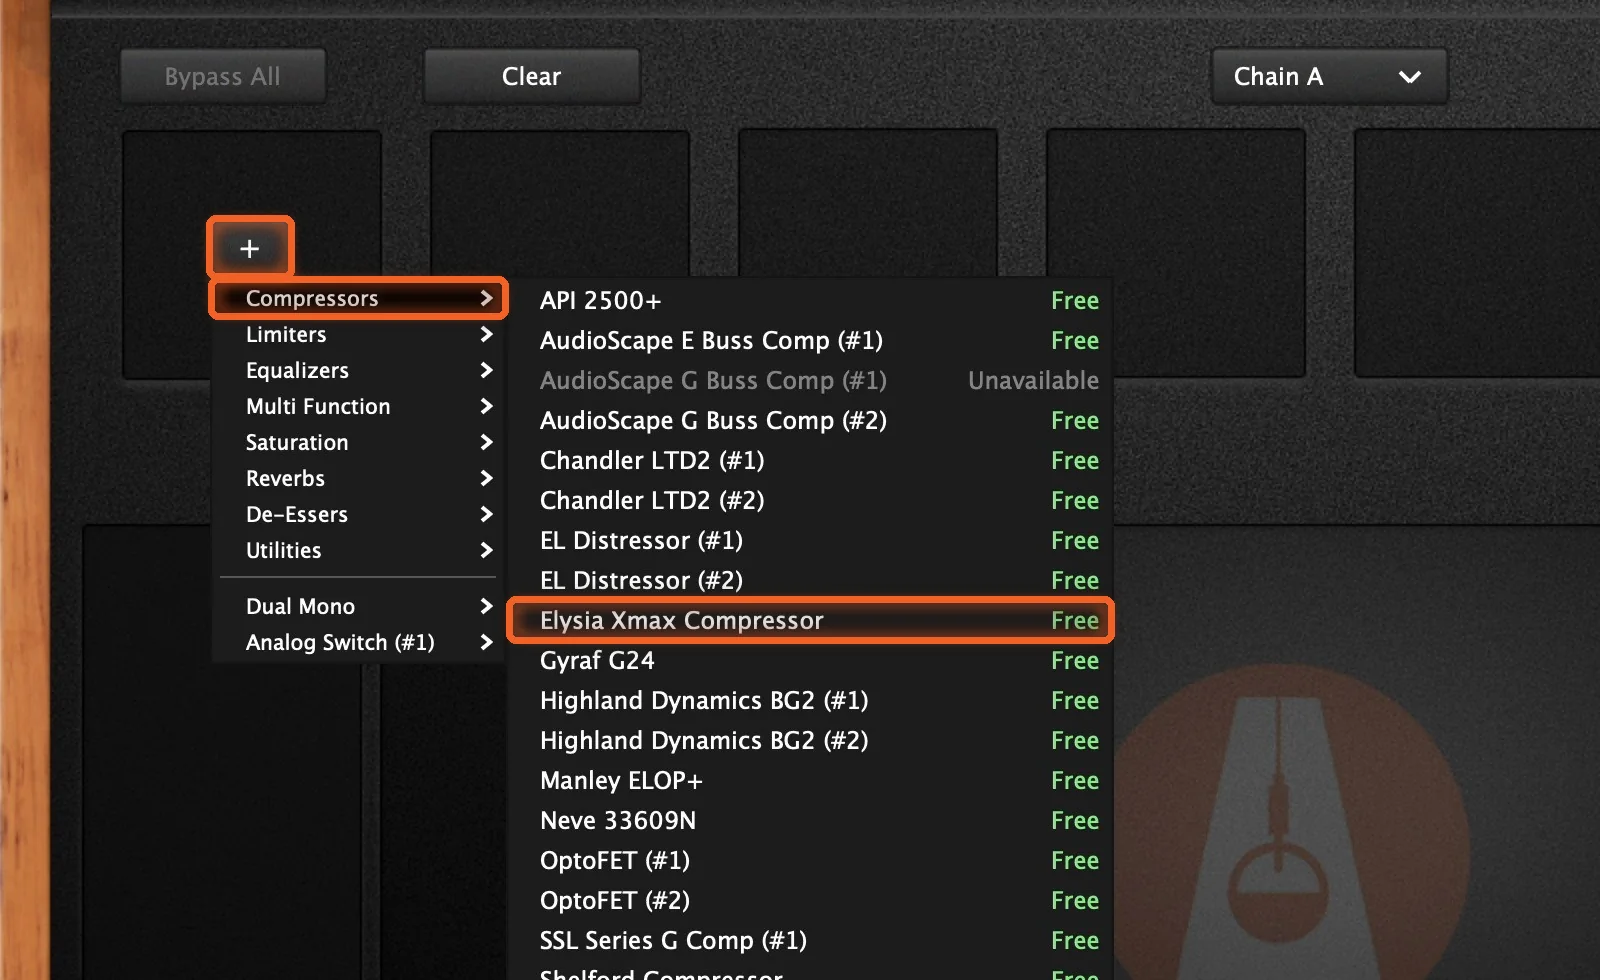
Click + in an empty slot of the chain and pick a device from the menu, such as Compressors › Elysia Xmax Compressor. When you add a piece of gear, every control starts at a safe default.
Step 1: Start From a Factory Preset
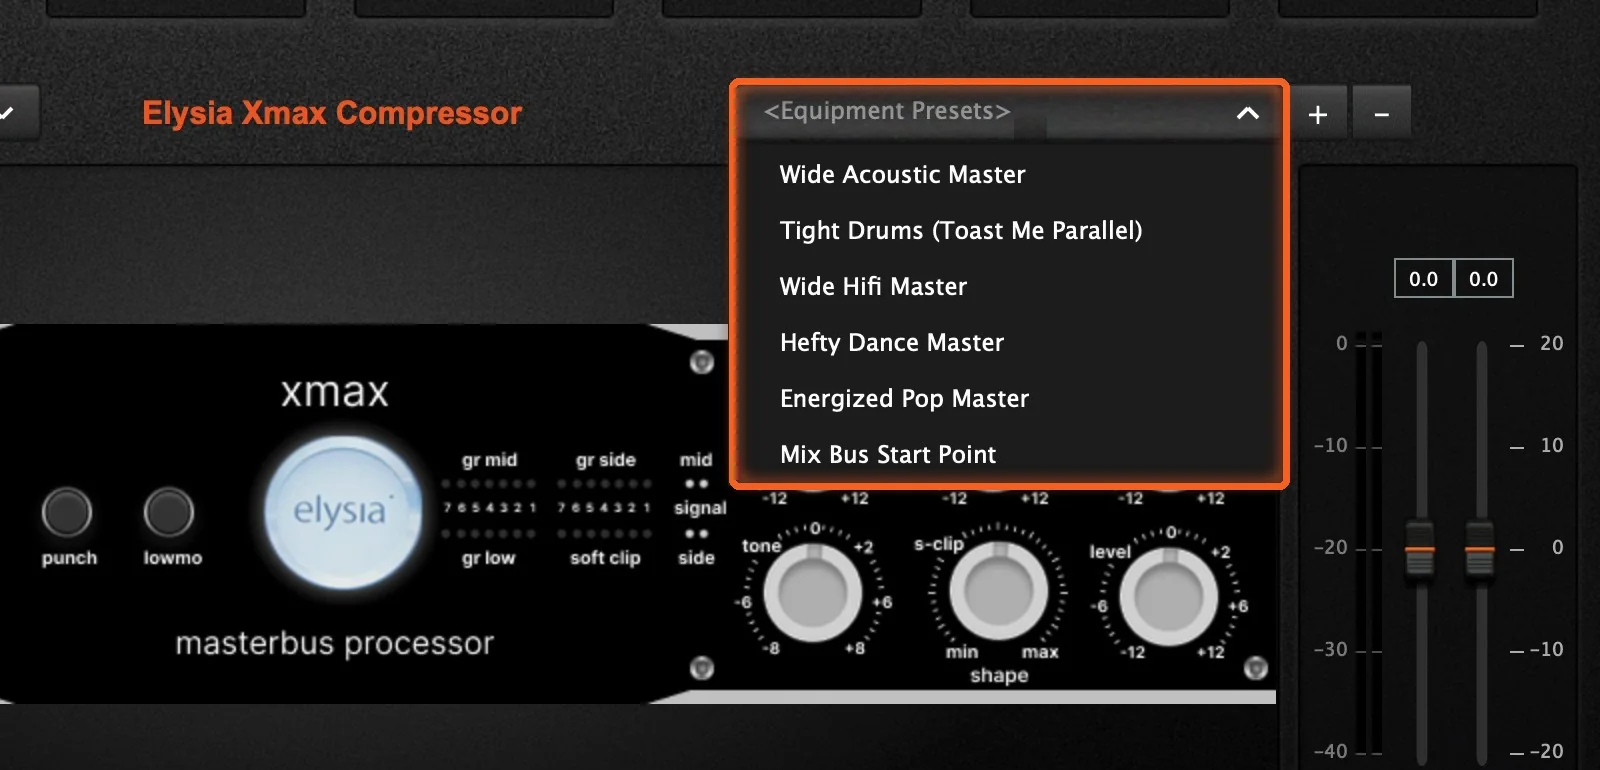
We recommend starting with a factory preset. Open the Equipment Presets menu to the right of the device's name. The presets at the top were created by industry professionals to show what the unit can do: the xmax has six, from Wide Acoustic Master to Mix Bus Start Point.
Pick one, and the robotics set every knob for you.
Tweak It
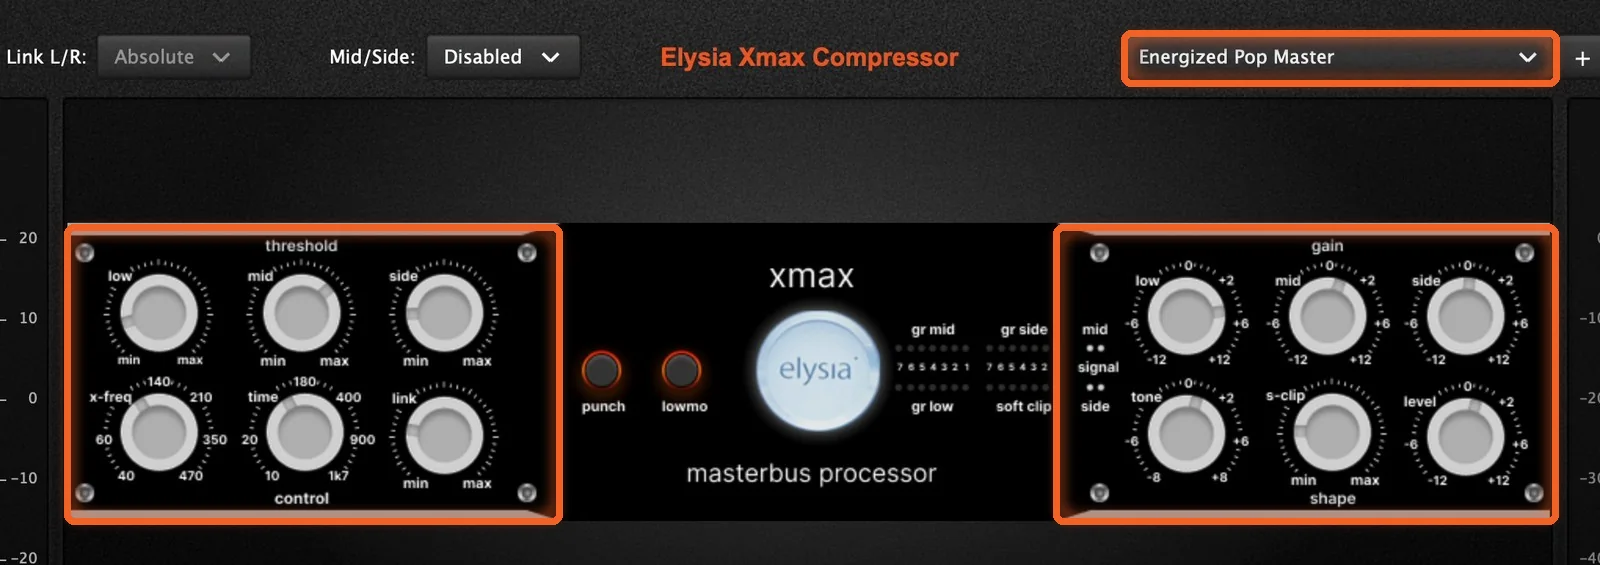
Then make it your own. Adjust a few controls until it sounds right on your mix.
Step 2: Save Your Own Preset
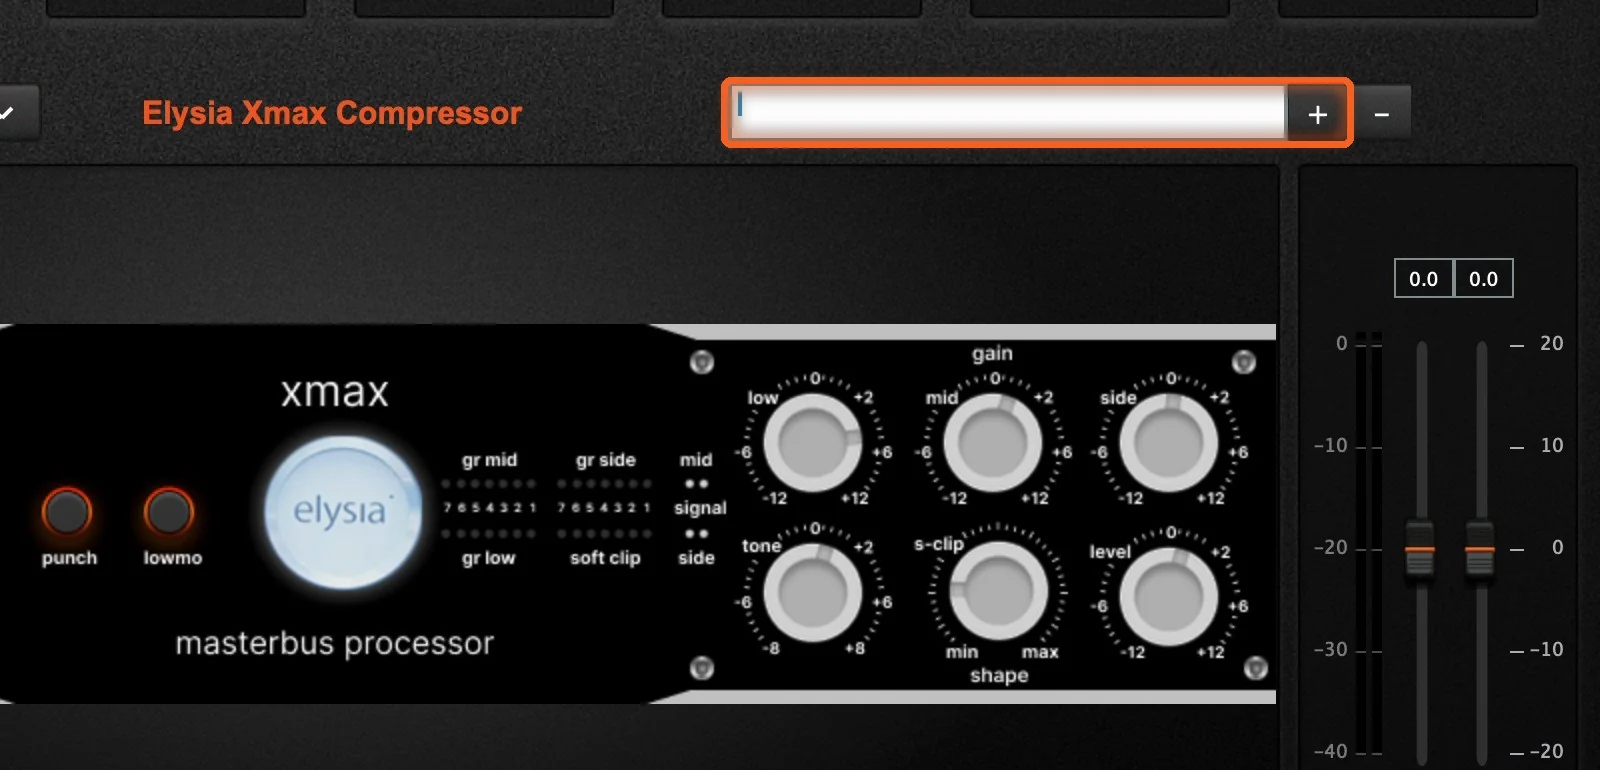
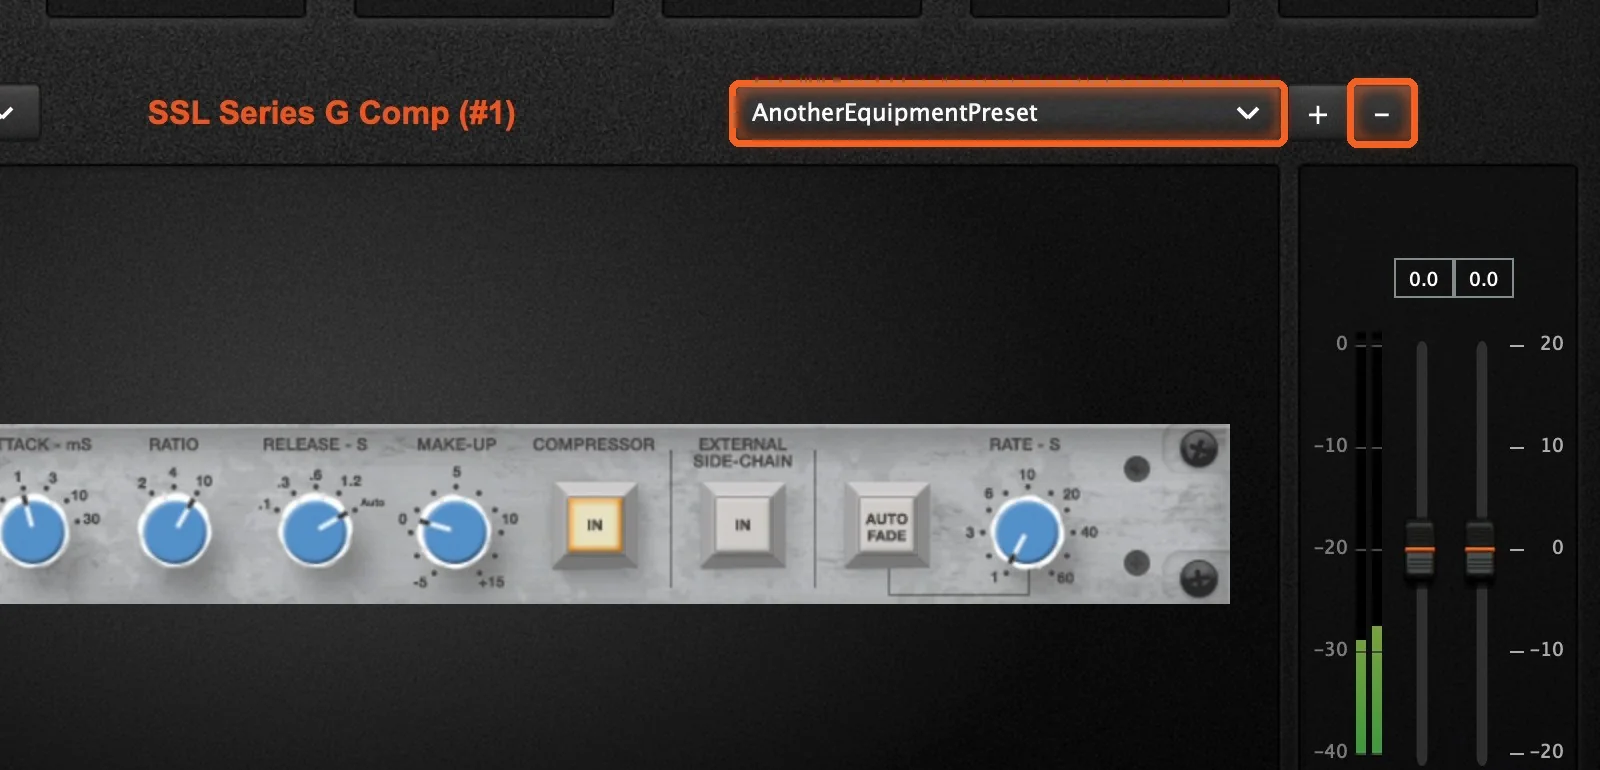
To save it, click the + button beside the Equipment Presets menu and type a name.
Find It in the Menu
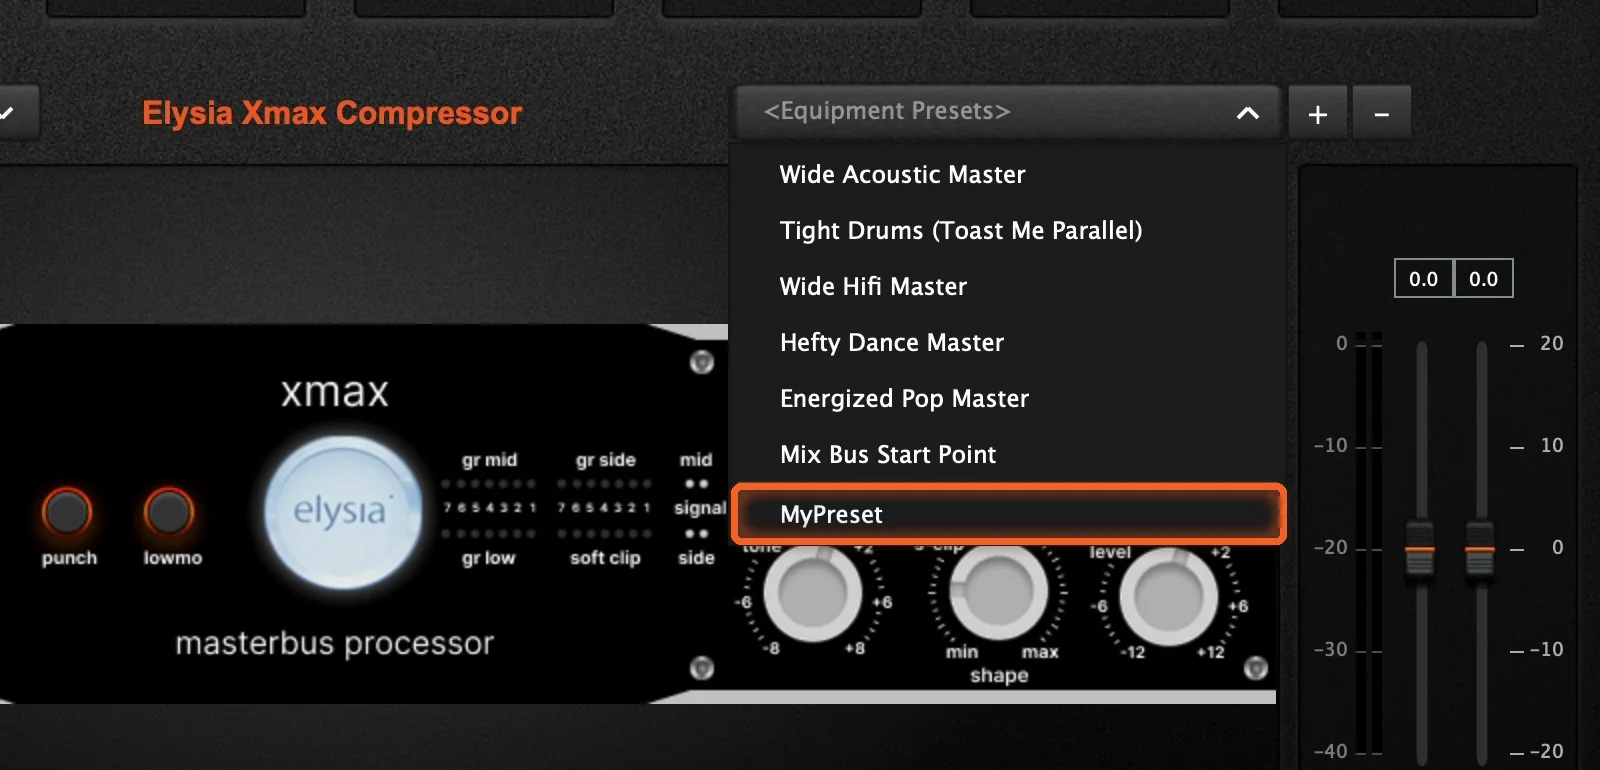
Your preset now sits at the bottom of the menu, under the factory presets. Pick it any time, and your settings come right back.
Remove a Preset
Done with one? Select it in the Equipment Presets menu and click the − button. Only your own presets can be removed: the factory presets always stay.
Chain Presets, Step by Step
A chain preset snapshots everything in your chain, so a whole signal path comes back in one click.
Step 3: Build Your Chain
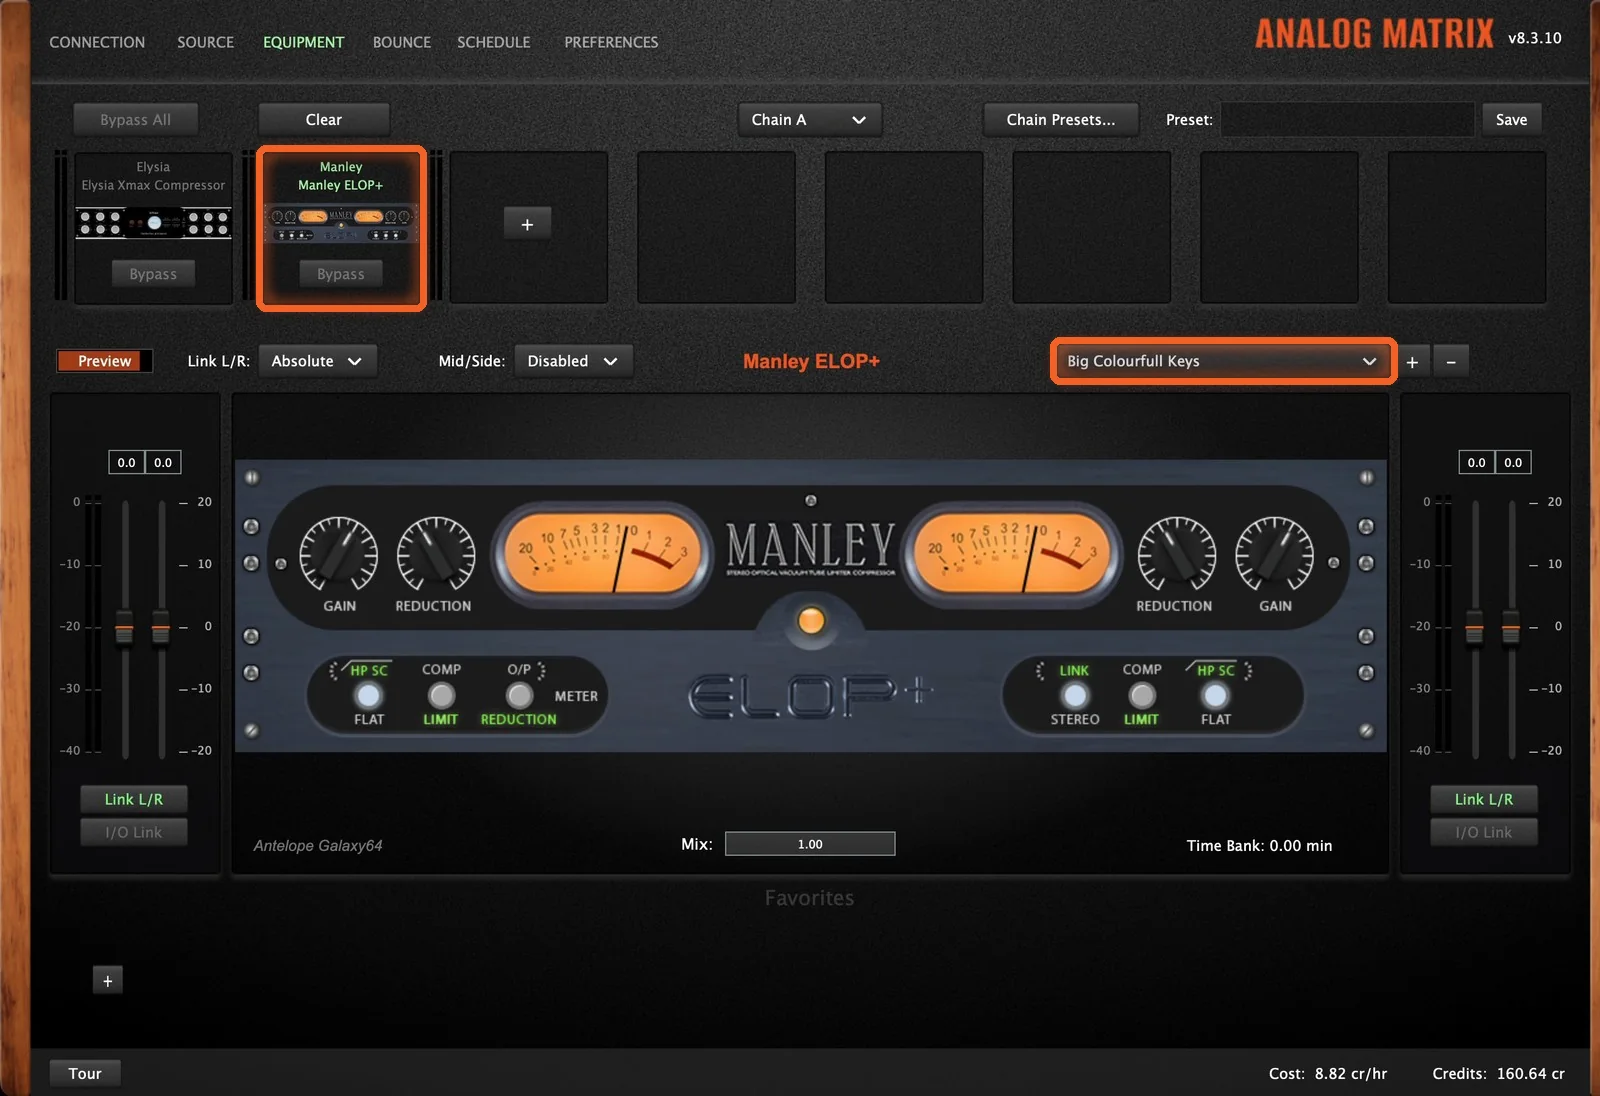
Add the next device with + in the next slot. Dan adds a Manley ELOP+ after the xmax and starts it from one of its own factory presets, Big Colourfull Keys. A chain can hold up to eight devices.
Save the Chain
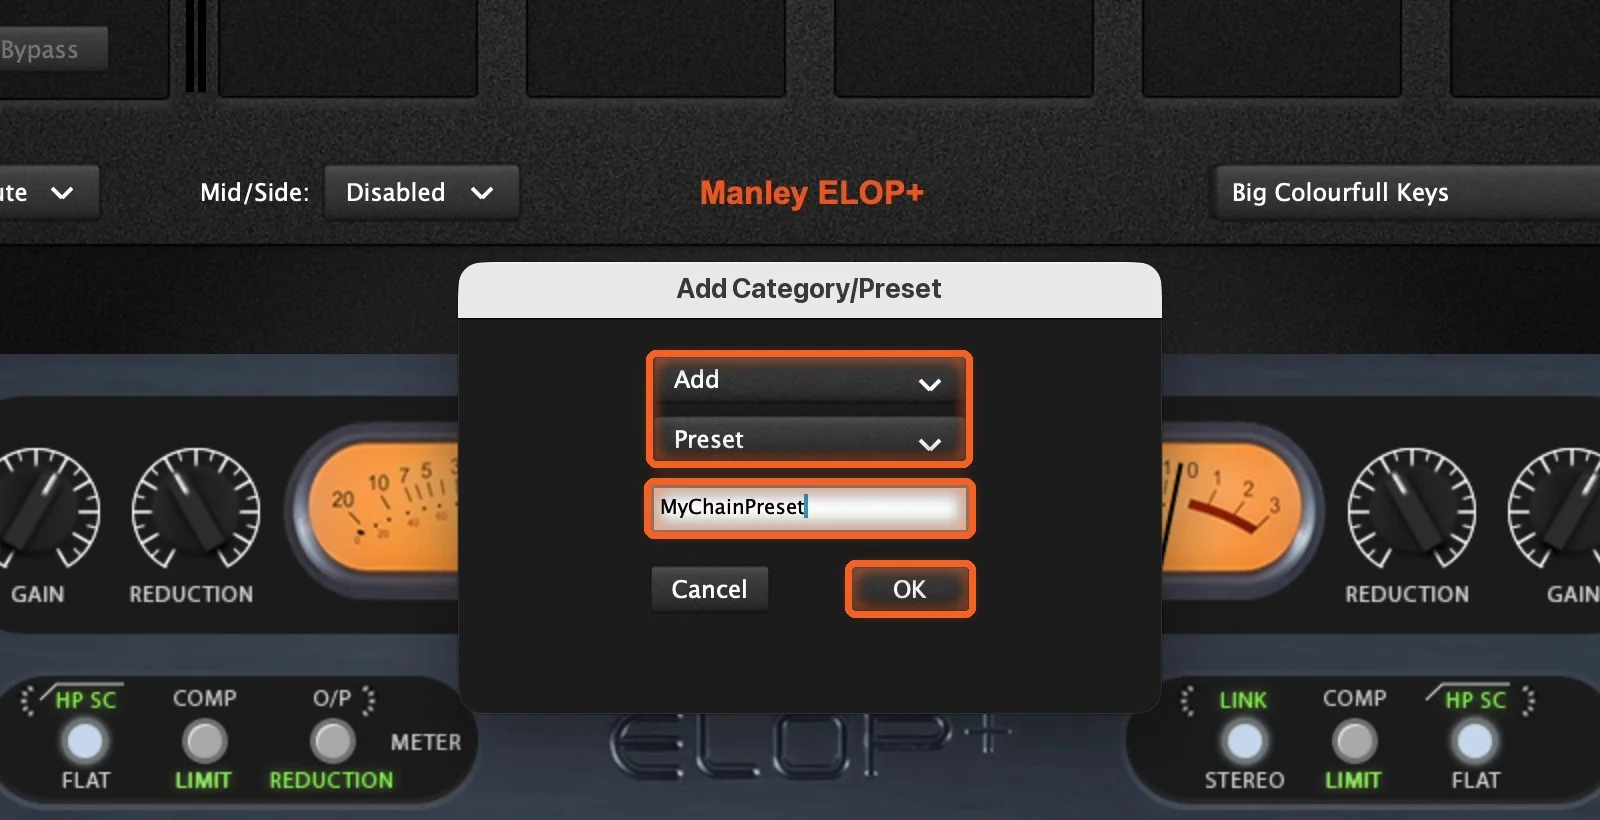
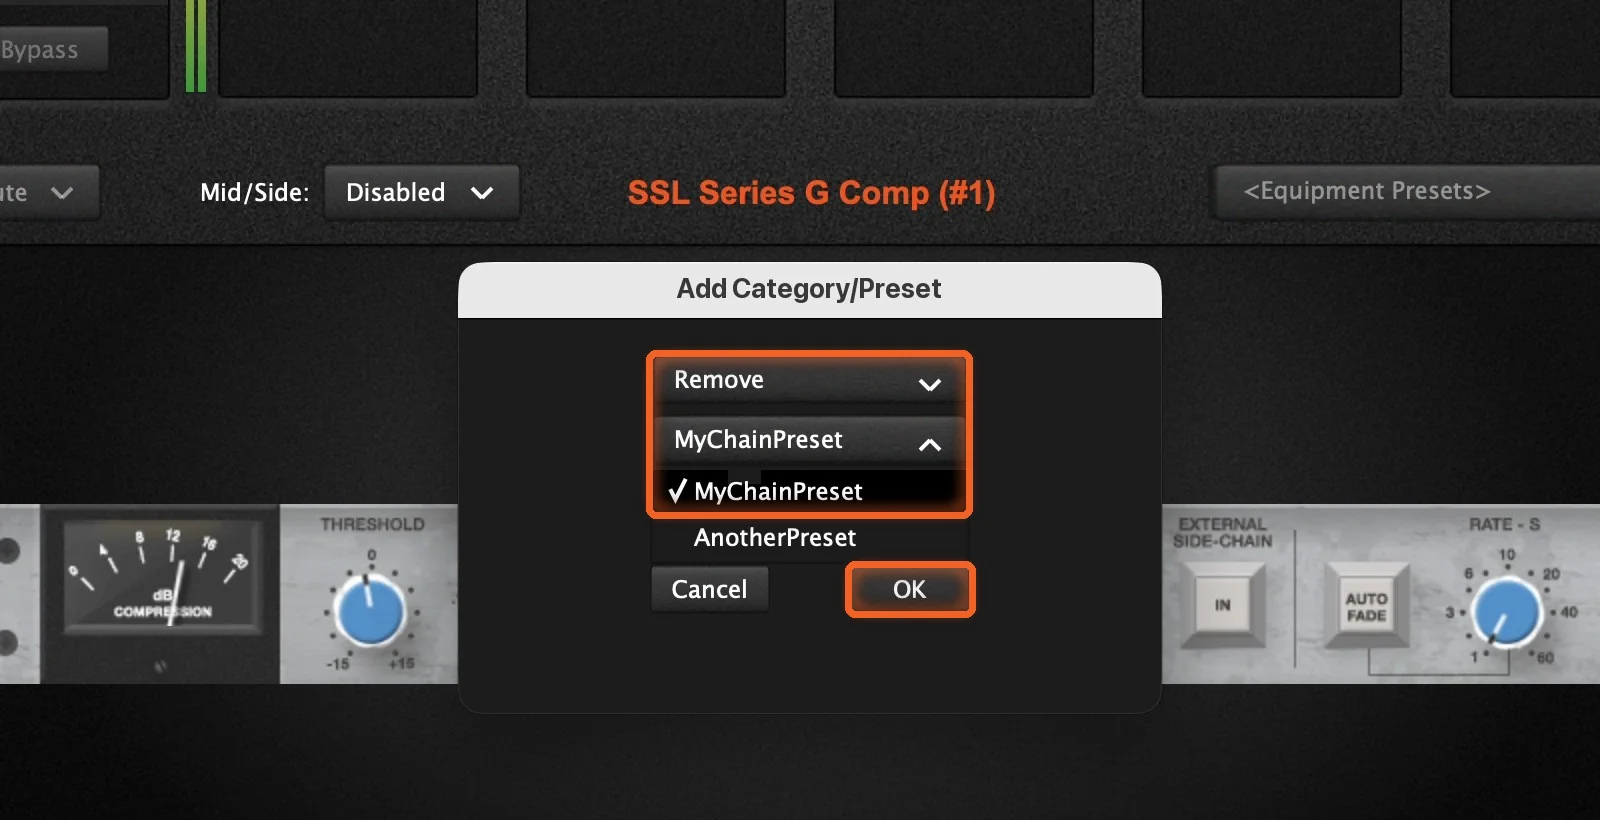
When the chain sounds the way you want, open Chain Presets, go to User, and choose Add / Remove. Leave the first menu on Add and the second on Preset, give your chain a name and click OK.
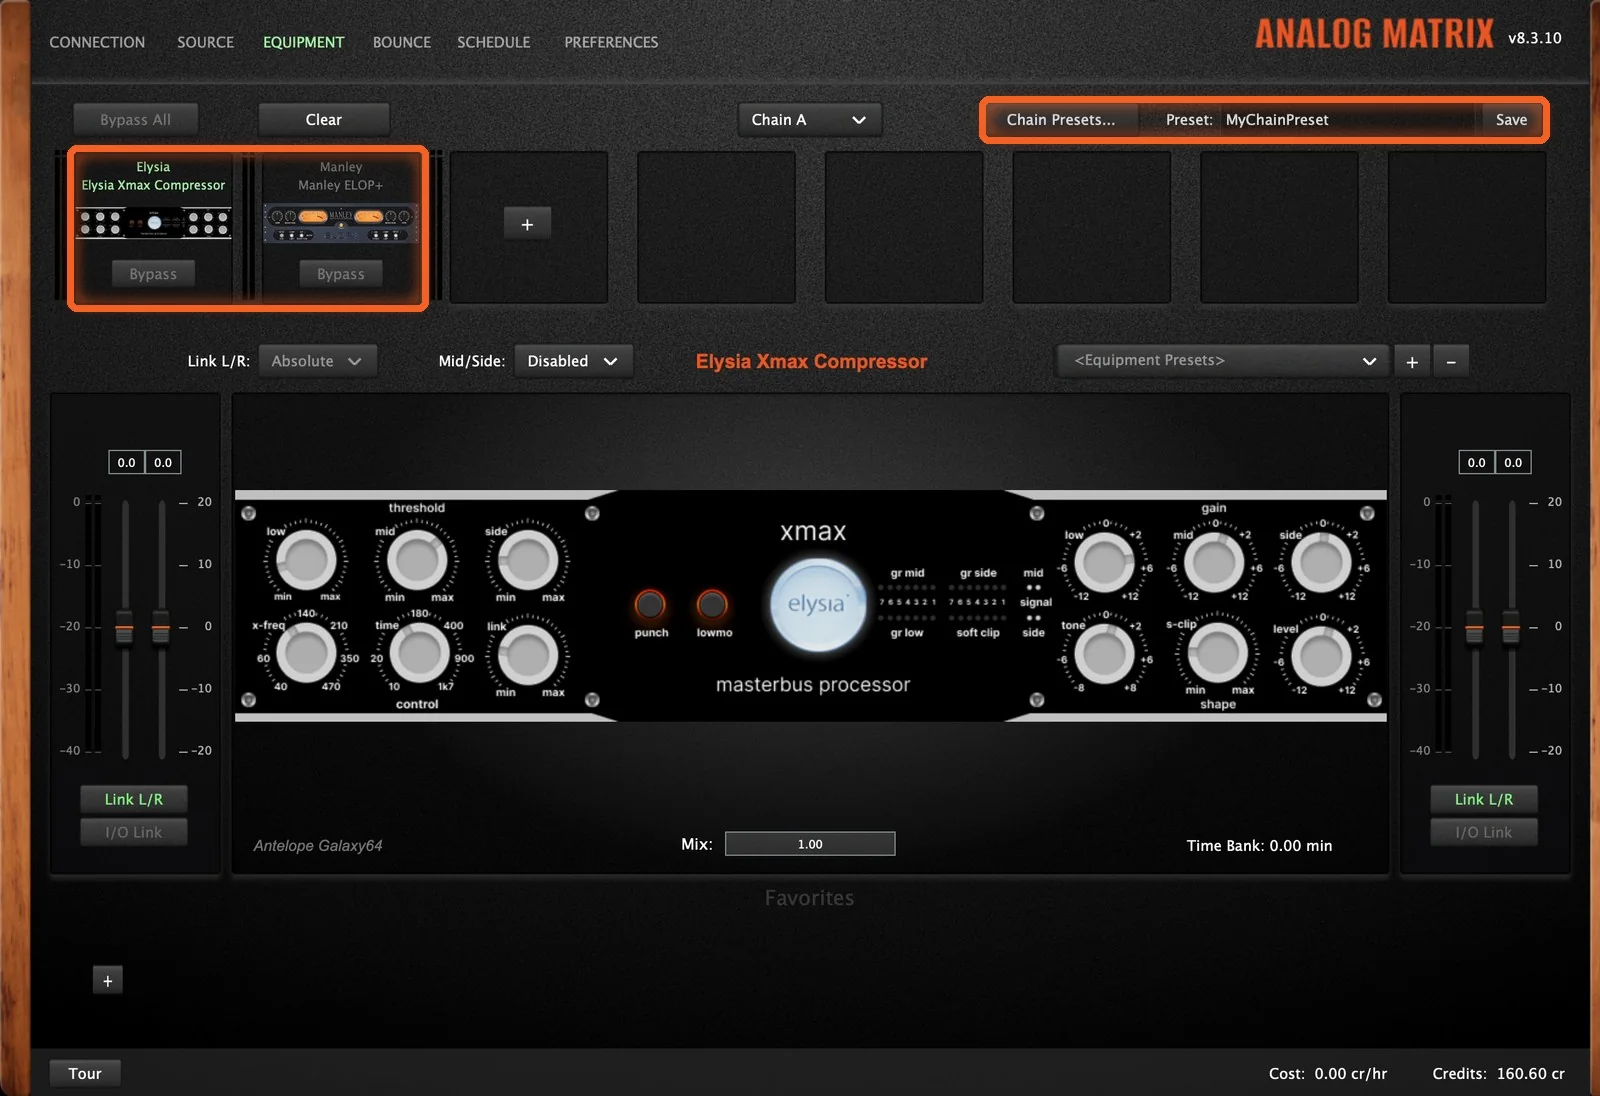
The preset's name now shows in the Preset field at the top of the tab. If you change something later, click Save beside it to update that preset.
Recall the Chain
To bring it back, open Chain Presets, go to User, and pick your preset. Even on an empty rack, both devices come back, with every setting just where you left it. The menu shows each chain preset's cost per hour beside its name.
Your chain presets show up on the Schedule tab too, where checking one picks every device in it for booking. Our Schedule Gear guide shows how to book it.
Remove a Chain Preset
To remove a chain preset, open the same Add / Remove window, switch Add to Remove, pick the preset you want gone and click OK.
Factory Chains
There are factory chain presets too, also from industry professionals. Find them under Chain Presets › Factory. Picking one adds its devices to your chain and sets every control on them.
Step 4: Compare A and B
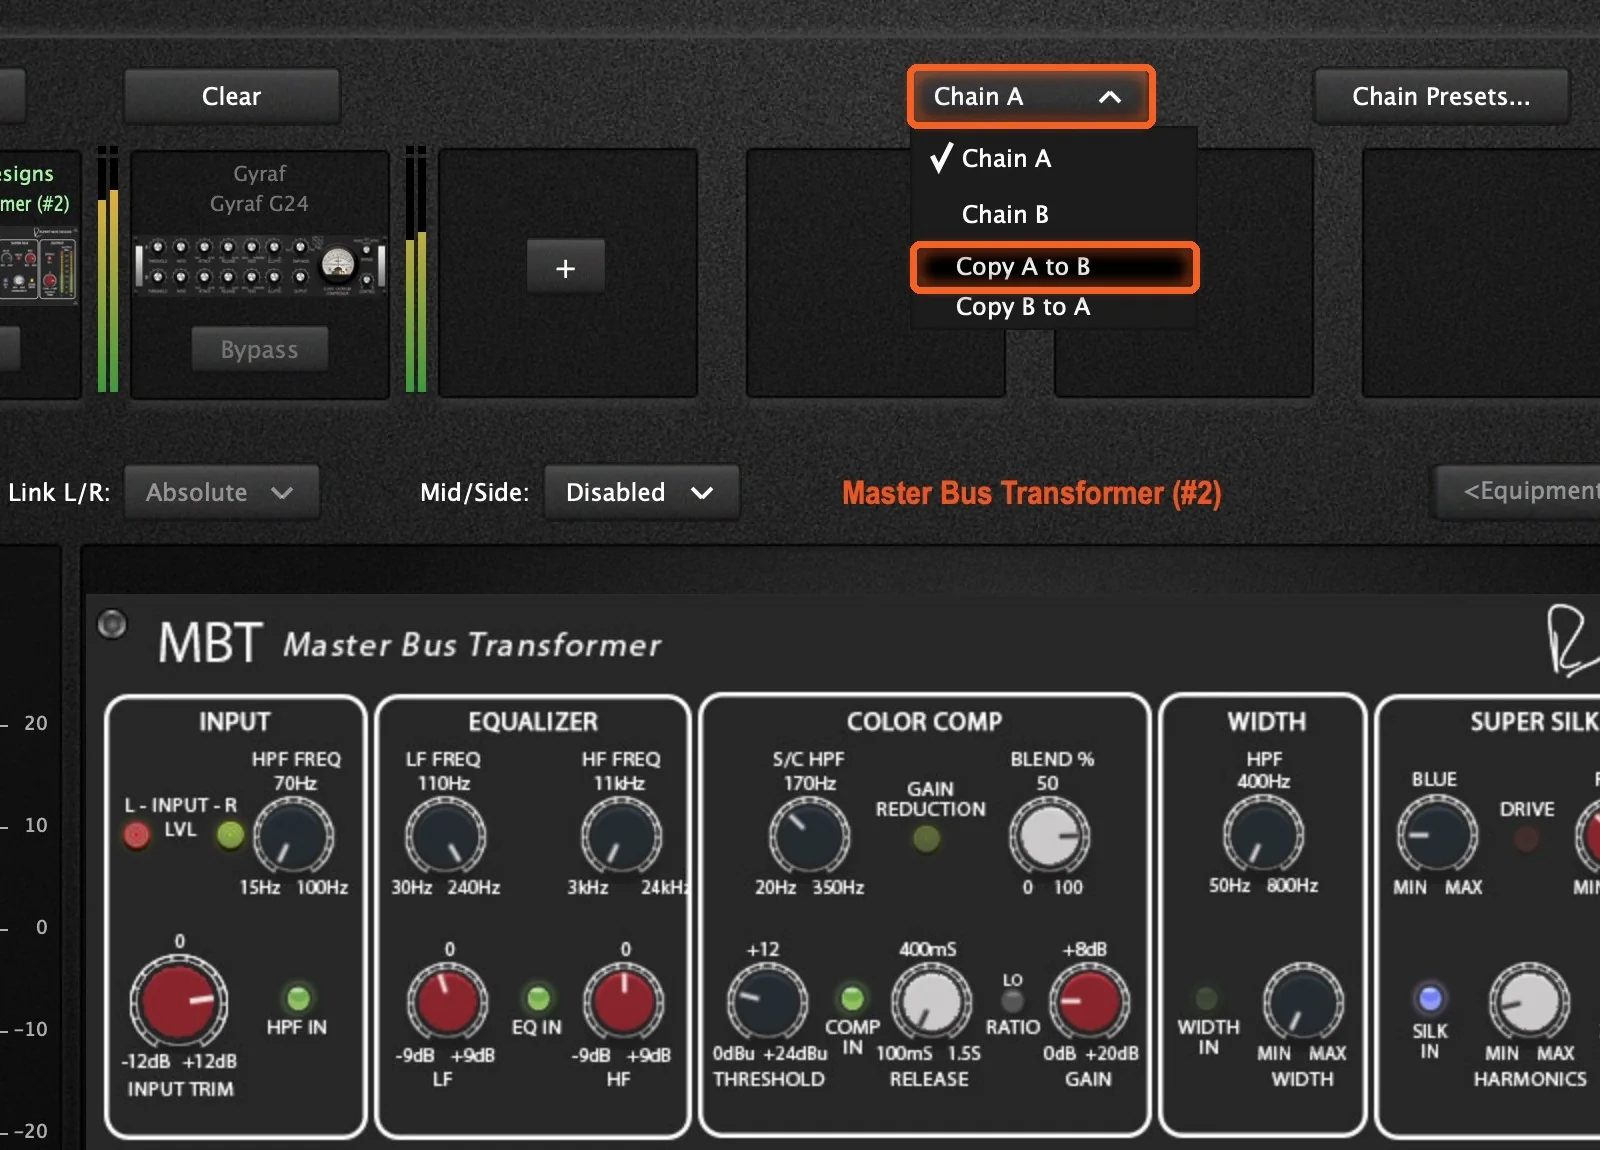
You actually have two chains, A and B, and you switch between them with the Chain selector at the top of the Equipment tab. Its menu also has Copy A to B and Copy B to A.
Same Chain, Small Changes
Chain B starts empty. Choose Copy A to B, switch to B, and change a few settings. Then switch back and forth while your track plays. It's a great way to hear small changes on the same chain, and let your ears decide.
A Whole New Chain
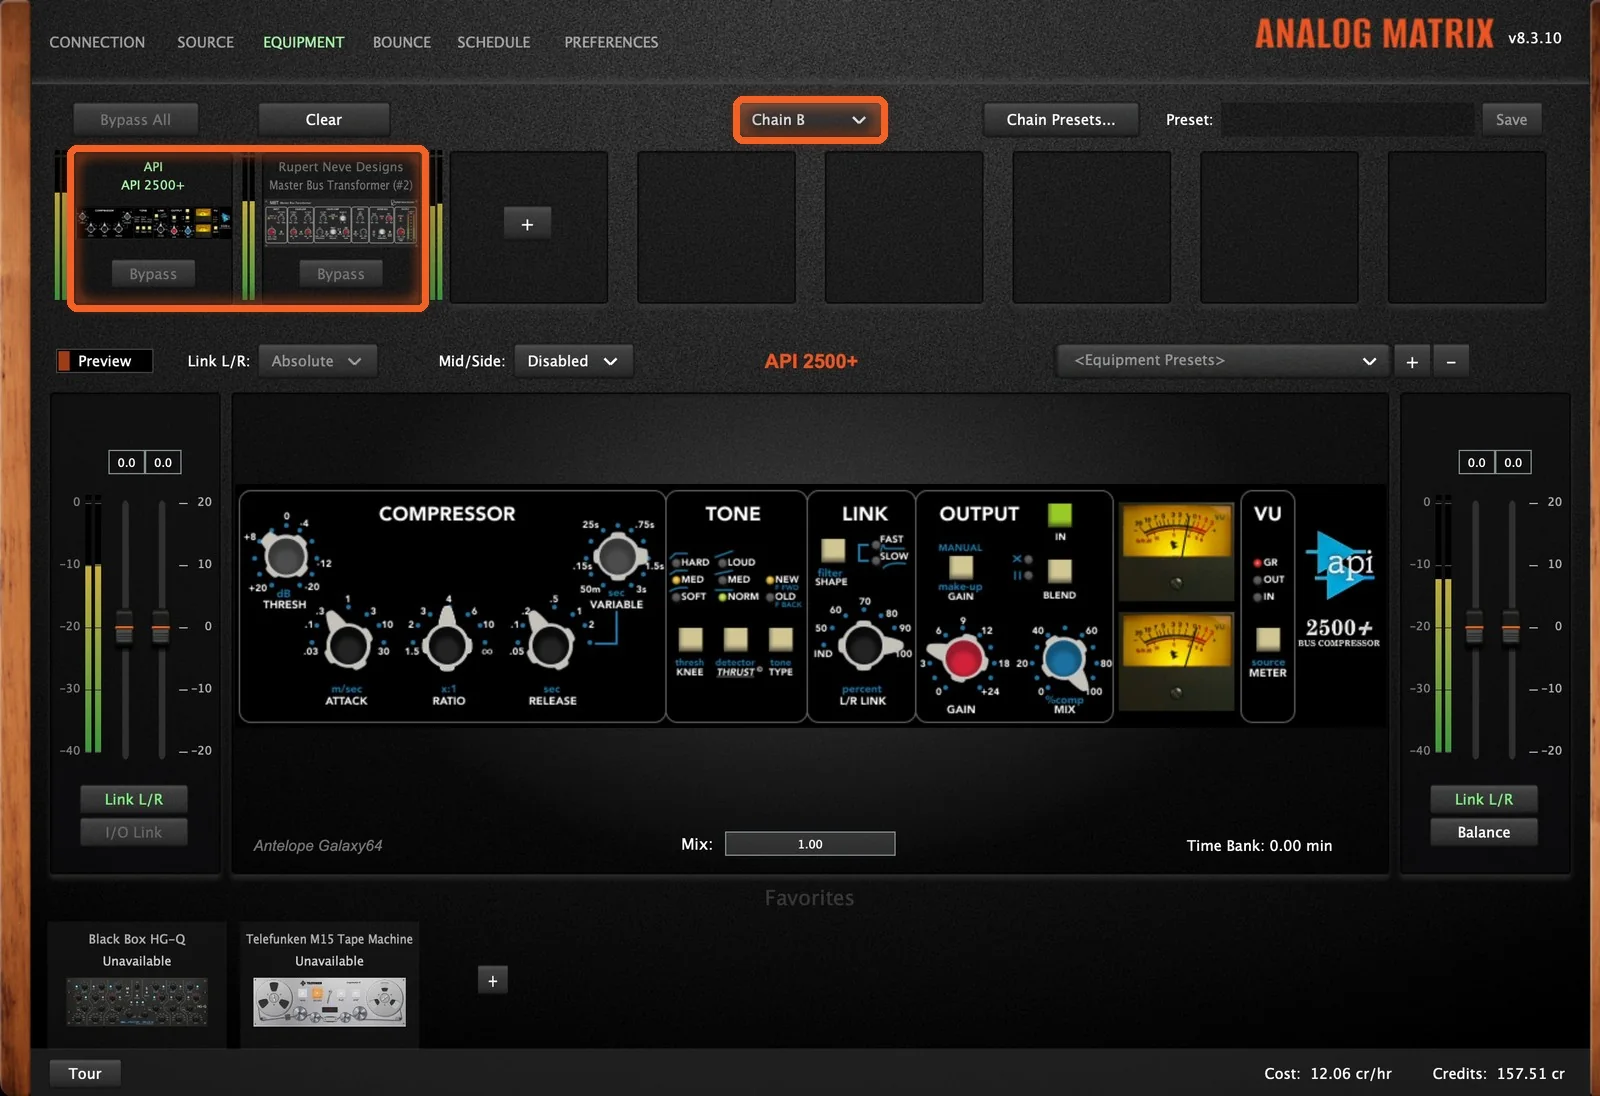
You can also build a completely different chain on B and compare two sets of gear. In Chris's recording, Chain B is an API 2500+ into a Master Bus Transformer, against a different chain on A.
When one of them wins, save it as a chain preset, and it's one click away next session.
How Do I Get Started?
Download the Analog Matrix. One free download from our downloads page installs the plugins (VST, VST3, AU and AAX) and the standalone app, for Mac and Windows. It is not an emulation: every knob you move turns a real control on real hardware in our racks.
Try a factory preset for free. A new account starts with 12 free credits, roughly an hour on an average device: enough to load a unit, start from a factory preset and save your first chain.
Pick how you pay for gear time. Buy credits on demand, reserve a unit for a set time, or move to the Access Analog Subscription (Essential, Pro or Elite) for the best rate.
Save It, Recall It, Compare It
Start from a factory preset, make it your own and save it. Save the whole chain when the signal path is the sound. Then put a second idea on Chain B and let your ears decide. Real analog gear, recalled as exactly as a plugin.
Save your sound on real Neve, SSL, Manley, API and more, and get it back in one click.
FAQs
Can I save my own presets in Analog Matrix?
Yes. For one device, set the controls and click the + button beside its Equipment Presets menu, then type a name. For a whole chain, open Chain Presets › User › Add / Remove and give the chain a name.
What's the difference between an equipment preset and a chain preset?
An equipment preset holds the settings for one device. A chain preset holds the whole chain: every device in order, all their controls, bypass, the gains before and after each device, the mix level, robotic linking and mid/side.
Who makes the factory presets?
They were created by industry professionals to show what each unit can do. Some sets have their own posts on the blog, such as the Manley Massive Passive presets and the Telefunken M15 presets. More sets have posts in our Presets category.
Can I delete a factory preset?
No. You can remove your own equipment presets with the − button and your own chain presets from the Add / Remove window, but the factory presets always stay.
How do I update a chain preset after I change it?
Recall the preset, make your changes, then click Save beside the Preset field at the top of the Equipment tab.
Do presets work in the standalone app?
Yes. Presets work the same way in the plugin and in the standalone app.
What are Chain A and Chain B?
You have two active chains. Build each one, or copy one to the other, and switch between them with the Chain selector to compare different gear, or the same gear with different settings.
How many devices can a chain hold?
Up to eight.
Hear what real analog gear does to your own mix, before you buy a single piece of it.
Run real outboard hardware from your DAW. New accounts get 12 free credits.
Connect todayMore in Getting Started
All posts →